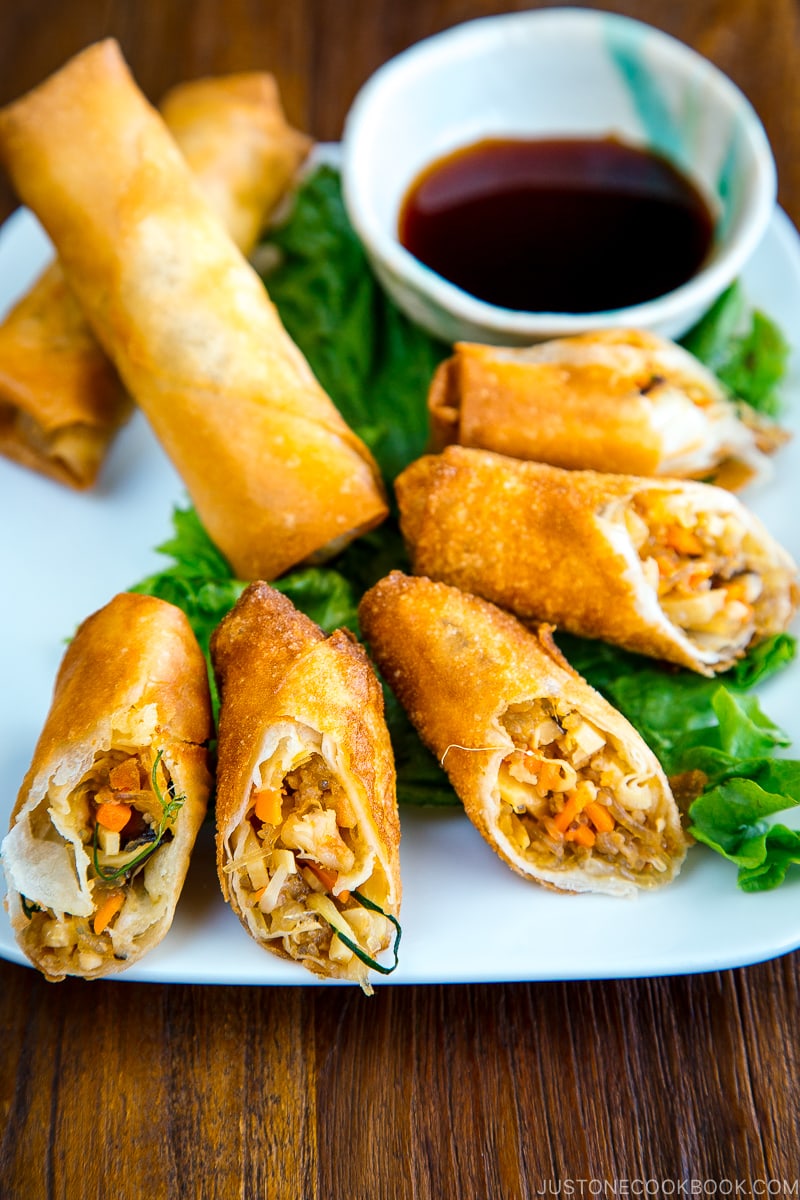
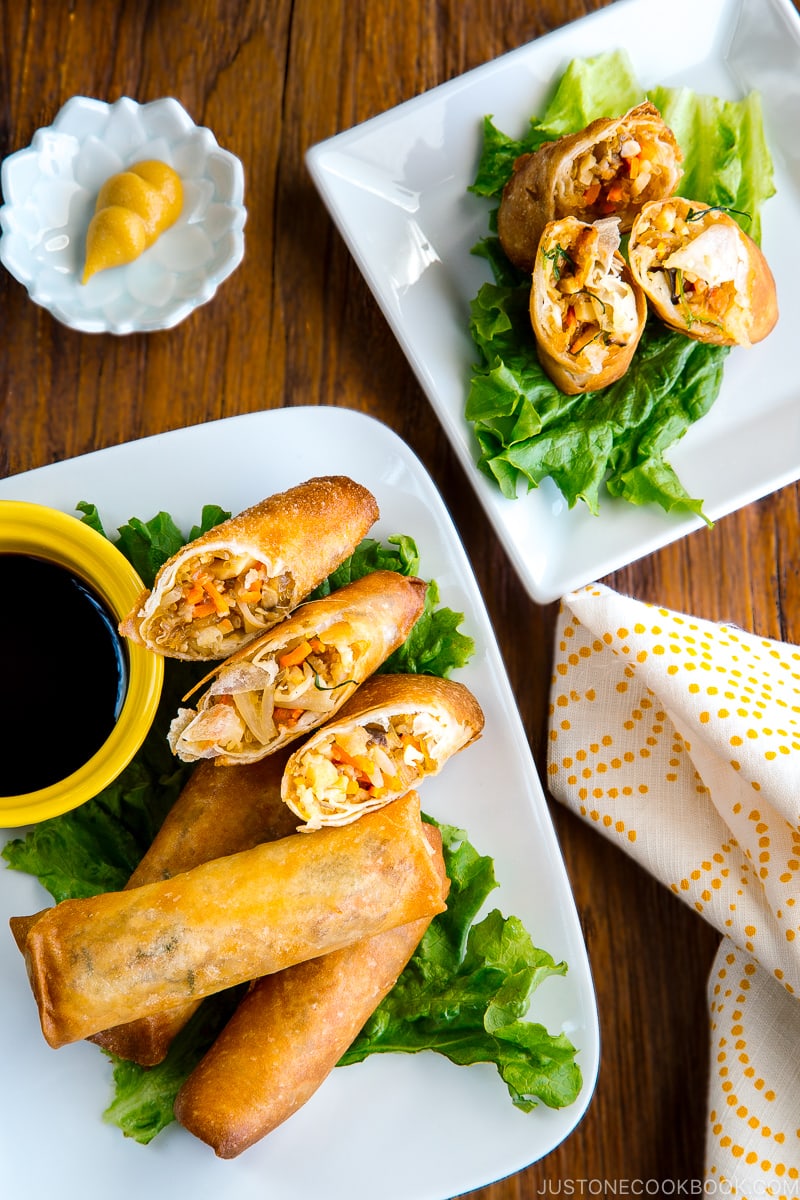
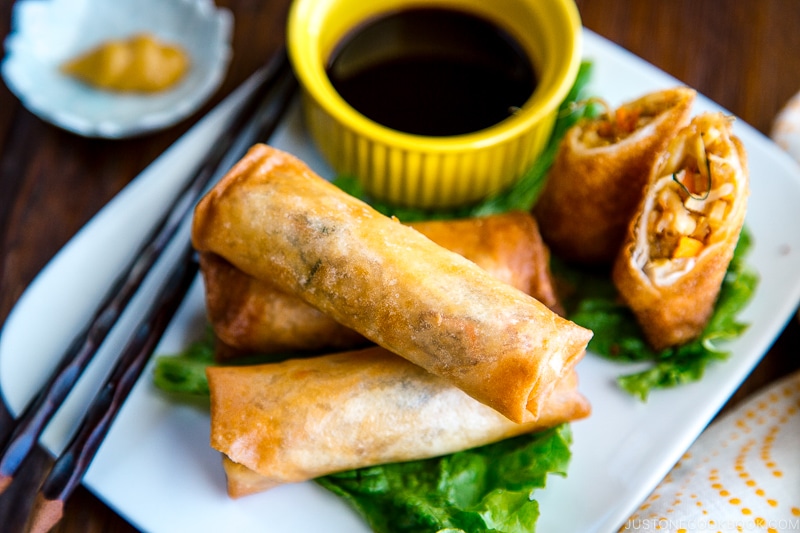
Harumaki are crispy Japanese Spring Rolls with a delicious filling of pork, chicken, shrimp, shiitake mushroom, carrots, and vermicelli glass noodles. Whether you deep-fry or bake them, they make an excellent finger food, party appetizer, or bento side dish!

Harumaki or Japanese spring rolls are a very popular food in Japanese home cooking. They’re a frequent side dish for a home cooked meal or a bento lunch. While each family makes them slightly different, typical ingredients include some type of meat or shrimp, carrot, shiitake mushrooms, and bamboo shoots.
Today, I’ll show you how I make my tasty Harumaki recipe. I learned it from my mom using her signature recipe that includes 10 ingredients for the filling. It’s highly customizable though, so feel free to use my recipe as a starting point for your spring roll journey!
Table of Contents
What is Harumaki?
In Japan, we call this dish harumaki (春巻き), a direct translation of “spring rolls” in Japanese. They are often called egg rolls and the names are used interchangeably. Harumaki were originally introduced to Japan by the Chinese and later adapted to Japanese tastes.
Found in East Asian and Southeast Asian cuisines, the basic format for spring rolls is essentially the same. A savory filling is wrapped in a flour-based pastry sheet and deep-fried until the outer shell is crispy and golden brown.
Ingredients You’ll Need for Harumaki
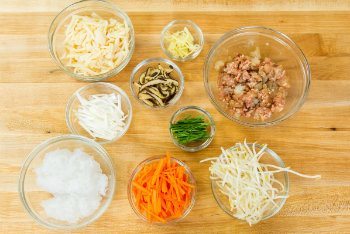
My mom’s signature harumaki includes three types of protein—shrimp, ground pork, and chicken tenders. Feel free to customize your filling ingredients to suit your tastes and what you have on hand.
- harumaki (spring roll) wrappers – make sure to use Japanese thin spring roll wrappers; plus flour and water for rolling and neutral oil for deep-frying
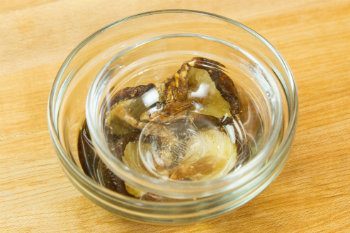
- dried shiitake mushrooms – plus water to rehydrate; save the soaking liquid (shiitake dashi)
- shrimp
- chicken tenders
- ground pork
- for the marinade – soy sauce, sake, and potato starch or cornstarch
- dried cellophane glass noodles (harusame)
- boiled bamboo shoots
- carrots
- bean sprouts
- for the aromatics – ginger knob, Tokyo negi (long green onion), and garlic chives
- to cook the filling – toasted sesame oil
- to season the filling – shiitake dashi (from soaking the dried shiitake), soy sauce, Diamond Crystal kosher salt, and freshly ground black pepper
- for the slurry – potato starch and water
How to Make Harumaki
- Rehydrate the dried shiitake in water for 15 minutes. Reserve the soaking (shiitake dashi).
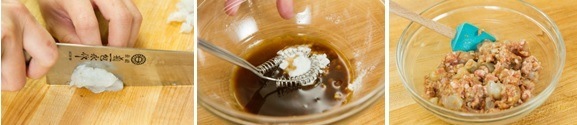
- Combine the marinade ingredients with the proteins and mix well. Set aside.
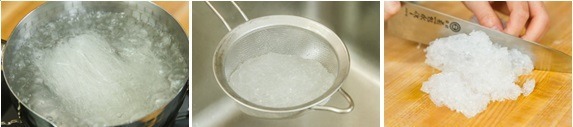
- Cook the cellophane noodles and cut into 1-inch pieces.
- Cut into long, thin strips the shiitake, carrot, bamboo shoot, Tokyo negi, ginger, and garlic chives.
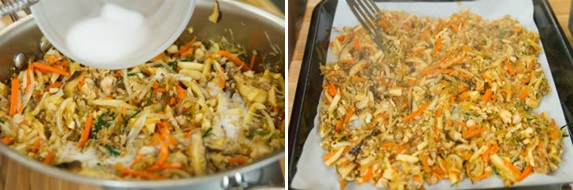
- Stir-fry the filling ingredients with sesame oil in a large frying pan. Add the seasonings. Add a slurry of potato starch and water and mix well.
- Transfer the filling mixture to a tray or baking sheet and spread it to cool and evaporate the moisture.
- Roll one harumaki at a time with the cooled filling. Follow the technique I use in my step-by-step photos below. Seal the edges with a loose paste of flour and water.
- Deep-fry in batches in neutral oil until light golden brown and crisp, about 5 minutes. Place on a wire rack or paper towel to drain the excess oil.
Customize Your Harumaki
- Change up the proteins and vegetables: It’s up to your preference what ingredients you add to your filling. You don’t have to include all 10 ingredients that I used. Pick a couple of your favorites or experiment with fresh seasonal ingredients. You could also make vegetable spring rolls with baked tofu for the protein.
- Make them bigger or smaller: The only difference between our recipes is that my mom’s rolls are about 1.5 times wider than mine. Growing up, I had trouble picking up her harumaki with chopsticks to eat them, so I made my harumaki similar in size to a typical Chinese spring roll.
- Switch the dipping sauce: We typically serve Japanese harumaki with a combination of soy sauce and rice vinegar and optional Japanese karashi mustard. Depending on the filling, you may want to change the dipping sauce.
Wish to learn more about Japanese cooking? Sign up for our free newsletter to receive cooking tips & recipe updates! And stay in touch with me on Facebook, Pinterest, YouTube, and Instagram.
Harumaki (Japanese Spring Rolls)
Video
Ingredients
- 4 dried shiitake mushrooms (0.5 oz, 13 g)
- ¼ cup water (to soak the dried shiitake)
- 4 shrimp (2.5 oz, 70 g; peeled, tails removed, and deveined)
- 2 chicken tenders (2 oz, 55 g)
- ¼ lb ground pork
- 1.5 oz dried glass/cellophane noodles (harusame)
- ½ boiled bamboo shoot (7 oz, 200 g)
- 1 knob ginger (1 inch, 2.5 cm)
- 1 Tokyo negi (naga negi; long green onion) (0.8 oz, 23 g; use only the white part)
- 2 stalks garlic chives (Chinese chives or Nira) (0.3 oz, 8 g)
- 3 inches carrot (3.2 oz, 90 g)
- 2.5 oz bean sprouts (70 g)
- 1 Tbsp toasted sesame oil
For the Shrimp and Meat Marinade
- 2 tsp soy sauce
- 2 tsp sake
- 2 tsp potato starch or cornstarch
For the Filling Seasonings
- ¼ cup shiitake dashi (reserve the liquid from soaking the dried shiitake)
- 2 Tbsp soy sauce
- 1 tsp Diamond Crystal kosher salt
- freshly ground black pepper
- 2 Tbsp potato starch or cornstarch
- 2 Tbsp water
For Rolling and Frying
- 10 egg roll (harumaki) wrappers
- 2 Tbsp all-purpose flour (plain flour)
- 2 Tbsp water
- 3 cups neutral oil (for deep-frying; you‘ll need 1–1½ inches (2.5–3.8 cm) of oil in the pot)
Instructions
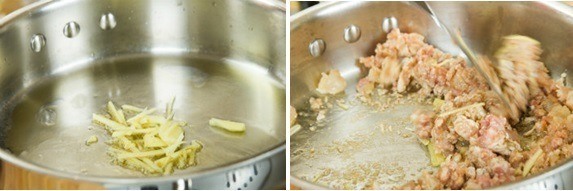
- Gather all the ingredients. Soak 4 dried shiitake mushrooms in ¼ cup water to rehydrate, about 15 minutes. Once the shiitake are tender and hydrated, squeeze out their liquid. Reserve the soaking liquid, now shiitake dashi, to use later.
- Meanwhile, cut 4 shrimp and 2 chicken tenders into small pieces. In a medium bowl, mix the ingredients for the marinade: 2 tsp soy sauce, 2 tsp sake, and 2 tsp potato starch or cornstarch. Add the shrimp, the chicken, and ¼ lb ground pork to the bowl and mix well. Set aside to marinate.
- Cook 1.5 oz dried glass/cellophane noodles (harusame) in boiling water for 2–3 minutes. Drain well and cut into 1-inch lengths.
- Cut ½ boiled bamboo shoot, 1 knob ginger, the rehydrated shiitake, the white part of 1 Tokyo negi (naga negi; long green onion), 2 stalks garlic chives (Chinese chives or Nira), and 3 inches carrot into long, thin strips (2-inch julienned pieces). Wash 2.5 oz bean sprouts and drain well.
To Cook the Filling
- Heat a large frying pan over medium-high heat. Add 1 Tbsp toasted sesame oil and the ginger. Once fragrant, add the marinated shrimp, chicken, and pork and stir-fry until no longer pink.
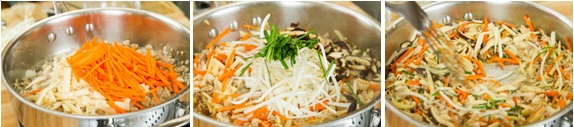
- Add the sliced bamboo shoot and carrot and stir-fry until coated with oil and slightly tender. Add the bean sprout, Tokyo negi, Chinese chives, and dried mushrooms and stir-fry. Then, add the noodles.
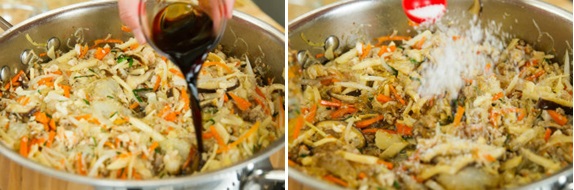
- Next, add the ingredients for the seasonings: ¼ cup shiitake dashi, 2 Tbsp soy sauce, 1 tsp Diamond Crystal kosher salt, and freshly ground black pepper. Mix well.
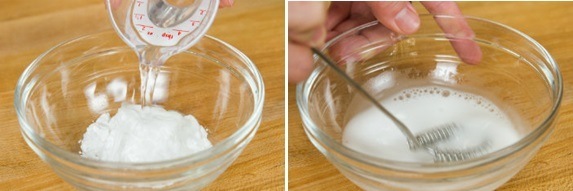
- Combine 2 Tbsp potato starch or cornstarch with 2 Tbsp water in a small bowl to make a slurry.
- After a quick stir, pour the slurry into the harumaki filling and mix well. Transfer the filling from the pan to a baking sheet or plate. Let it cool completely and evaporate the moisture. Make sure there is no moisture in the filling. Otherwise, the wrappers will break easily before and during deep-frying (and might explode in the oil).
To Roll the Harumaki
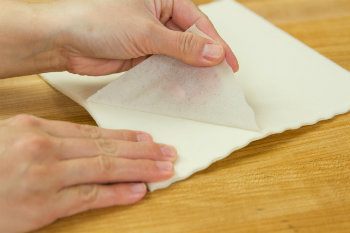
- Slowly peel each of the 10 egg roll (harumaki) wrappers, one at a time, and keep them under plastic wrap or a damp kitchen towel to prevent drying while you work. Mix 2 Tbsp all-purpose flour (plain flour) and 2 Tbsp water in a small bowl to form a loose paste.
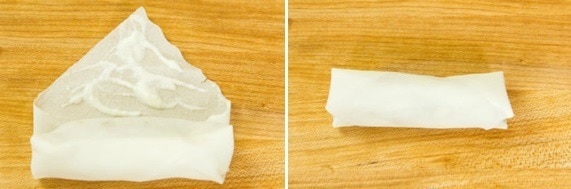
- Lay one harumaki wrapper on your work surface with a corner pointed towards you in a diamond shape. Place one portion of filling neatly just below the center of the wrapper. I use an ice cream scoop so the filling amount is the same for each wrapper. Fold the bottom corner up over the filling and firmly tuck the filling under it.
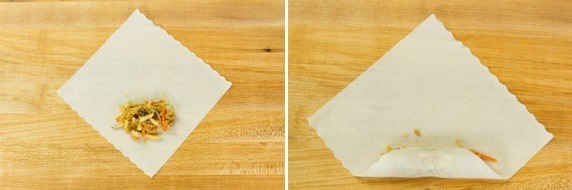
- Roll the wrapper once to cover the filling. Then, fold the right and left corners of the wrapper in toward the center, forming straight edges on either side. The two corners should overlap in the center a little bit. Continue rolling toward the top corner, making sure that both sides of the wrapper taper inward (and don‘t flair out) as you roll.
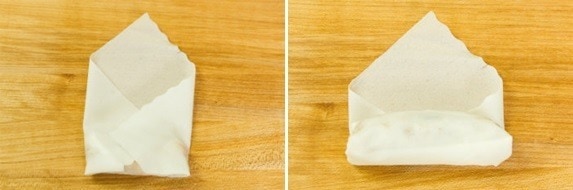
- Dip your finger in the flour + water paste and place a good amount of it on the top corner. Then, roll and press firmly to seal. Continue rolling with the remaining wrappers.
To Cook
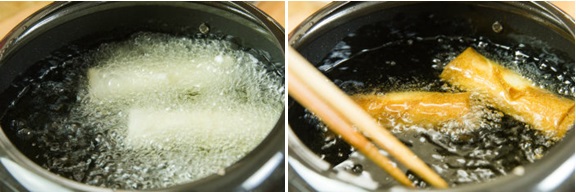
- Deep-fry (recommended): Fry the harumaki immediately after rolling and before the wrappers get soggy. To a deep, heavy-bottomed pot, add 3 cups neutral oil or enough for 1–1½ inches (2.5–3.8 cm) of oil. Heat to 340°F (170°C); I recommend using an instant-read thermometer to check. When the oil is hot enough, deep-fry the rolls in batches until light golden brown and crisp, about 5 minutes. Place on a wire rack or paper towel to drain the excess oil. Tip: When you deep-fry, do not crowd the pot because the oil temperature will drop quickly and cause the rolls to absorb oil. Your ingredients should take up no more than about half of the oil surface area at any one time. For more helpful hints, read my post How to Deep-Fry Food at Home.
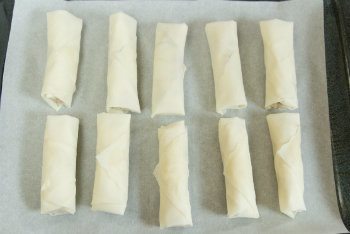
- Bake (optional): If you prefer to bake, preheat the oven to 400ºF (200°C). For a convection oven, reduce cooking temperature by 25ºF (15ºC). Arrange the harumaki in a single layer on a baking sheet lined with parchment paper. Brush the tops of the rolls with neutral oil, then bake for 10–12 minutes, rotating after 6 minutes, until they‘re golden brown and crispy.
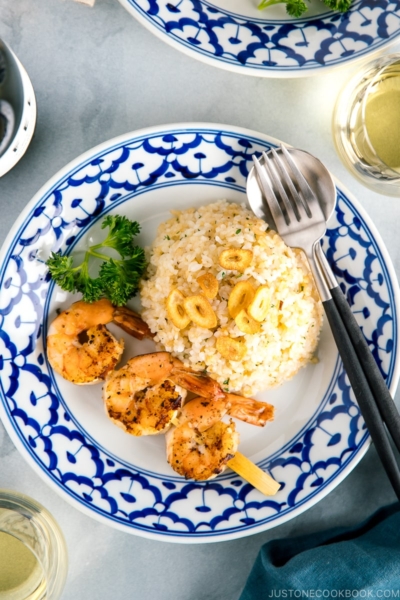
To Serve
- Make a dipping sauce with soy sauce, rice vinegar (unseasoned), and Japanese karashi hot mustard as you like and serve with the Harumaki. Enjoy!
To Store
- You can keep the leftovers in an airtight container and store in the refrigerator for up to 3 days and in the freezer for a month.


what is the best to make these ahead of time for a cocktail party for a larger group of guests
Hello, Stacy! Thank you for using Nami’s recipe.
We’re not sure if you have time to deep fry on that day, but you can freeze premade Harumaki in an airtight container. Then you may deep fry it at a little lower temperature, such as 320F, so that the inside cooks without defrosting. We hope this information is helpful!
It seems like a lot of ingredients and steps, but once you have everything ready, you can make a big batch and freeze some for later. That’s what I did and I had them with everything all week. They’re so good!!
Hello, Kim! Thank you for trying Nami’s recipe!
Making a large batch and freezing them is ideal. We are glad you enjoyed the handmade Harumaki.
Are there any substitutions to make the wrapper gluten free?
Hi Michele, How about using Gluten-free puff pastry or Rice paper (rice wrappers)?
We hope this helps!
Hi,
I reallly love and enjoy your recipes.
I would like to know if I can freeze Harumakis before cooking and what is the best way to cook afterwards.
Thank you
Hi Maria! You can freeze harumaki BEFORE deep frying. The skin will stick together, so you have to wrap individual pieces (only if you save a few) in plastic then put in a Ziploc bag etc, OR flash freeze until outside layer is frozen then put the frozen harumaki in a ziploc bag to freeze for up to 1 month.
You do not need to defrost and deep fry from the frozen stage. The oil should be 320 F (160 C), lower than usual, as you have to cook inside the filling that’s frozen. Make sure to get rid of any ice or frost around the harumaki to avoid oil splatter. 🙂
Nami can you make the harumaki filling the day before and then wrap and fry them the next day or will that cause too much moisture to build up in the fridge overnight?
Hi Jason! I would definitely make the filling first, then wrap before you deep fry. I wouldn’t keep the harumaki wrapped already for a long time as the wrapper gets wet. 🙂
I have celiac disease and used Vietnamese rice wrappers for these. Yumm.
Thank you so very much for your recipes! My family is grateful.
Hi Aimeé! I’m glad to hear you and your family enjoyed it. Glad to hear the rice wrapper made it work! Great alternative!
Thank you for a delicious recipe! It seemed like it would be tedious to prepare all the ingredients but it was actually pretty quick.
I followed your recipe but made a few changes:
-I haven’t found a good Japanese-sourced dried shiitake brand here in the US so I just used fresh ones
– I used half a packet of dashi powder (tea bag type) to sprinkle on the stir-fried mix for flavor instead of the dried shiitake water
– reduced the amount of salt and actually think next time I will omit it as there was enough flavor
– I only used shrimp and ground pork since I didn’t have chicken, and also omitted the bamboo shoot
Hi Ponyo! Thanks so much for your kind feedback! Glad you enjoyed it! 🙂
Since when are spring rolls and egg rolls interchangeable terms?
I’m not sure – In direct translation of Harumaki (春巻き) is “Spring (春) Roll (巻き)”, but I’ve seen the term “Egg Roll” is used here in the U.S. In fact, many calls “Spring Roll” for non-deep fried, and “Egg Roll” for deep fried.
spring rolls batter doesn’t have eggs but egg rolls batter has
Oh my stars, those look amazing. Shall definitely play with this recipe! I know I can’t get all of the ingredients here… Thank goodness the recipe is so versatile. Loved the accompanying video — very well done. 🙂
Hi Elizabeth! Yes, play with the ingredients you have/enjoy and it’ll be delicious! I am glad to hear you enjoy my video. Thank you so much for watching and following my blog! 🙂
How beautifully golden they look! I’m sure you learned from the best. =)
When I was little and when my mom fried up spring rolls, she would do some savory ones and then a few sweet ones (just the wrapper filled with red bean paste) to satisfy my sweet tooth.
Thank you so much Kimmi! I’m totally going to make red bean harumaki!!! 😀 I make cheese and nutella sometimes but haven’t even thought of red bean. Shame on me… I love red bean so much! Thanks for sharing!
This looks really good. I’ll have to make an ingredient list next time I go to San Jose. The Harumaki wrappers are the same a regular spring roll wrappers that they use for Lumpia right?
Also step 5 says “heat sesame and ginger oil over medium high heat” and I think you meant to say Sesame oil and ginger.
Hi Kat! Thank you so much! Yes, Harumaki is usually thinner than typical Chinese wrappers I find in Asian stores. However, for Lumpia or Singapore brand (I think it was Singapore) wrappers are about same thickness.
I just edited the recipe. Thank you for catching my mistake. 🙂