Hiroshima-style Okonomiyaki is a Japanese savory pancake layered with yakisoba noodles, fried egg, and pork belly drizzled with a delicious sauce. Watch my video tutorial for step-by-step instructions on how to make this fantastic homemade recipe for lunch or dinner!
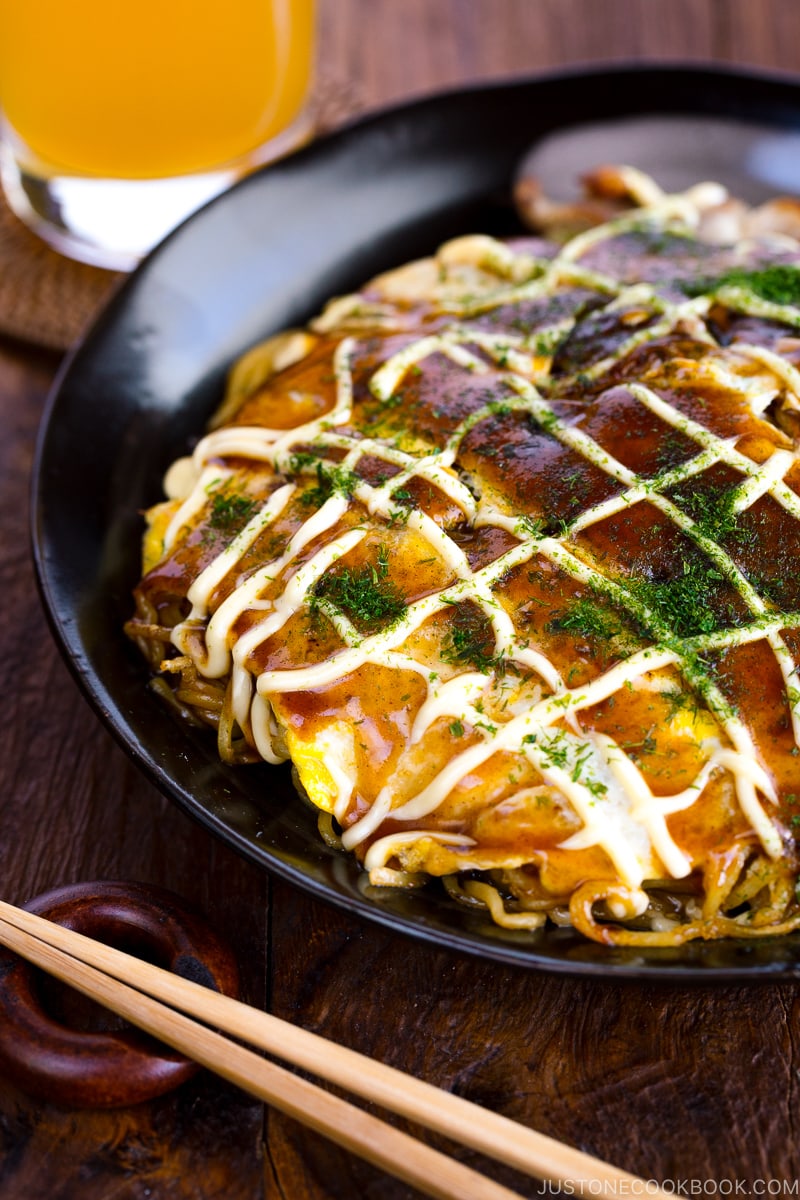
Have you tried okonomiyaki (お好み焼き) before? It’s a Japanese savory pancake that contains a variety of ingredients. “Okonomi” in Japanese means “as you like it”, so it’s a savory pancake that contains whatever ingredients you like.
In this Hiroshima-style Okonomiyaki (広島風お好み焼き) recipe, the pancake gets a serious boost with a layer of stir-fried noodles on the bottom and fried egg on top. The result is a popular street food from Hiroshima in western Japan that makes a hearty lunch or dinner. It’s easy to make at home, too.
Table of Contents
Two Styles of Okonomiyaki
What’s the difference between Osaka-style and Hiroshima-style savory pancakes? One is mixed and the other is layered.
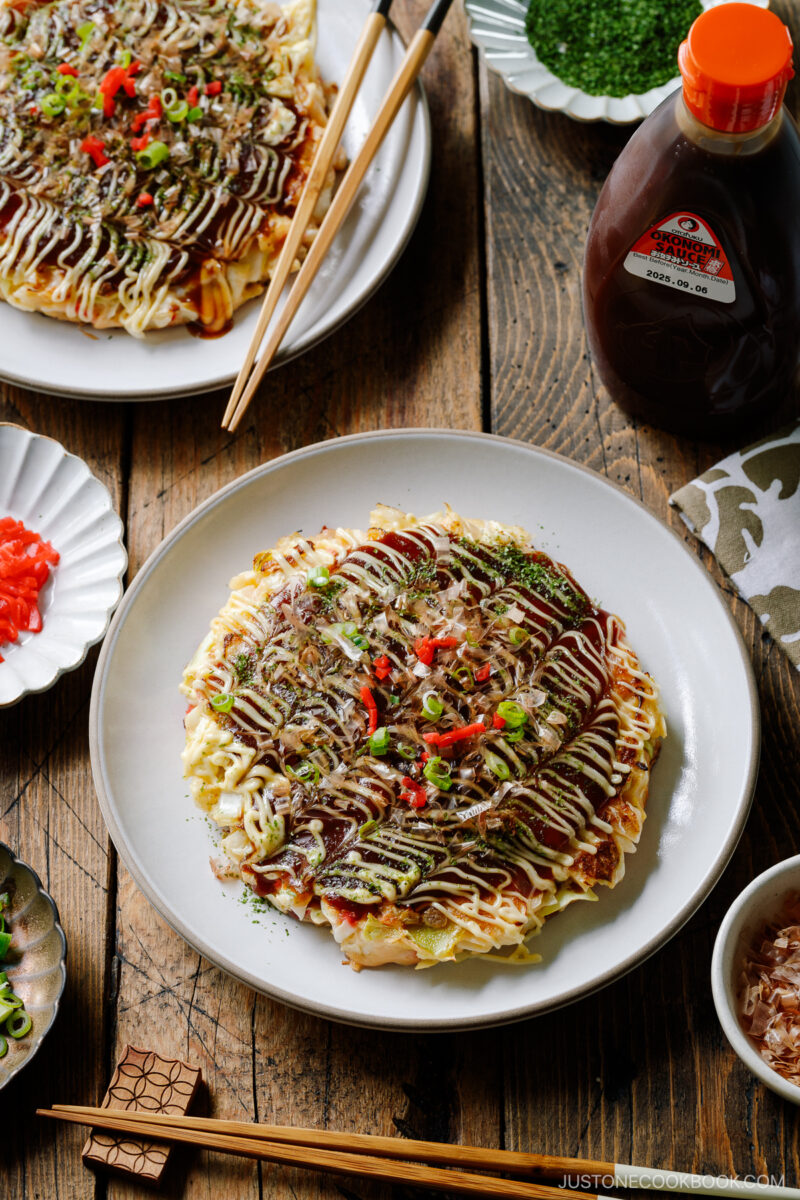

- Osaka-style – The pancake batter is a mix of flour, water or dashi, shredded cabbage, egg, and green onion. It’s topped with the protein of your choice, such as pork belly slices or seafood. I have a delicious Osaka-style okonomiyaki recipe that’s one of the most popular recipes on my website!
- Hiroshima-style – This variation uses almost the same ingredients, but they are layered rather than mixed in with the batter. Not only that, fried egg and yakisoba noodles (or sometimes udon noodles) are used as toppings.
Which one is tastier? Well, that’s really up to your preference. If you like fried noodles and a less doughy texture, Hiroshima-style okonomiyaki is your choice.
I like both styles of okonomiyaki, so it’d be very hard for me to pick just one! At home, I just alternate cooking them.
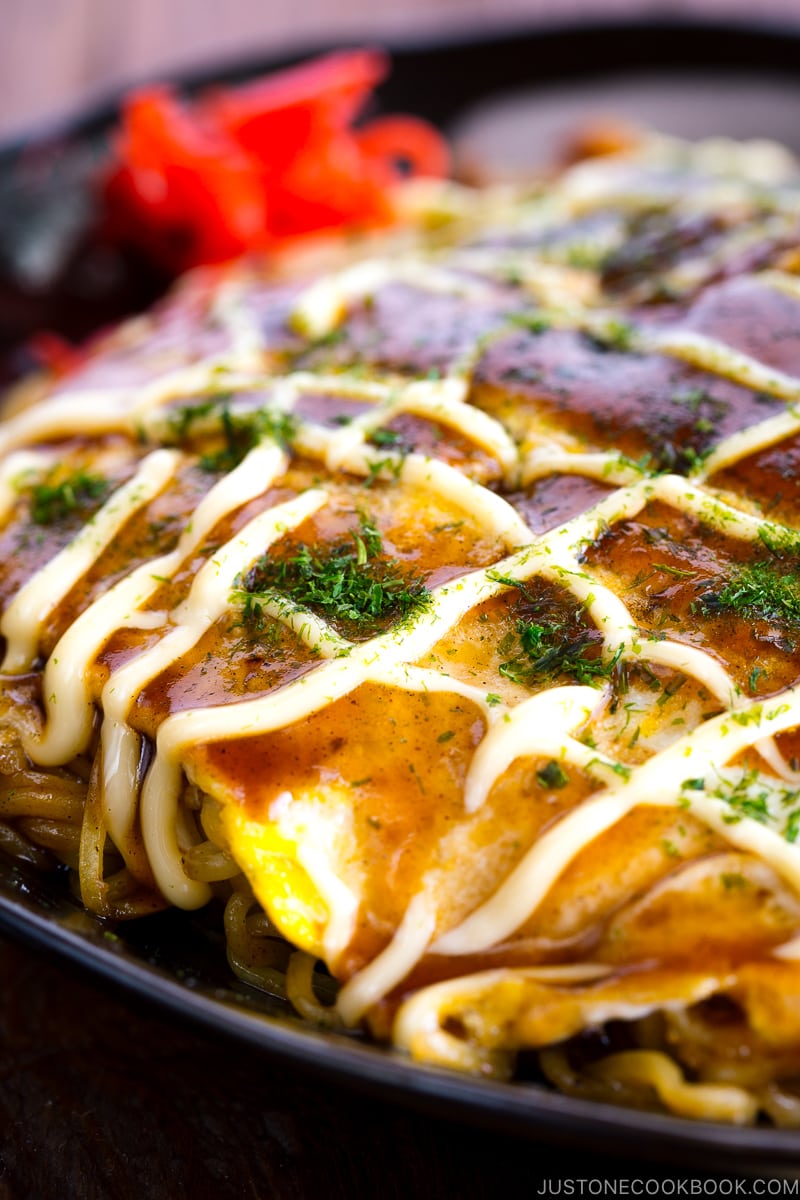
What is Hiroshima-style Okonomiyaki?
Hiroshima-style okonomiyaki has been around since the 1950s. At that time, the country was quite poor and people only used a little bit of flour and vegetables to make Hiroshima-style okonomiyaki.
The current Hiroshima okonomiyaki with meat, egg, and noodles is a version that has evolved throughout the years. Nowadays, there are over 2,000 restaurants within the Hiroshima area that specialize in this popular dish!
Ingredients You’ll Need
- water, mirin, and cake flour – for the batter
- green cabbage
- green onion/scallion
- katsuobushi (dried bonito flakes)
- tenkasu/agedama (tempura scraps)
- bean sprouts
- tororo kombu – dried kelp shavings; you can buy it online; optional
- sliced pork belly
- yakisoba noodles – pre-steamed
- large eggs
- okonomiyaki sauce – try my homemade okonomiyaki sauce recipe
- toppings of your choice – typically aonori (dried green laver seaweed), pickled red ginger (beni shoga), and Japanese Kewpie mayonnaise)
3 Key Toppings for Okonomiyaki
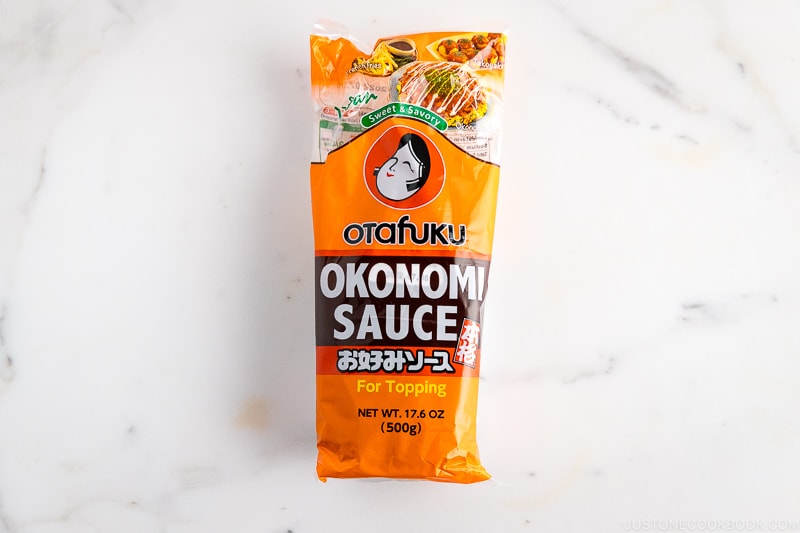
- Okonomi sauce – The important and delicious element of both Hiroshima- and Osaka-style okonomiyaki is okonomi sauce (お好みソース). Originally, Worcestershire sauce was used but throughout the years the flavor has evolved. These days, okonomi sauce has a sweet and sour flavor that’s slightly different from tonkatsu sauce and its thicker consistency goes well with okonomiyaki. Oh, so delicious!
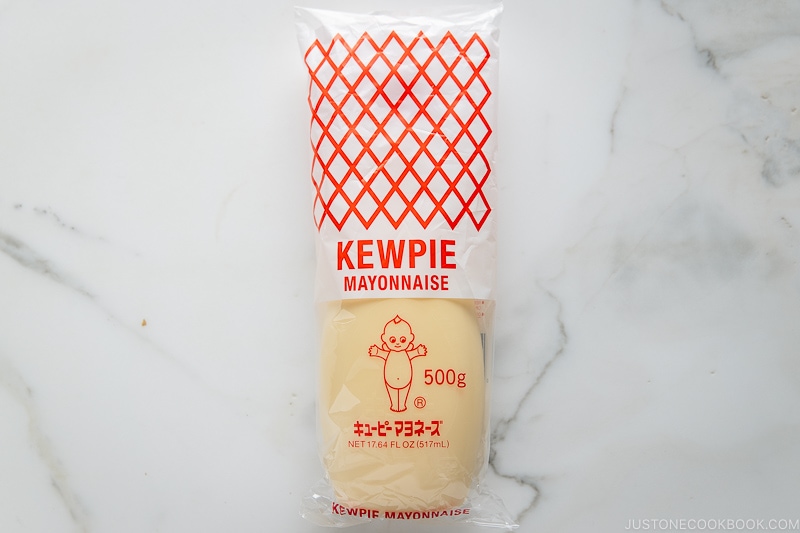
- Japanese Kewpie mayonnaise – It has a sweet and tangy flavor that is well balanced. Many JOC readers have told me that they haven’t gone back to the original Western-style mayo they had been using since they tasted Japanese mayonnaise!
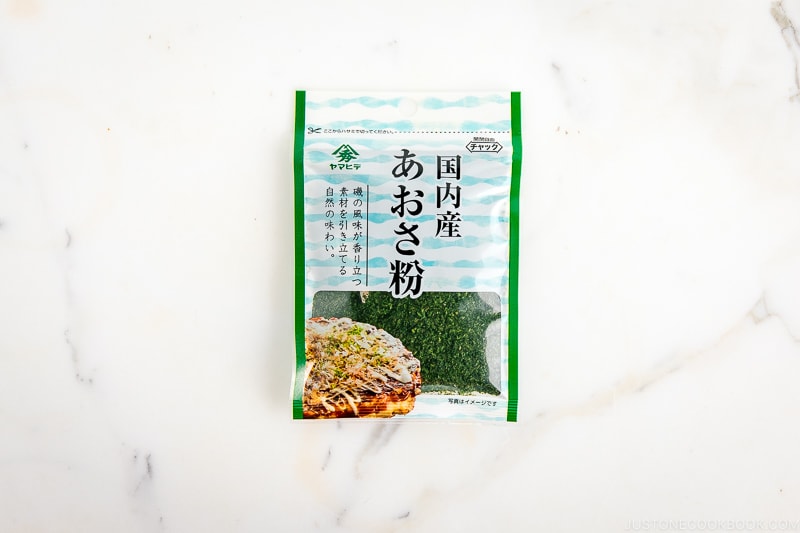
- Aonori (dried green laver seaweed) – These dried flakes of umami-rich seaweed have a bright, intense green color and unique fragrance. Japan has many types of seaweed, from wakame to nori to kombu, each used for specific dishes. You can buy aonori from Amazon and Japanese/Asian grocery stores. If you can’t find it, substitute regular nori.
How to Make Hiroshima-style Okonomiyaki
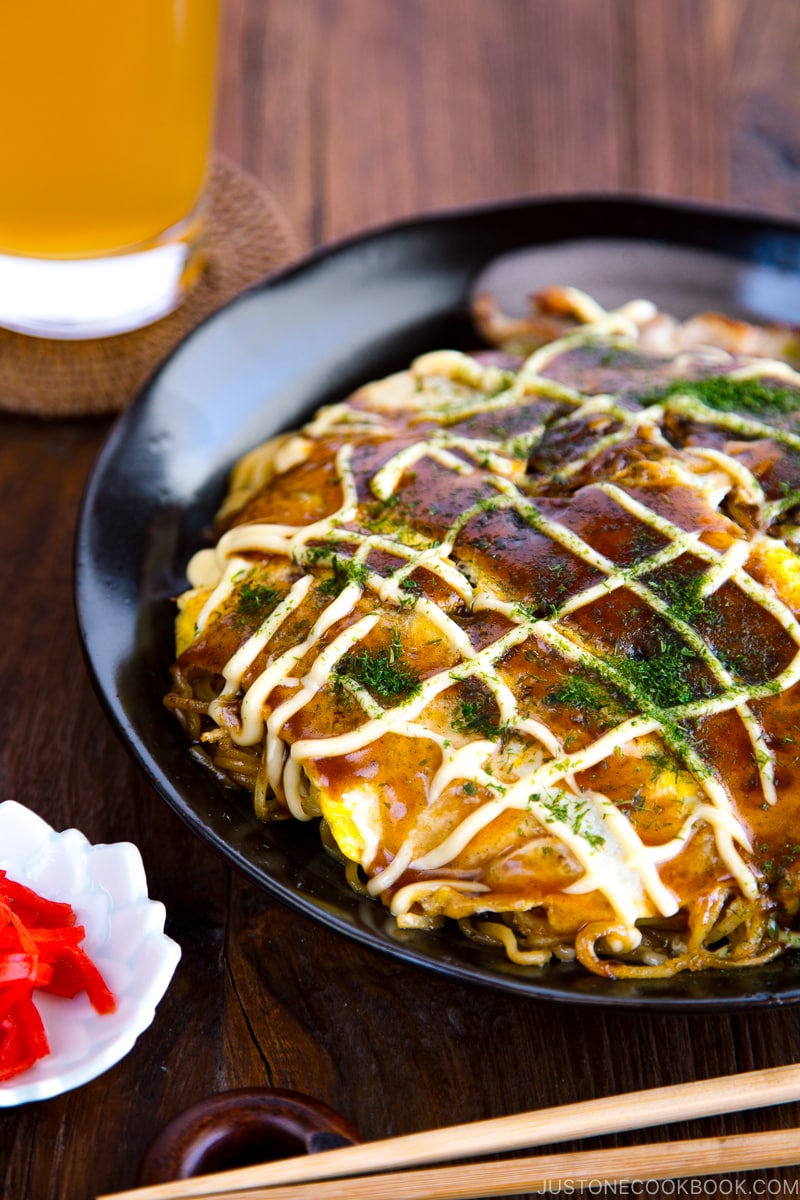
Make one okonomiyaki at a time.
- Make the batter in a large bowl, whisking water, mirin, and cake flour until combined. Chill in the fridge for 1 hour.
- Meanwhile, thinly slice the green cabbage and green onion.
- Grind the katsuobushi into a fine powder.
- Pour one portion of batter on top of a heated, nonstick griddle. Spread the batter in a large, thin circle with the back of the ladle.
- Add the layers of ingredients to the crepe. Sprinkle ground katsuobushi, then scatter sliced cabbage. Top with tenkasu, sliced scallion, and bean sprouts. Add the tororo kombu, if using. Finally, add a single layer of 3 thin slices of pork belly.
- Drizzle 1 Tbsp batter on top to “glue” the layers. Quickly flip the pancake with one spatula in each hand and correct the shape of the pancake. Turn up the heat to cook the meat, then turn down the heat and move the okonomiyaki to the side.
- Stir-fry the yakisoba noodles in the fat rendered from the meat. Drizzle the noodles with okonomiyaki sauce and toss to coat. Shape the noodles into a flat, round shape like the crepe.
- Layer the pancake on top of the noodles.
- Crack a large egg onto heated neutral oil and spread it into the same size as the pancake. Place the pancake on top of the egg before its completely cooked. Once cooked, flip the okonomiyaki a final time.
- Now, add the condiments and garnishes. Spread okonomiyaki sauce on top and drizzle with Japanese mayonnaise in a zigzag pattern. Sprinkle with aonori and garnish with pickled red ginger.
I hope you give my recipe for Hiroshima-style Okonomiyaki a try! If you try Osaka-style okonomiyaki as well, tell us which type you prefer in the comment section below. Have fun trying different variations of this popular Japanese street food!
Wish to learn more about Japanese cooking? Sign up for our free newsletter to receive cooking tips & recipe updates! And stay in touch with me on Facebook, Pinterest, YouTube, and Instagram.
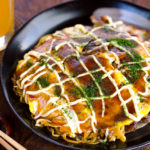
Hiroshima-style Okonomiyaki
Video
Ingredients
For the Batter
- 150 ml water (⅔ cup minus 2 tsp)
- 1 tsp mirin
- 100 g cake flour (¾ cup + 1½ Tbsp; you can make homemade cake flour; or substitute all-purpose flour in a pinch)
For the Okonomiyaki Layers
- 8.5 oz green cabbage (about 3 large cabbage leaves)
- 1 green onion/scallion
- 2 Tbsp katsuobushi (dried bonito flakes)
- 4 Tbsp tenkasu/agedama (tempura scraps) (12 g)
- 2 oz bean sprouts (about 1 handful)
- 2 Tbsp tororo kombu (dried kelp shavings; you can buy it online; optional)
- 6 pieces sliced pork belly
- 2 servings yakisoba noodles (pre-steamed; about 11 oz, 310 g)
- 2 large eggs (50 g each w/o shell)
- okonomiyaki sauce (you can make my homemade okonomiyaki sauce recipe)
- toppings of your choice (typically aonori (dried green laver seaweed), pickled red ginger (beni shoga or kizami beni shoga), and Japanese Kewpie mayonnaise)
Instructions
- Gather all the ingredients.

- In a large bowl, add 150 ml water (⅔ cup minus 2 tsp) and 1 tsp mirin.

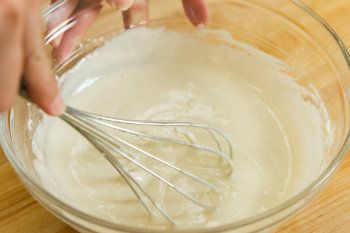
- Add 100 g cake flour (¾ cup + 1½ Tbsp) and whisk until combined. Chill in the refrigerator for at least 1 hour so the texture becomes smooth.

- Meanwhile, use a sharp knife to cut 8.5 oz green cabbage and 1 green onion/scallion into thin slices.

- Grind 2 Tbsp katsuobushi (dried bonito flakes) in a mortar and pestle to a fine powder.

- After chilling for 1 hour, the batter will become smoother.
To Make the Okonomiyaki
- We will make one Okonomiyaki at a time The ingredients are for 2 pancakes, so divide all the ingredients into 2 portions.
- Heat a large nonstick griddle (I use an electric griddle at home) to 340°F (170°C). Pour ¼ cup batter onto the hot griddle. Immediately spread the batter thinly into a large circle with the back of the ladle, starting at the center and spiraling the batter outward (see the video) to a diameter of 8–9 inches (20–23 cm).

- Now, start layering your ingredients. Sprinkle this “crepe“ with 1 Tbsp ground katsuobushi. Then, scatter a portion of sliced cabbage on top.
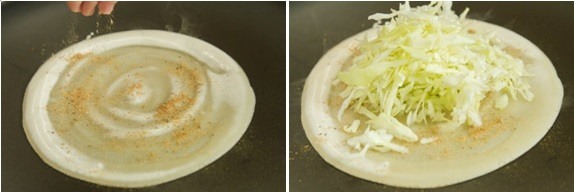
- Next, top with 2 Tbsp tenkasu/agedama (tempura scraps), some of the sliced scallion, and 1 oz bean sprouts.

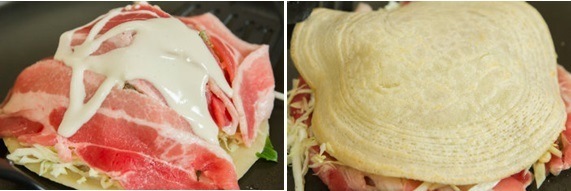
- Add 1 Tbsp tororo kombu on top, if using. Then, add a single layer of 3 pieces thinly sliced pork belly without overlapping.

- Pour 1 Tbsp batter on top (this will act as glue). With two spatulas, one in each hand, carefully pick up the pancake from either side and quickly flip. Turn the heat to 390°F (200°C) to cook the meat. Use the spatula to push the edges of the meat toward the rounded pancake shape. Don’t press down the crepe with the spatula yet (you will do so later). When the meat is no longer pink, turn down the heat to 340°F (170°C) and move the Okonomiyaki to the side. If you are using a frying pan instead of the griddle, heat up a second pan.
- With your hands, loosen 1 serving yakisoba noodles and place them in the open space on the griddle (or the 2nd frying pan). Stir-fry until the noodles are coated with the rendered oil from the meat. Next, drizzle 1–2 Tbsp okonomiyaki sauce on the noodles and toss to coat.

- Form the noodles into a round flat shape similar in size to the crepe. Using the two spatulas, quickly transfer the Okonomiyaki on top of the noodles.

- Heat some neutral oil in the open space and crack 1 large egg. Quickly spread the egg into the same size as the Okonomiyaki.

- Before the egg is completely cooked, place the Okonomiyaki on top of the egg (see the video).
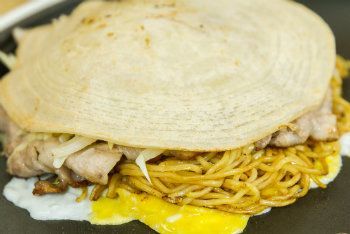
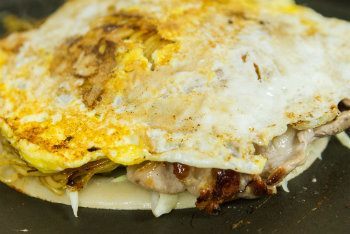
- When the bottom of the egg is cooked, flip the Okonomiyaki for the last time using the two spatulas.
To Serve
- Transfer the okonomiyaki to an individual plate and drizzle with okonomiyaki sauce. Customize with the condiments and toppings of your choice. I recommend drizzling Japanese Kewpie mayonnaise in a zigzag pattern and sprinkling aonori (dried green laver seaweed) on top. Garnish with pickled red ginger (beni shoga or kizami beni shoga), if desired. Serve immediately.

To Store
- You can keep the leftovers in an airtight container and store in the refrigerator for 3 days or in the freezer for a month.


Thank you for the recipe! We love Hiroshima style okonomiyaki and this one was almost exactly like in Japan. We are travelling there for the fouth time this winter and wanted to try making some japanese food at home before leaving. Recipe was easy to follow and on the second try we managed to flip the pancake without ruining everything.
Hello, Veronika. Wow! How exciting to visit Japan during the winter! We wish you a great time in Japan!
Thank you so much for trying Nami’s recipe and for your kind feedback. Happy cooking!
When I am in Hiroshima, I say that Hiroshima okonomiyaki is best. When I am in Kansai, I lie and say that Kansai is best.
Hi, David! Hahaha 😁. This is the good one.🤩 We glad to know that you love both Okonomiyaki styles!
Thank you for reading Nami’s post and trying out her recipes!
Wonderful!
Takes me back to Okinawa.
Hi Casey! We are glad to hear you enjoyed Nami’s recipe!
Thank you so much for your kind feedback. Happy Cooking!
When I was on a tour of the Wood Egg Okonomiyaki museum in Japan, each visitor was given a bottle of freshly made Otafuku okonomiyaki sauce. So I had to try your recipe back home after the trip to Japan. My daughter said to keep your recipe, it tasted “legit” to her, similar to the okonomiyaki we ate in Hiroshima. Only thing is, the batter was too thick when I followed the water & flour quantities in the recipe, it was not as smooth flowing as shown in the video, so I had to keep adding water to make it the same consistency as in the video . Perhaps there is a typo in the recipe?
Hi Bernie! Thank you so much for reading Nami’s post and trying her recipe! We hope you enjoy your visit to the Okonomiyaki Museum. Yes! We hope the sauce tastes comparable to what you’ll taste in Japan. 😉
As for the batter, what type of flour did you use? It might be the type or brand of flour you used, or if you used the cup to measure the ingredient, it may have packed too much flour. If you haven’t used the scale before, we highly recommend it. We hope this is helpful.
I used plain flour, and used the food weighing scale using the metric measurements in the recipe. For the water, I used a measuring cup. That’s why I wondered whether the recipe had a typo for the flour and water.
Hello, Bernie. I had Nami double-check her recipe, but there seemed to be no errors. Maybe it got overmixed?
Is there anything you would recommend substituting for egg? My daughter is obsessed with Japanese culture and I would love to make this for her, but she has dairy and egg allergies. This was my favorite dish I enjoyed when I visited Japan so I would love to be able to share such a wonderful dish with her!
thanks!!
Hi Shelly! Thank you very much for reading Nami’s post and trying her recipe!
You can skip the fried egg or make another crepe instead.
We hope you and your daughter enjoy this dish!☺️
Quite good. Took a little more time to prepare than I expected (due to no experience). I also may not have measured quite right as the “crepe” was a little thicker than it should have been. It’ll be better next time. Very filling!!!
Hi David! Thank you very much for trying Nami’s recipe!
We hope your next try will be easier than the first time. Happy Cooking!
I made the Hiroshima variety yesterday. I should say tried to make it. 😀
I can’t get pork belly here so I blanched some lightly cured bacon to get rid of some salt and smoke flavor. All was going well until I came step 12 and didn’t increase the heat enough to cook the bacon properly. When I flipped it over it started to fall apart so I didn’t dare try to flip it back. No Okonomiyaki sauce so I used Bulldog sauce. I managed to get it onto a plate nearly in one piece but was tired and hungry and neglected the aonori which I enjoy very much. The recipe is good but Having never eaten it or made it before I was pleased with all the flavors. Would use more katsuobushi next time. Thank you for a fun recipe.
Hi Barbara! Thank you very much for trying Nami’s recipe and for sharing your cooking experience with us!
If you can’t get pork belly, you can try thin sliced pork or beef as well.
We hope your next try will be much easier than the first time! Happy Cooking!
Thanks for sharing your recipes! I really appreciate it to be able to cook and experience authentic food.
I made both Okonomiyaki Versions on two following days for my mum and myself. I have to say, my Mum and I both prefer Hiroshima Okonomiyaki when it comes to taste, the noodles and the egg make the difference. I like the texture of the Osaka version better though, really exciting mouthfeel.
I guess the Osaka Version is also a little better for being warmed up (correct me if I am wrong).
I actually had more problems when trying to flip the Osaka Okonomiyaki, flipping the Hiroshima Version worked a lot better than I guessed it would, maybe thats because I used a pan for the Osaka version and a small iron griddle for the hiroshima version.
Hi Chun! Wow! Thank you very much for trying both versions and for your kind feedback!
Nami and I like both versions of Okonomiyaki, so it’d be tough for us to pick just one! Both versions are delicious, aren’t they?😋
Using a griddle might be easier for flipping Okonomiyaki. If you can flip one kind, we think you can flip both versions. Happy Cooking!
Hi Nami! My family is from Yamaguchi prefecture, very close to Hiroshima, so I am very familiar with Hiroshima-yaki! Can you tell me about how long you cook the crepe (with cabbage/sprouts/pork etc) BEFORE you flip it, and how long you cook it AFTER you flip it? Can’t wait to try this one!
Hi Julia, Thank you very much for trying this recipe! We hope your family enjoys this Hiroshima-Style Okonomiyaki.
If you follow the recipe and the time you get to Step 12, it is the perfect time to flip the Okonomiyaki. The crepe should look dried and not wet batter. After you flip the Okonomiyaki, you have to cook the pork belly until it is no longer pink. It should be about 4~5 minutes, but it’s up to the thickness of your meat, so please check it using spatulas to lift the side of Okonomiyaki.
We hope this helps! 🙂
So delicious, thank you for the recipe!
All the steps are very well explained!
Hi Marie, We are glad to hear you enjoyed this recipe. Thank you very much for your kind feedback!
Thank you for the wonderful recipe. I have been dying to taste okonomiyaki for ages, but there aren’t any restaurants making it in Greece where I live. Just tried it and it was a very, very interesting dish. Served it along with inarizushi and husband liked it a lot. Thanks again!
Hi Efthymia, We are so happy to hear you cook this Okonomiyaki at your home in Greece, and you and your husband enjoyed it! Thank you very much for trying this recipe and for your kind feedback!
Hi Nami and thanks for your amazing blog! I cannot find any proper yakisoba noodles here in German. There are only those yakisoba instant noodle packages. Would you recommend to take those or better to choose different noodles? Maybe udon or chinese style noodles?
Many thanks!
Alex
Hi Alex! Thank you for your kind words! I know, Yakisoba noodles can be so hard to find. 🙁 I would say udon is a bit different so I would prefer to use Chinese noodles. One day I’m going to check what kind of Chinese noodles are similar to Yakisoba noodles and will share my experience. 🙂
Great, thanks 🙂
This recipe was delicious. Although it was a bit on the messy side what with layered ingredients along with the necessity to flip the creation ever so quickly but gently to cook on both sides. With practice I’m sure it will be significantly easier to flip! Next time I shall attempt the Osaka style Okonomiyaki. And I shall come back to this recipe often. I might even try doing a vegetarian version with tempeh.
Hi Patrick! Thank you so much for your kind feedback! Start with a smaller size, which is much easier to flip. Hope you enjoy Osaka version too! Thanks again for writing! xo
I saw a nagaimo at the local asian grocery and on a whim decided to buy it to try this recipe- glad I did!! I followed the recipe mostly (except sub tempura bits for crushed up kids’ crackers and the pickled ginger for yellow pickled daikon). My kids were too picky to eat it – oh well, more pancake for me 😅 I loved it, great fluffy interior and crispy exterior, great density and structure, easy to follow recipe that seems very versatile and flexible. Really great especially with the homemade Okonomiyaki sauce recipe! Thank you so much Nami!!
Hi Brian! Aww I’m so happy to hear you enjoyed this recipe! Thank you so much for your kind feedback. We just had Osaka-style Okonomiyaki last night too. SO good! Ate a bit too much. xD Stay safe and healthy!
This is exactly what my son wanted me to make after seeing some food videos on the YouTube. Thank you.
Hi Joanne! Hope you two enjoy cooking Hiroshima style Okonomiyaki! 🙂