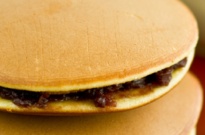
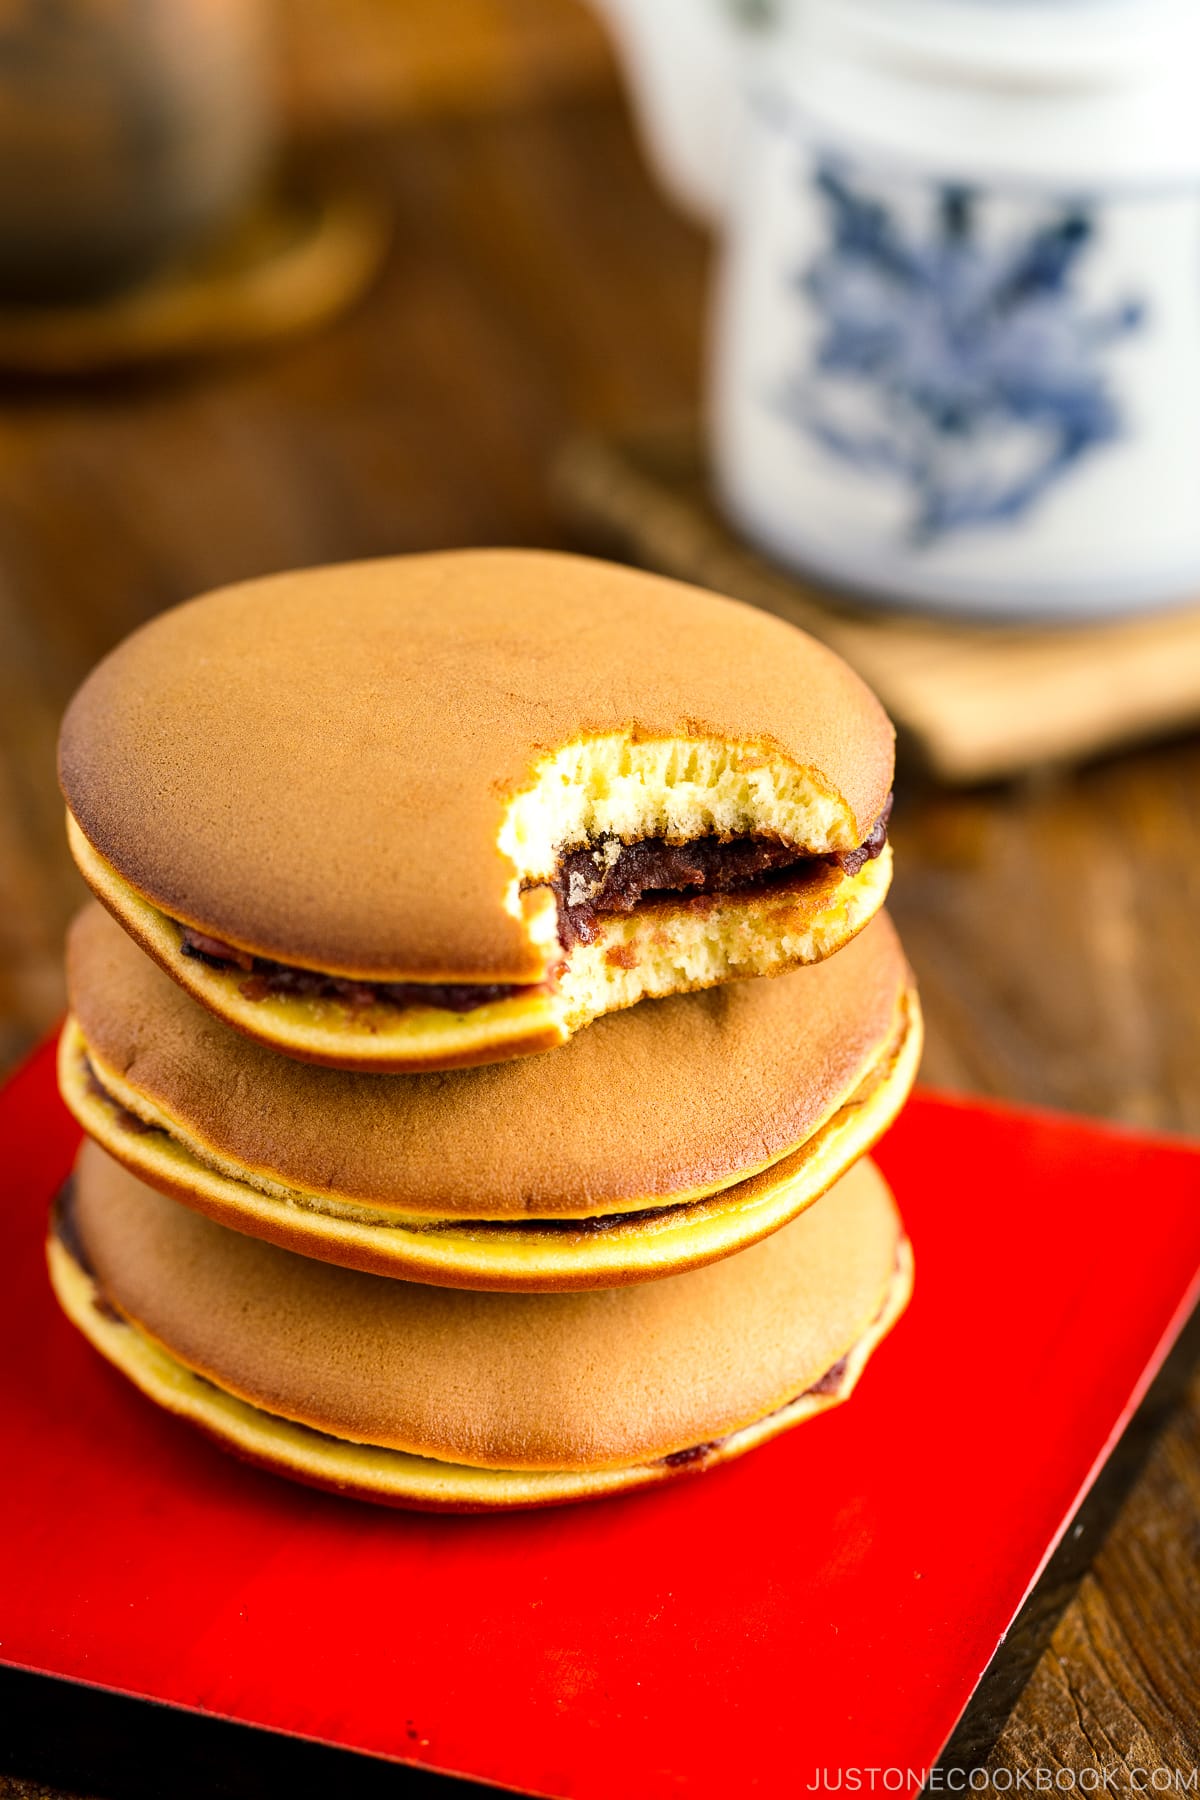
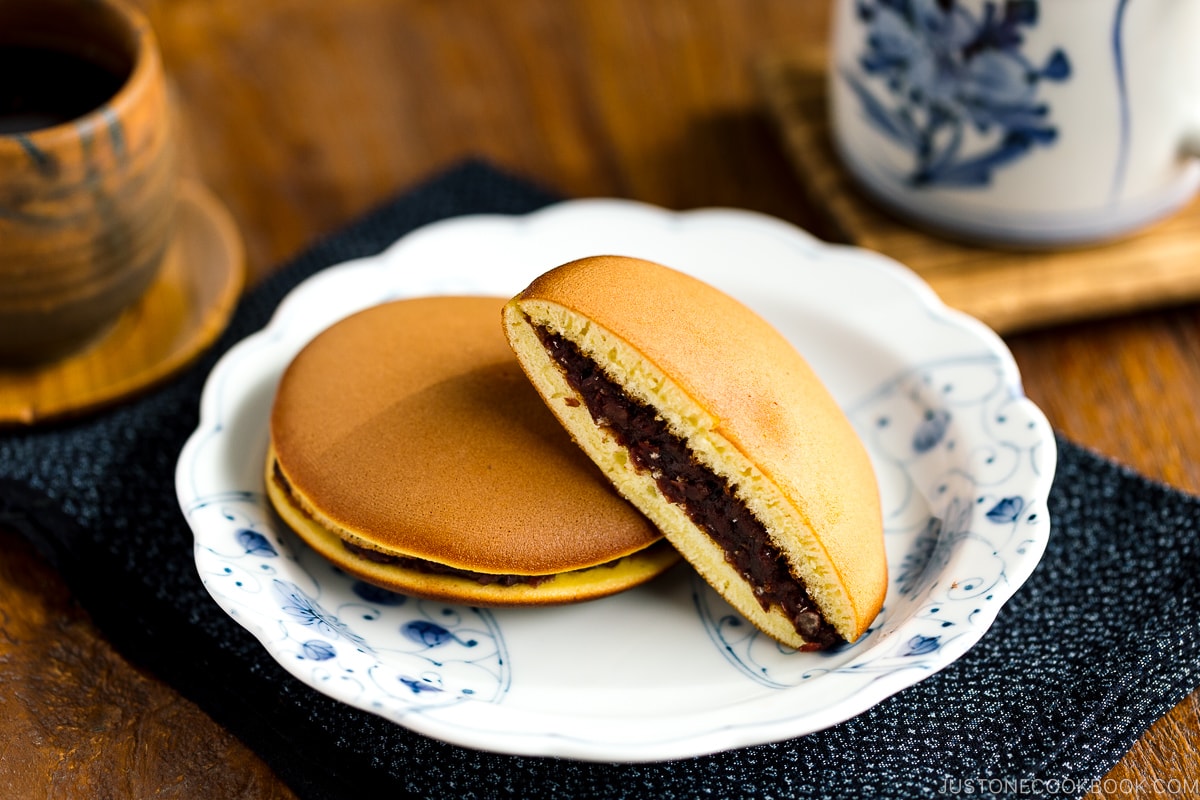
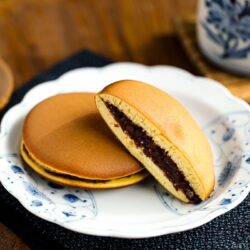
Dorayaki (どら焼き) is best described as a dessert with red bean filling between two slices of sweet fluffy pancakes. If you are familiar with Japanese cartoons from the ’70s, you probably know this dessert from the anime character Doraemon who is crazy about this snack and falls for any trap involving them.

Different Types of Dorayaki
Besides Doraemon, my entire family including my children and husband all love this snack. This traditional Japanese confectionery is most commonly filled with sweet azuki red bean paste called anko; however, custard cream (recipe), chestnuts (kuri), and cream (matcha cream, cream with fruits, etc) are also popular.
The soft moist honey pancake with sweet red bean filling goes perfectly with warm and slightly bitter Japanese green tea. I am drooling just thinking about these tasty pancake snacks.
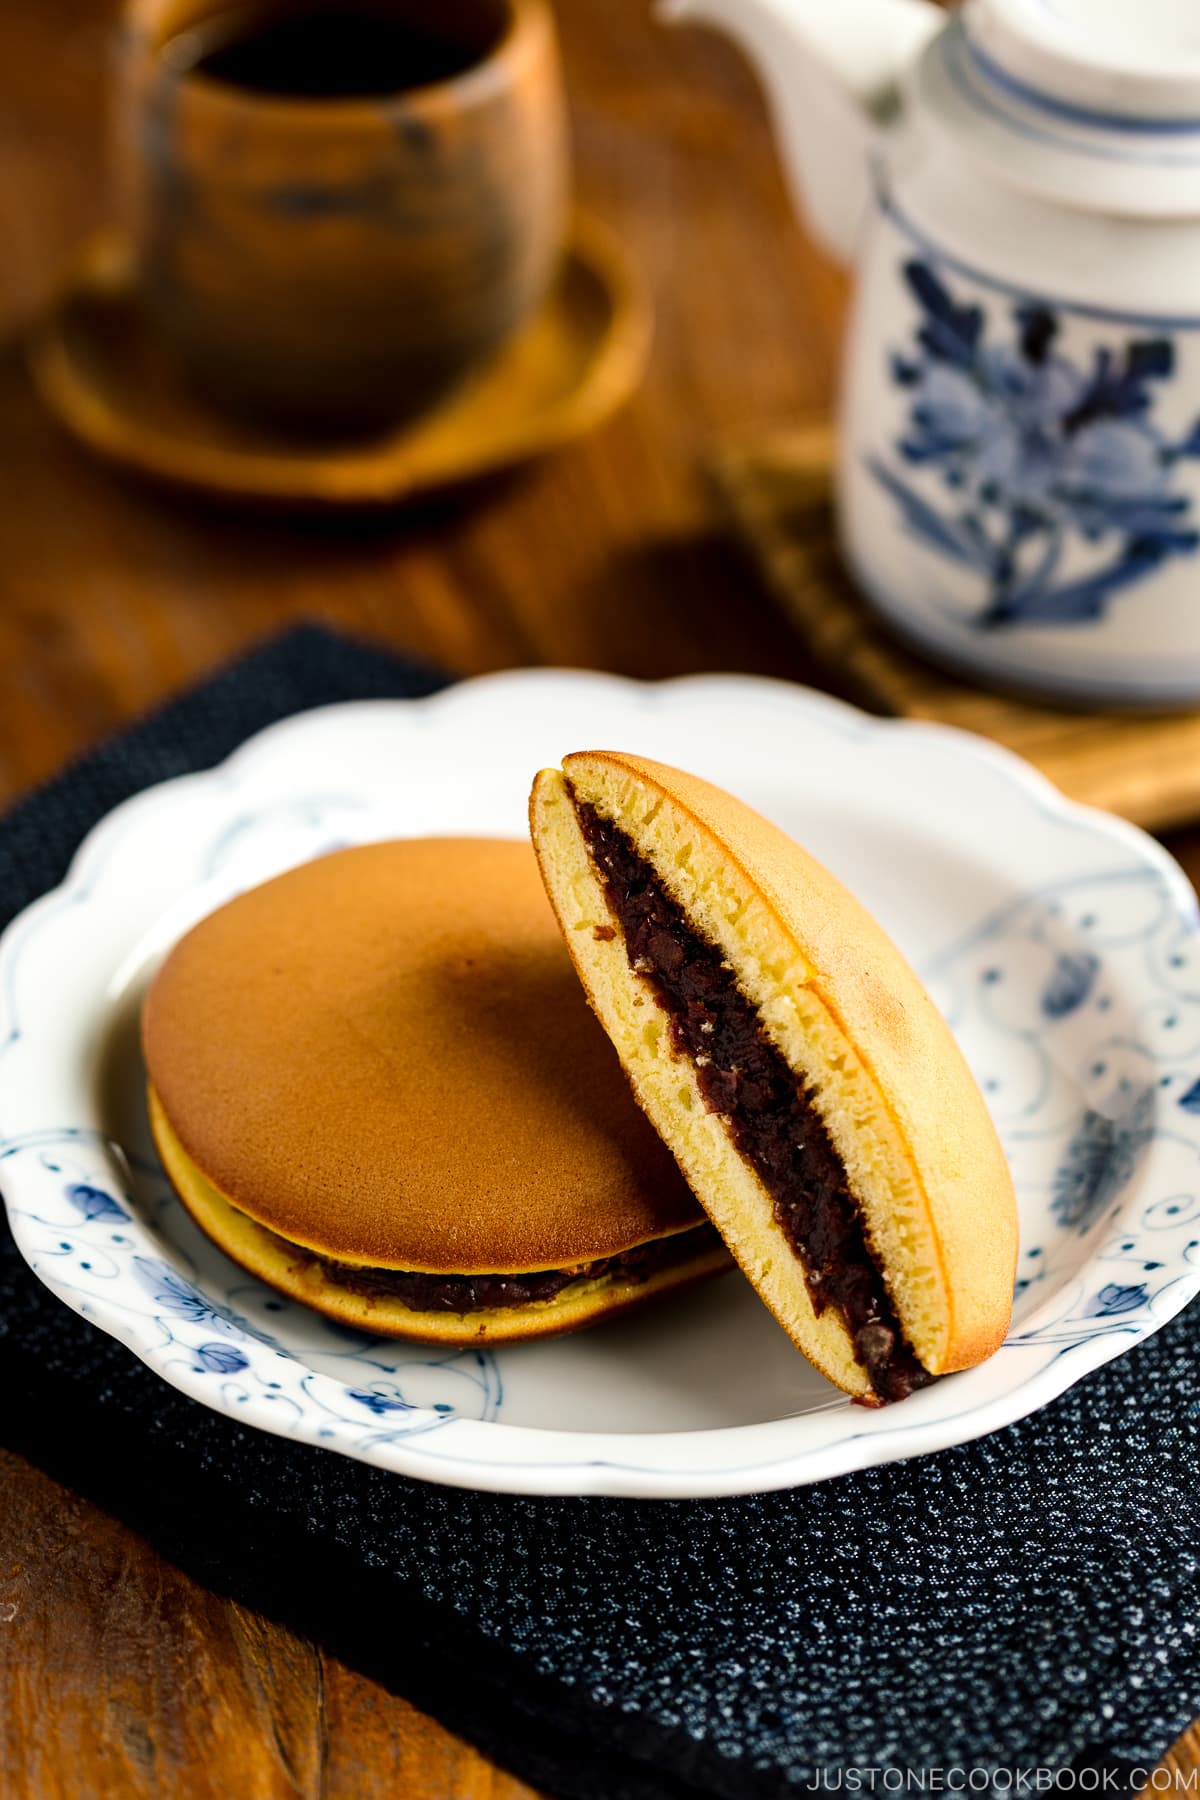
Golden Brown Dorayaki Pancakes
For perfect golden brown pancakes, make sure to wipe off all excess oil on the frying pan’s surface. If you leave oil streaks on the pan, the pancakes will not turn into nice golden color without spots. Don’t worry if the first few don’t turn out perfect, just keep going and you’ll get the hang of it very quickly.
Most of the Japanese confectionery stores in Japan carry these traditional sweets. Here in the U.S., Japanese and Asian grocery stores carry packaged dorayaki. They taste good, but homemade ones are very easy to make and I hope you give this homemade recipe a try!
FAQs
What is dorayaki?
Dorayaki is a traditional Japanese sweet made of two soft, fluffy honey pancakes sandwiched with sweet red bean paste. It’s similar to Imagawayaki, another popular filled pancake enjoyed in Japan, but dorayaki uses pancake-style batter instead of a waffle-like shell.
What is dorayaki filling made of?
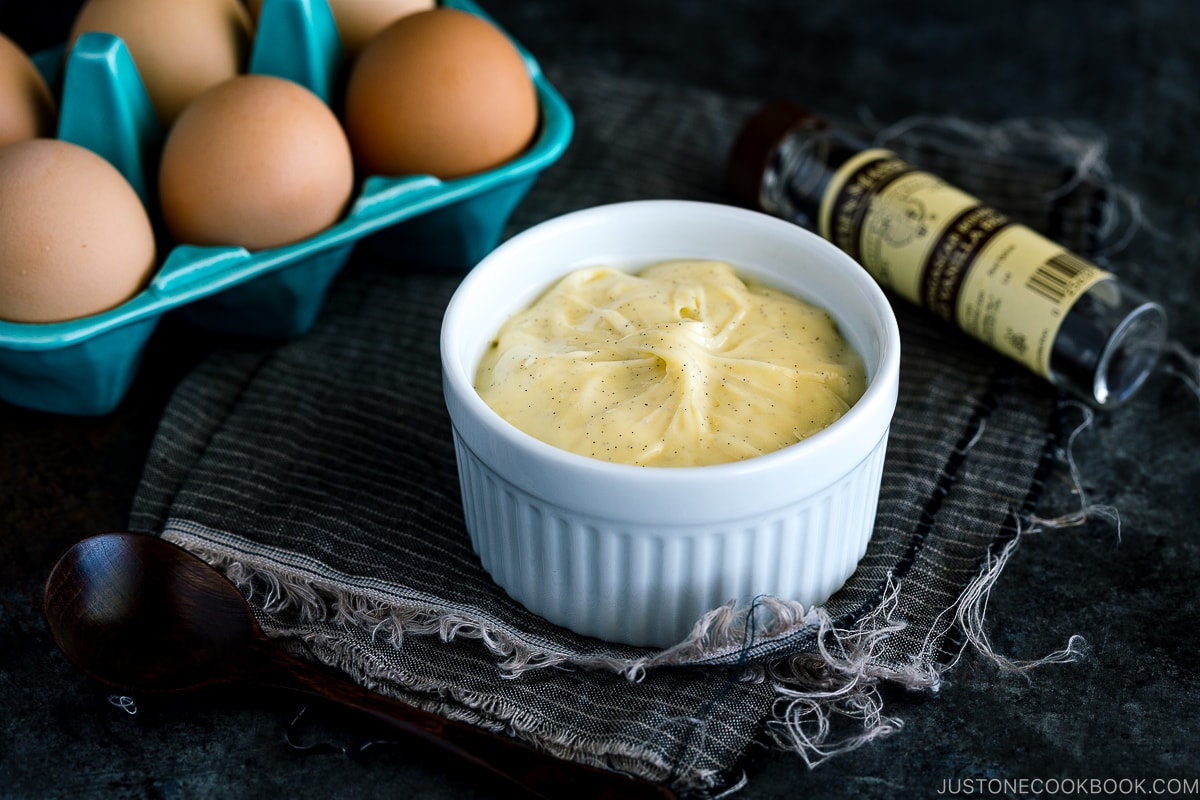
The classic filling for dorayaki is sweet red bean paste made from azuki beans, called Anko. The fine, smooth anko is a common choice, but you can also use the chunky version. Modern fillings include custard cream, whipped cream, Japanese custard pudding (Purin), chestnuts, and matcha-flavored cream.
Can I make dorayaki ahead of time?
Yes. You can make the pancakes ahead of time and store them in an airtight container. Assemble them with the filling shortly before serving. Fully assembled dorayaki keep in a cool place or refrigerator for 2 days.
Why are my dorayaki pancakes not fluffy or evenly browned?
Rest the batter and do not overmix it to help create soft, fluffy pancakes. They can turn dense if the heat is too high, so reheat your pan slowly to avoid hot spots and cook over medium-low heat. Uneven browning comes from excess oil in the pan. Be sure to wipe the pan clean before cooking each pancake.
Wish to learn more about Japanese cooking? Sign up for our free newsletter to receive cooking tips & recipe updates! And stay in touch with me on Facebook, Pinterest, YouTube, and Instagram.
Dorayaki (Japanese Red Bean Pancake)
Ingredients
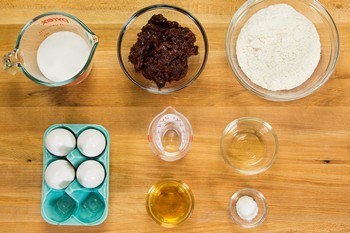
- 1⅓ cups all-purpose flour (plain flour) (weigh for accuracy; click the Metric button above for weights; or learn how to measure flour with a measuring cup)
- 4 large eggs (50 g each w/o shell)
- 140 g sugar (⅔ cup + ½ Tbsp)
- 2 Tbsp honey
- 1 tsp baking powder
- 1–2 Tbsp water
- neutral oil (for greasing the pan)
- 1.1 lb sweet red bean paste (anko) (store bought or make homemade stovetop Anko or Pressure Cooker Anko)
Instructions
- Before You Start: I highly encourage you to weigh your ingredients using a digital kitchen scale. Click the Metric button above for weights. If you don't have a scale, here's how to measure flour with a measuring cup to avoid scooping too much: Fluff the flour with a spoon, sprinkle it into the measuring cup, and level it off.Please note that the pancake batter requires 15 minutes of resting time.Gather all the ingredients.
To Make the Batter
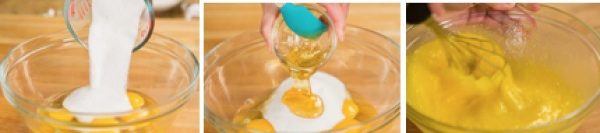
- Combine 4 large eggs (50 g each w/o shell), 140 g sugar (⅔ cup + ½ Tbsp), and 2 Tbsp honey in a large bowl. Whisk well until the mixture becomes fluffy.
- Sift 1⅓ cups all-purpose flour (plain flour) and 1 tsp baking powder into the bowl with the egg mixture and mix until combined. Put the bowl in the refrigerator and rest the batter for 15 minutes.
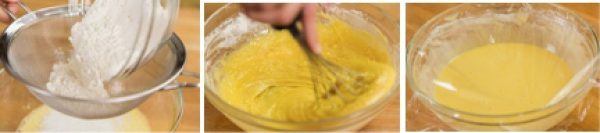
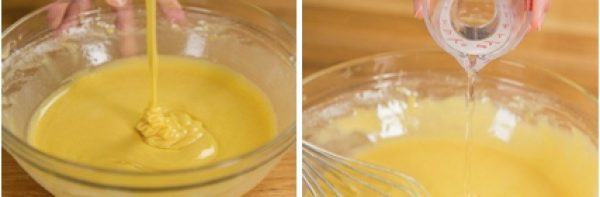
- After resting, the batter should be relaxed and slightly smoother. Now, stir in half of the 1–2 Tbsp water and check the consistency. It should be similar to pancake batter. Add more of the water, as needed, to achieve the right consistency. The water amount will vary based on the size of the eggs and how accurately you measured the flour.
To Cook the Honey Pancakes
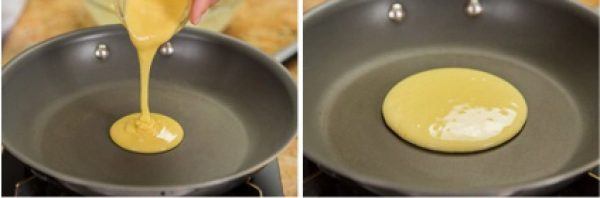
- Preheat a large nonstick frying pan over the lowest heat setting for 5 minutes. Take your time and heat the pan slowly. When it is thoroughly heated with no hot spots, increase the temperature to medium-low heat. Dip a paper towel in neutral oil and coat the bottom of the pan with it. Then, use another paper towel to remove the oil completely so there are no streaks. A clean pan is the key to evenly golden brown pancakes. Cook one pancake at a time. With a ladle or a 4 Tbsp measuring cup, pour 3 Tbsp of the batter from 3 inches (8 cm) above the pan to create a pancake that‘s 3 inches (8 cm) in diameter.
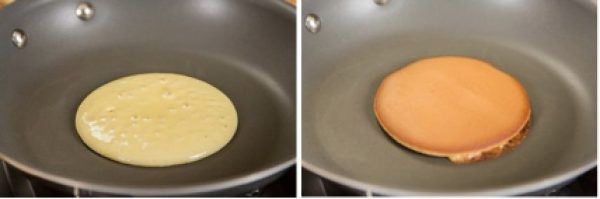
- When you see bubbles on the surface of the batter, flip the pancake over and cook the other side. When done, transfer it to a plate and cover it with a damp towel to prevent drying. Continue making the rest of the pancakes, greasing and wiping the pan between batches, as needed. You can make about 12 pancakes.Nami's Tip: With my stove and frying pan, it takes 1 minute, 15–30 seconds to cook the first side and 20–30 seconds for the other side.
To Assemble the Dorayaki
- Make sandwiches using two pancakes and a scoop of the 1.1 lb sweet red bean paste (anko) as filling. The dorayaki's overall shape is curved, so mound the red bean paste in the center so the sandwich‘s middle is thicker than the edges. Wrap individually with plastic wrap until ready to serve.
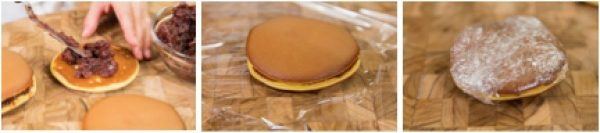
To Store
- Store the individually wrapped dorayaki in a cool place for 2 days. You can also store them in a freezer bag in the freezer for a month.
Nutrition
Did you make this recipe?
Tag @justonecookbook on Instagram so we can see your delicious creation!
Editor’s Note: The post was originally published on October 28, 2011. The new post includes updated images and the new video.