
Red bean, also known as azuki (小豆), is by far the most popular flavor in traditional Japanese sweets. Its prominence in Japanese desserts can be compared to that of chocolate in Western desserts.
Azuki has always been one of my absolute favorite flavors, especially in ice cream, so I want to show you how to make Azuki Red Bean Ice Cream (小豆アイスクリーム) the way we enjoy it in Japan.
What Does Azuki Red Bean Ice Cream Taste Like?
At a glance, azuki beans look similar to black beans, but they are deep red in color with a mildly nutty taste. Red beans also have a light sweetness, making them a perfect ingredient for desserts.
In Japan, red bean-flavored foods are impossible to miss, whether you’re in a bakery, convenience store (konbini), or restaurant. Even after living in the States for many years, the taste of red bean sweets makes me nostalgic for Japan. This homemade red bean ice cream brings back so many great memories of childhood and the summers I spent at my grandpa’s house.
Japanese Ice Cream vs. American Ice Cream
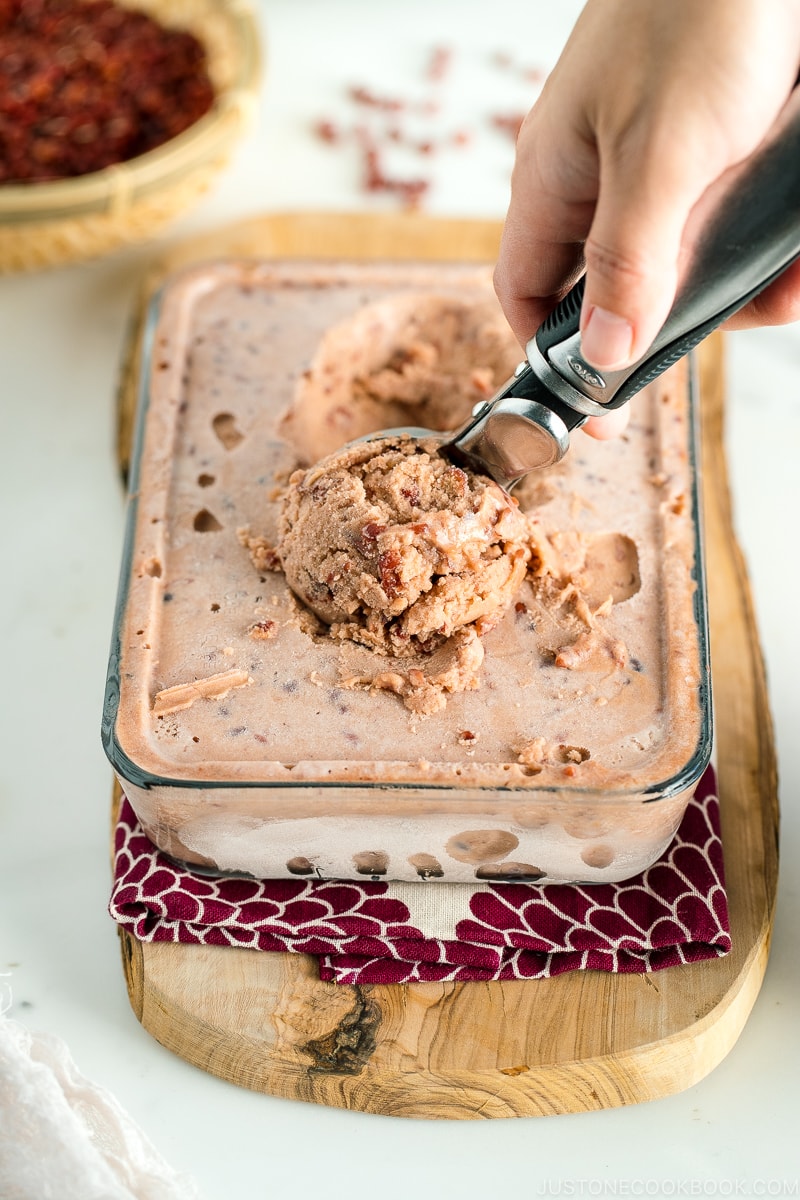
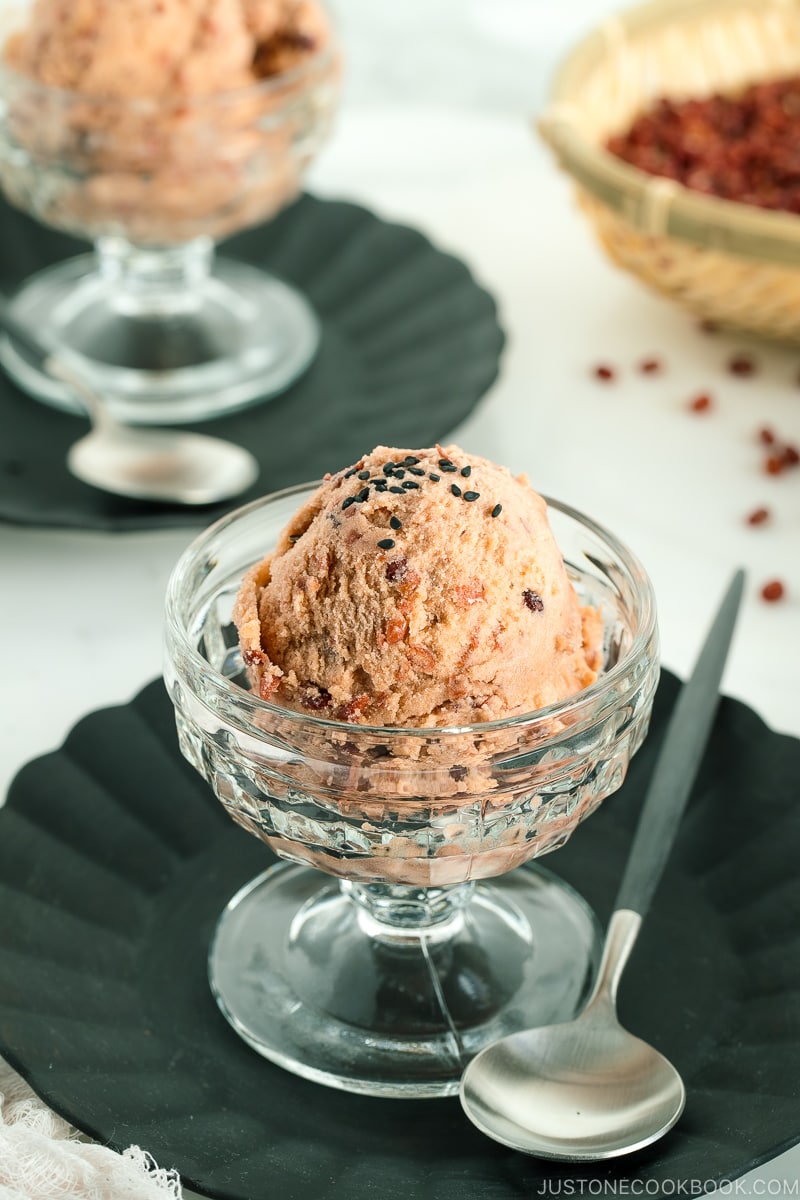
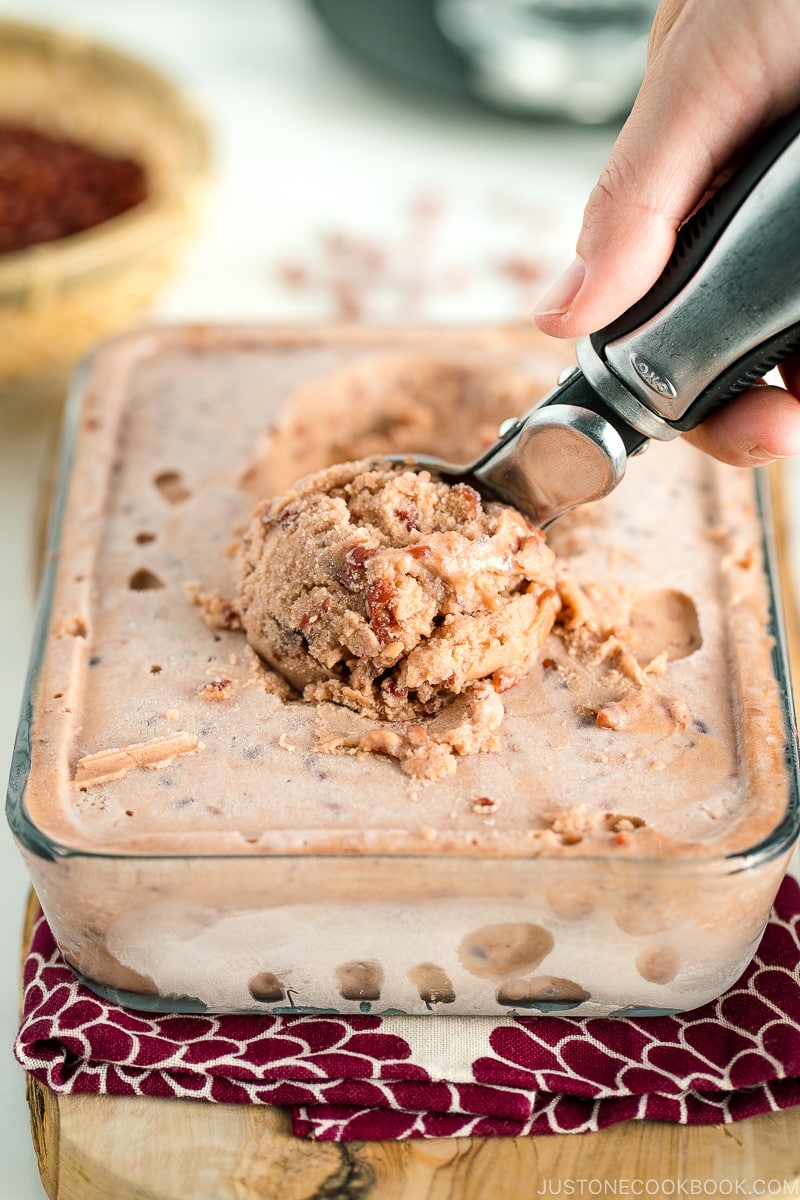
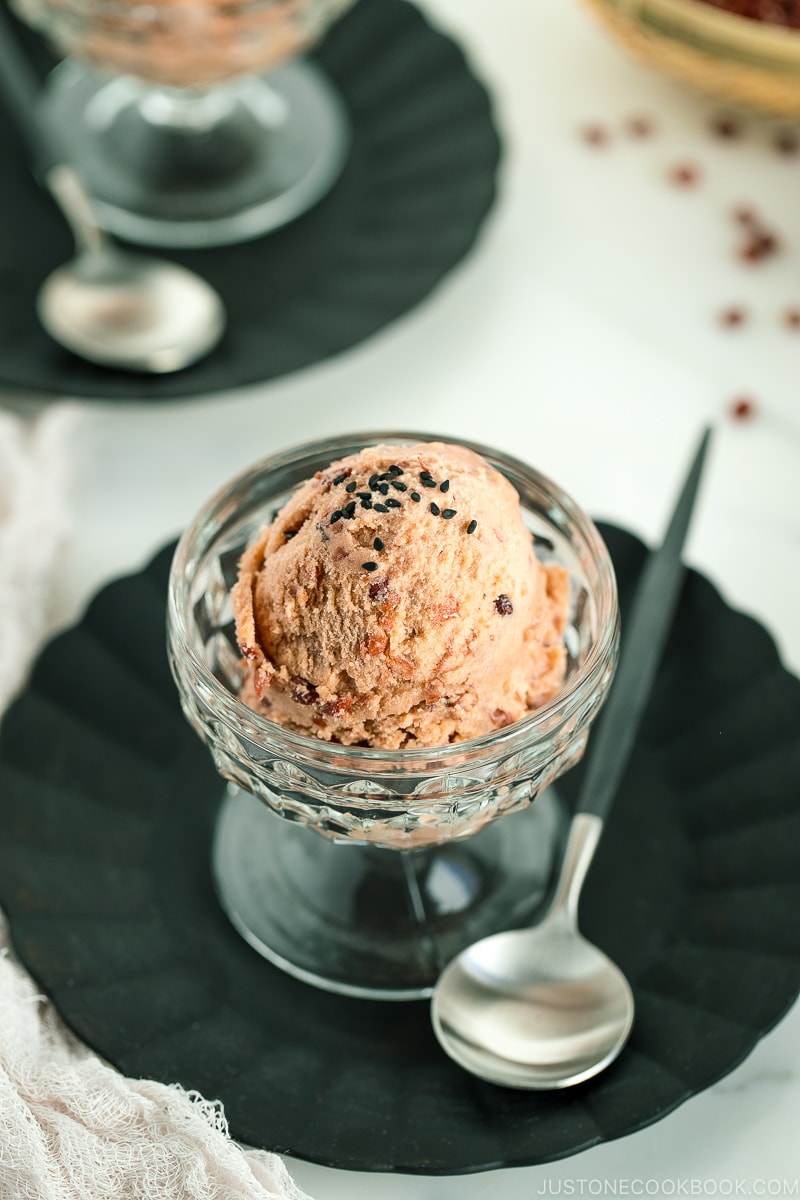
Japanese red bean ice cream is a little different from the ice cream you may be used to, not only because of the unique main ingredient. A key difference is its level of creaminess. The texture of the ice cream is “harder,” similar to an ice bar, and it won’t be as rich and creamy as typical ice cream or soft serve, but it’s satisfying, scoopable ice cream nonetheless. Unlike many ice cream recipes, this one does not call for heavy cream or eggs. All you need is milk, sugar, and red bean. I much prefer this over chocolate ice cream any day!
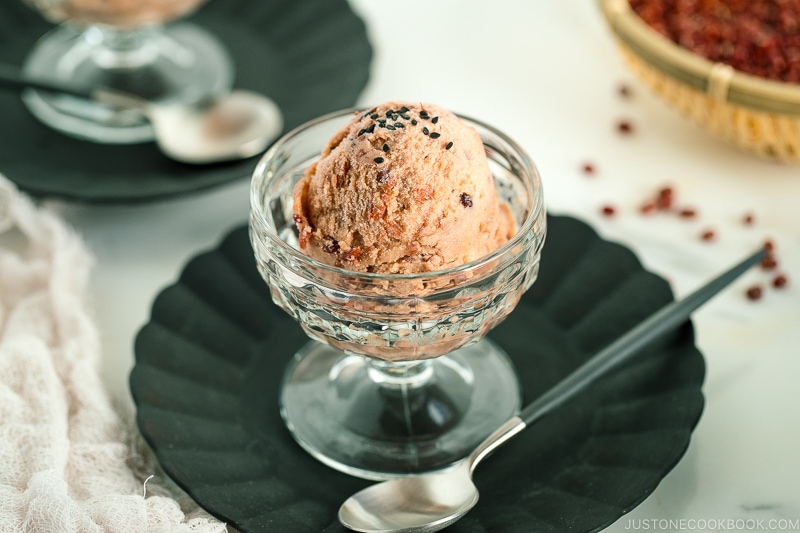
My favorite toppings are toasted black sesame seeds or a little sweetened condensed milk if you have any. If you crave richer ice cream, the condensed milk on top will give you just that. The sesame seeds add a nutty crunch that complements the azuki flavor wonderfully. If you want to take it one step further, use this as a filling for your Mochi Ice Cream!
Where to Buy Japanese Red Bean (Azuki Beans)
You can find canned red bean paste (called “anko” in Japanese) at any Japanese grocery store. Recently, I’ve noticed other grocery stores beginning to carry it, too! Be sure to keep an eye out in the Asian section of your supermarket.
The store-bought red bean paste is quite sweet, so if you prefer a less sweet option, I highly recommend making your red bean paste from scratch—it’s much easier than you’d think! For this recipe, I stick with the canned option because the other ingredients balance out the sweetness. If you own a pressure cooker or Instant Pot, you can make your red bean paste in just a few easy steps with this recipe.
More Japanese Ice Cream Recipes
- Green Tea Ice Cream
- Soy Sauce Caramel Ice Cream
- Black Sesame Ice Cream
- Mochi Ice Cream
- Yuzu Ice Cream
- Coffee Ice Cream
Wish to learn more about Japanese cooking? Sign up for our free newsletter to receive cooking tips & recipe updates! And stay in touch with me on Facebook, Pinterest, YouTube, and Instagram.

Azuki Red Bean Ice Cream
Ingredients
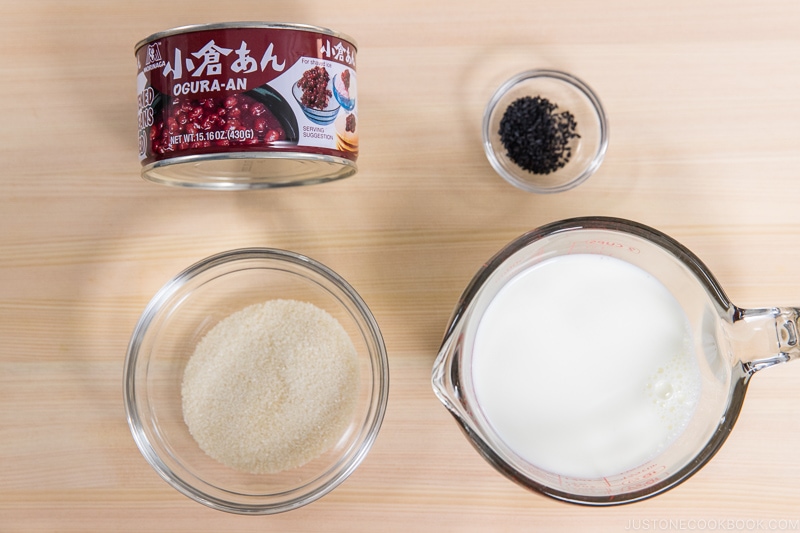
- 1¼ cups whole milk (please use whole milk as we don‘t use heavy cream in this recipe)
- ⅓ cup sugar (adjust to your taste)
- 15 oz sweet red bean paste (anko) (1 can of ogura-an; or make my Homemade Red Bean Paste)
To Serve
- 2 tsp toasted black sesame seeds (optional)
Instructions
- Before You Start…Please note that this recipe requires 8+ hours of chilling, churning, and freezing time.Gather all the ingredients.
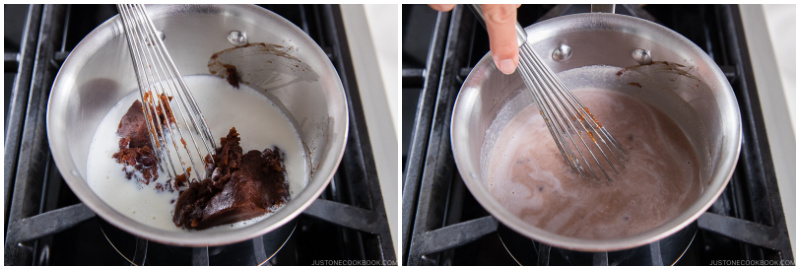
- In a medium saucepan, combine 1¼ cups whole milk and ⅓ cup sugar.
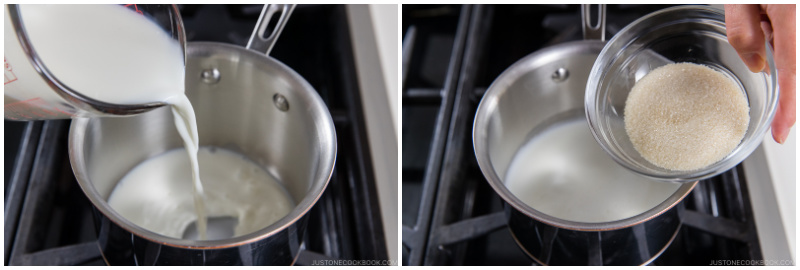
- Stir and heat the mixture on medium heat. When the sugar is dissolved, add 15 oz sweet red bean paste (anko).
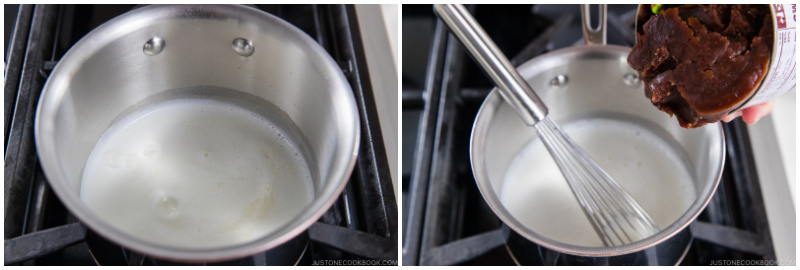
- Whisk the mixture until combined and turn off the heat.
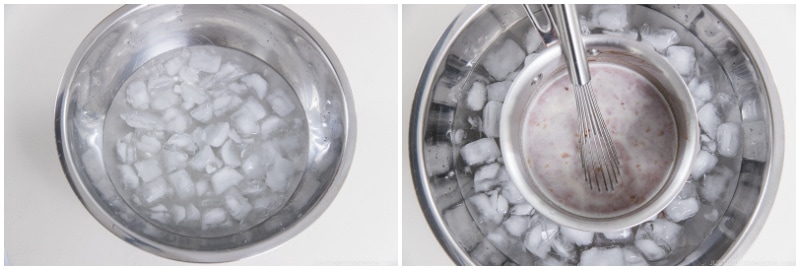
- Prepare ice water in a large bowl. Place the pot of red bean mixture in the ice bath and let the mixture cool completely. Then put the lid on and store it in the refrigerator overnight or at least 4 hours.
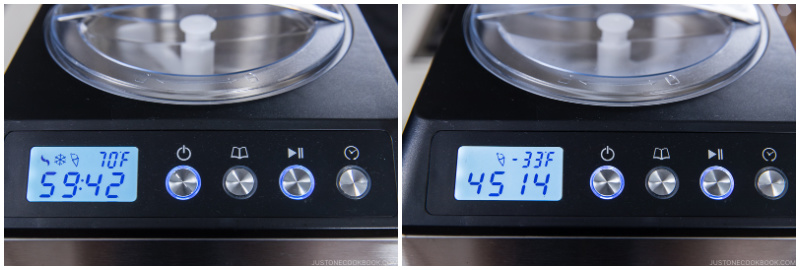
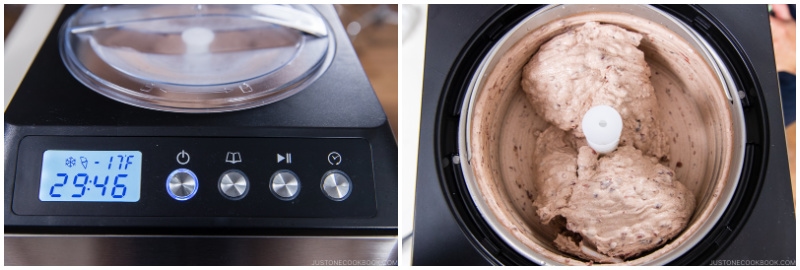
- On the following day (or after 4 hours), set up your ice cream maker according to the instructions. My ice cream maker does not require freezing the bowl in advance but I need to run it for 15–20 minutes prior to making ice cream. Please make sure your ice cream bowl is frozen ahead of time. A bowl that isn’t completely frozen will take longer to freeze your ice cream and impact the finished product. If you make homemade ice cream on a regular basis, store your bowl in the freezer once it is clean. It will always be ready for your next batch of ice cream. If you don‘t have an ice cream maker, check out here.
- Pour the mixture into the ice cream machine. Make sure not to fill it more than about two-thirds of the way up. Start churning. Churning ice cream incorporates air into the finished product while it freezes, so you will need some extra room in your freezer bowl.
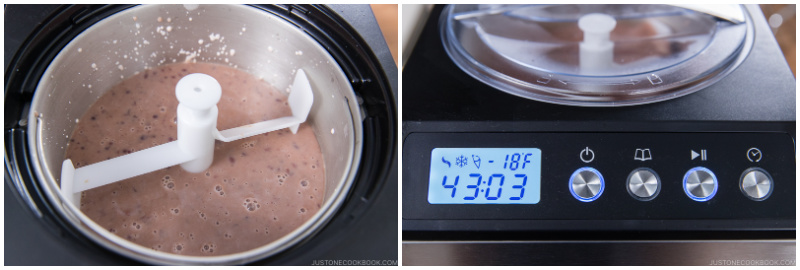
- The mixture will become thicker and creamier, about 25–30 minutes.
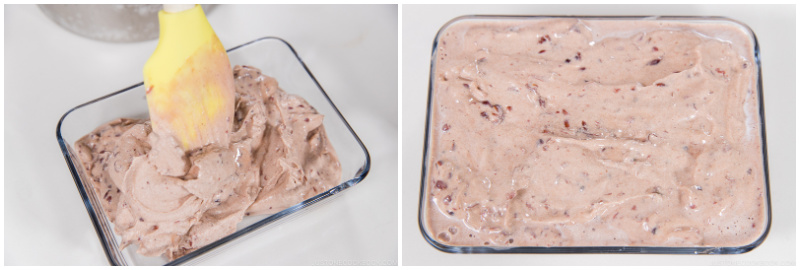
- Transfer the ice cream to an airtight container and flatten it with the silicone spatula. Cover the lid and put it in the freezer for at least 3–4 hours. Set freezer temperature to the coldest setting, so the ice cream freezes faster. Optional: Lay plastic wrap directly on top of ice cream and press down gently to prevent ice crystals from forming on top of the ice cream.
- Serve the ice cream and sprinkle with 2 tsp toasted black sesame seeds.
Nutrition
Did you make this recipe?
Tag @justonecookbook on Instagram so we can see your delicious creation!
Editor’s Note: This post was originally published on July 11, 2011. The images and recipe have been updated in January 2021.