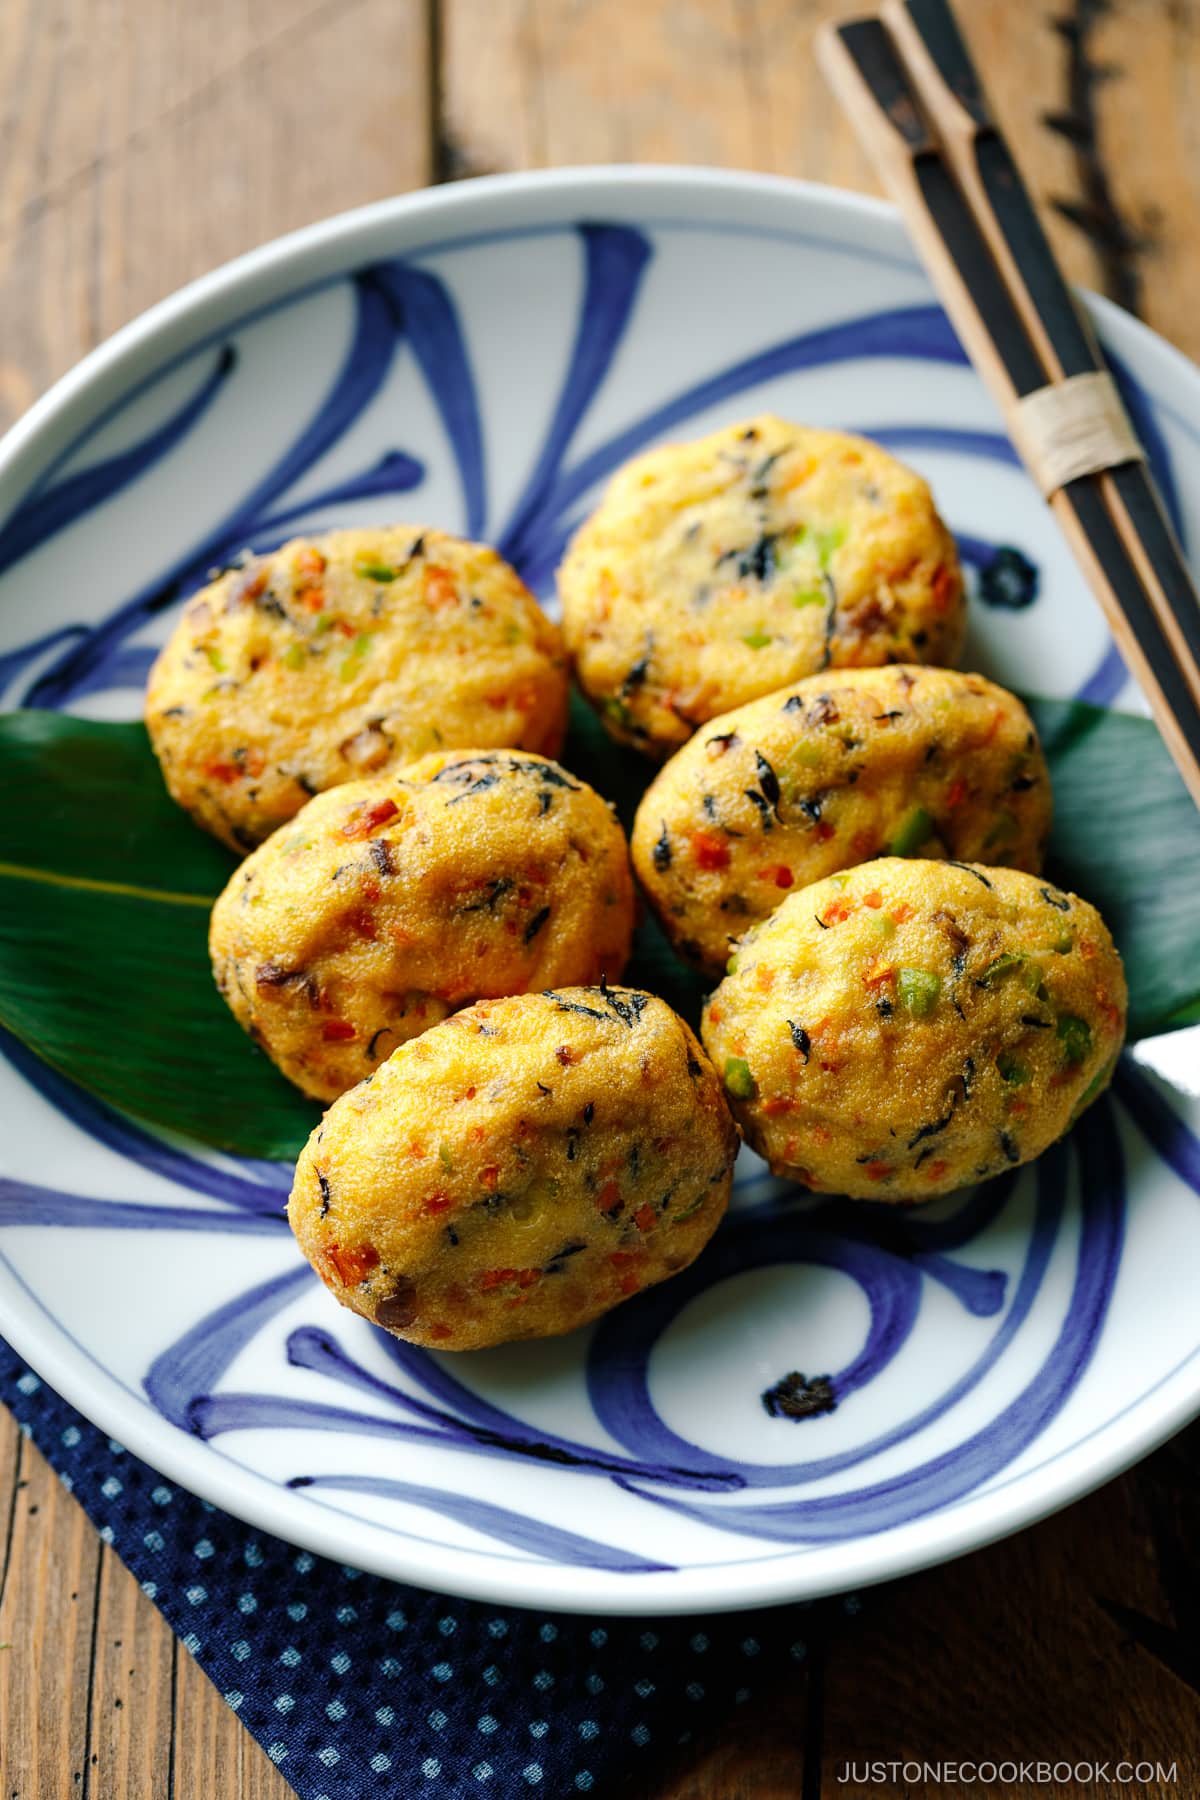
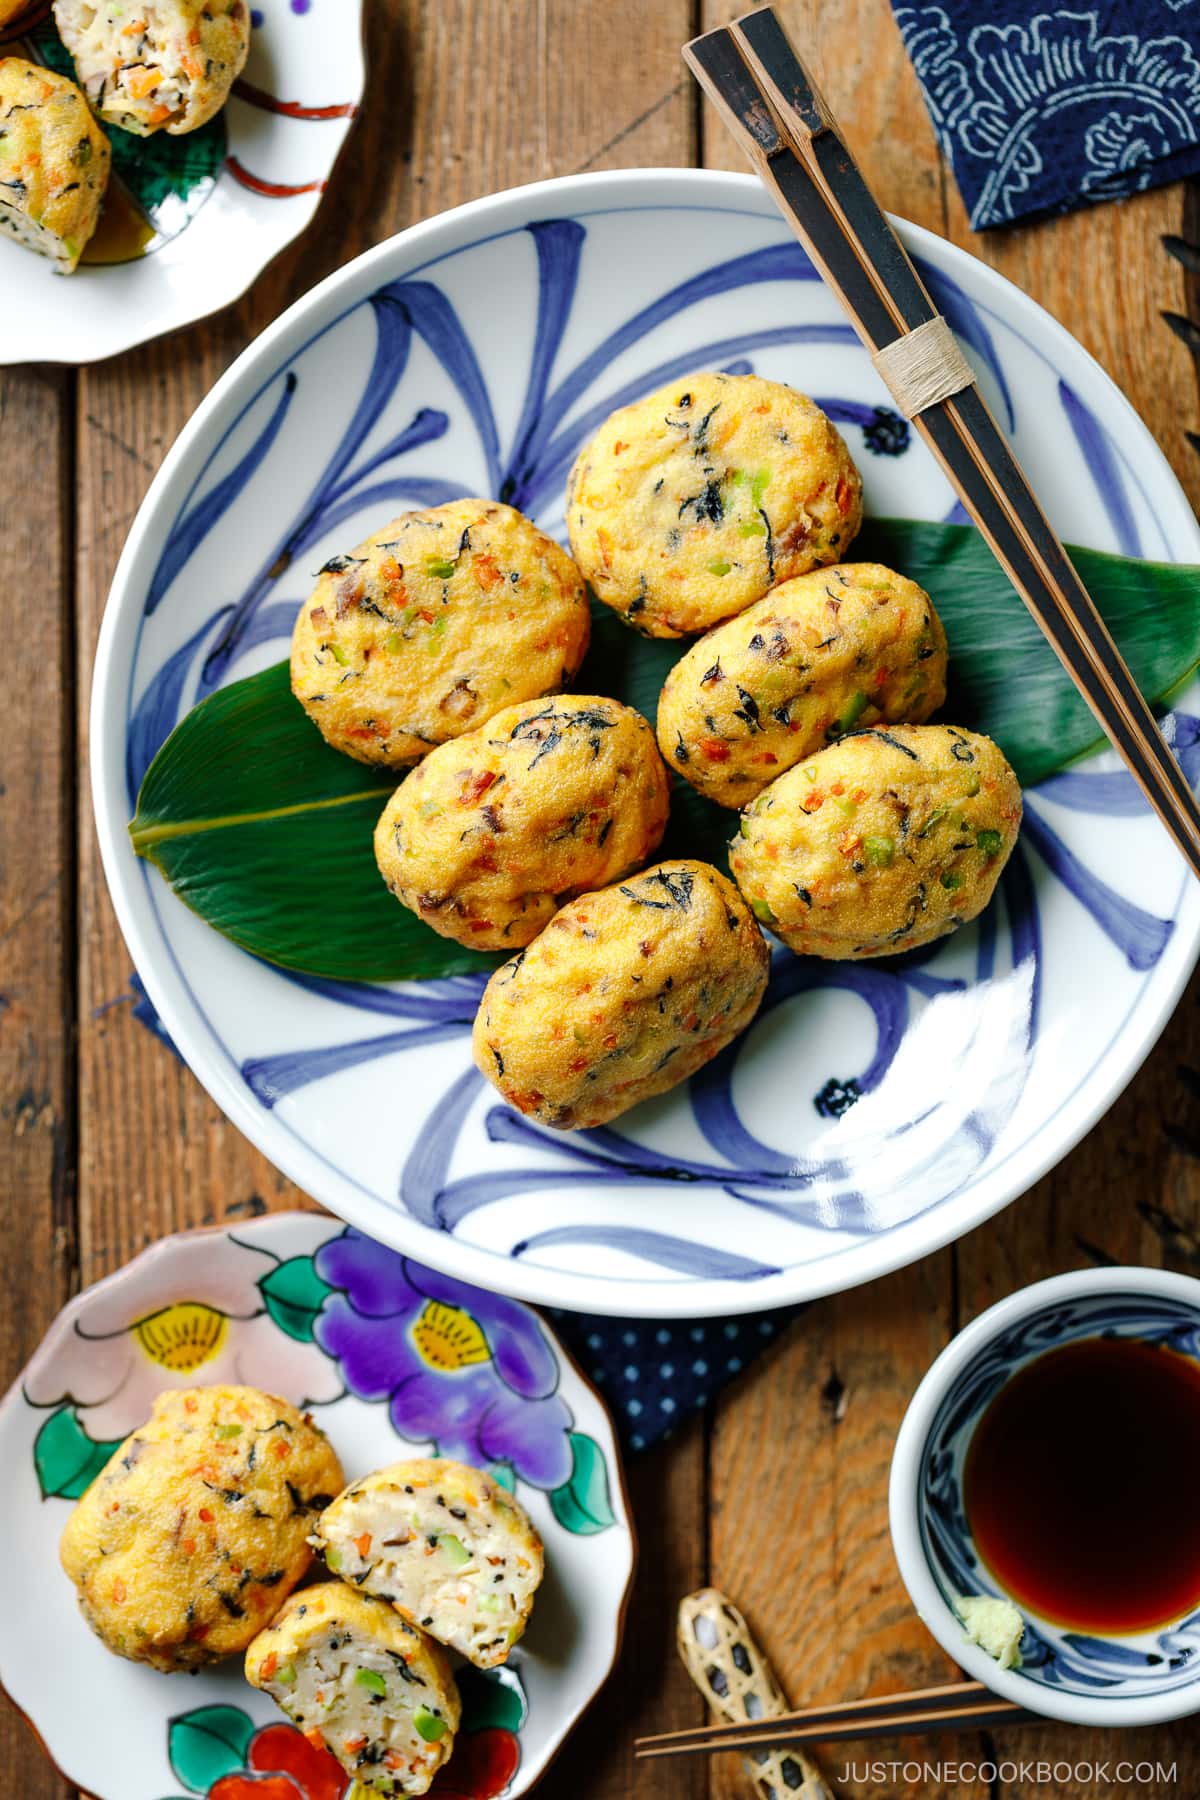
Originally created as shojin ryori (Buddhist vegan cuisine), Ganmodoki are delicious Japanese fried tofu patties with hijiki seaweed, shiitake, and edamame. Crispy on the outside yet soft and fluffy inside, freshly made ganmodoki are irresistible! {Vegan Adaptable}
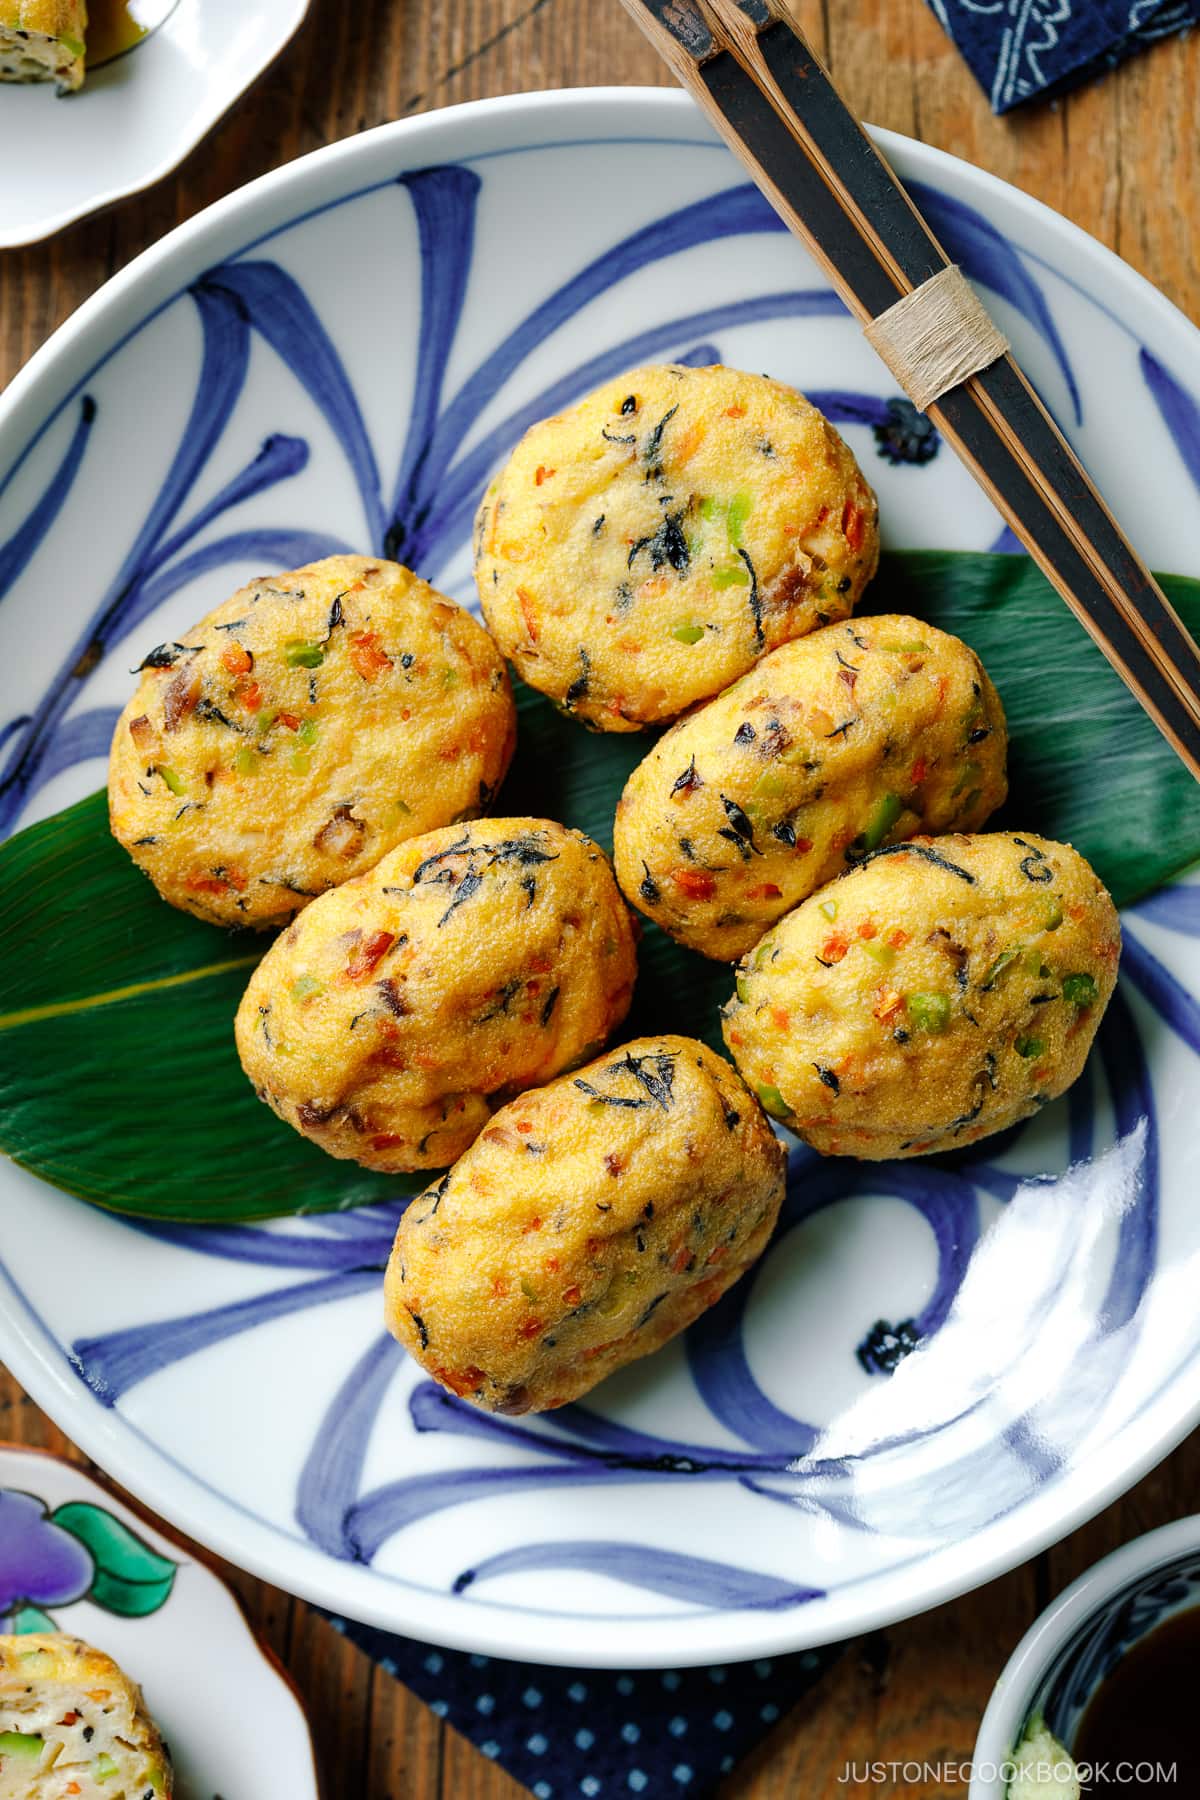
As a busy working mom, I always thought that making Japanese Fried Tofu Patties or Ganmodoki (がんもどき) from scratch was a luxury. Since I could easily buy them from a Japanese or Asian grocery store, I often just resorted to the pre-made ones. However, I kept receiving requests from readers who wanted to learn how to make ganmodoki at home. With the growing interest, I decided to roll up my sleeves and get my hands on these tofu patties. Oh, I was sure glad that I did!
The homemade ganmodoki not only tasted fresher and 100% better than the store-bought versions, but they also turned out to be easier and faster to make than I had imagined. My family just couldn’t get enough of them! Thank you to those who nudged me into making the recipe. I know some of you have been waiting for it for years, so I hope you have lots of fun making these at home!
Table of Contents
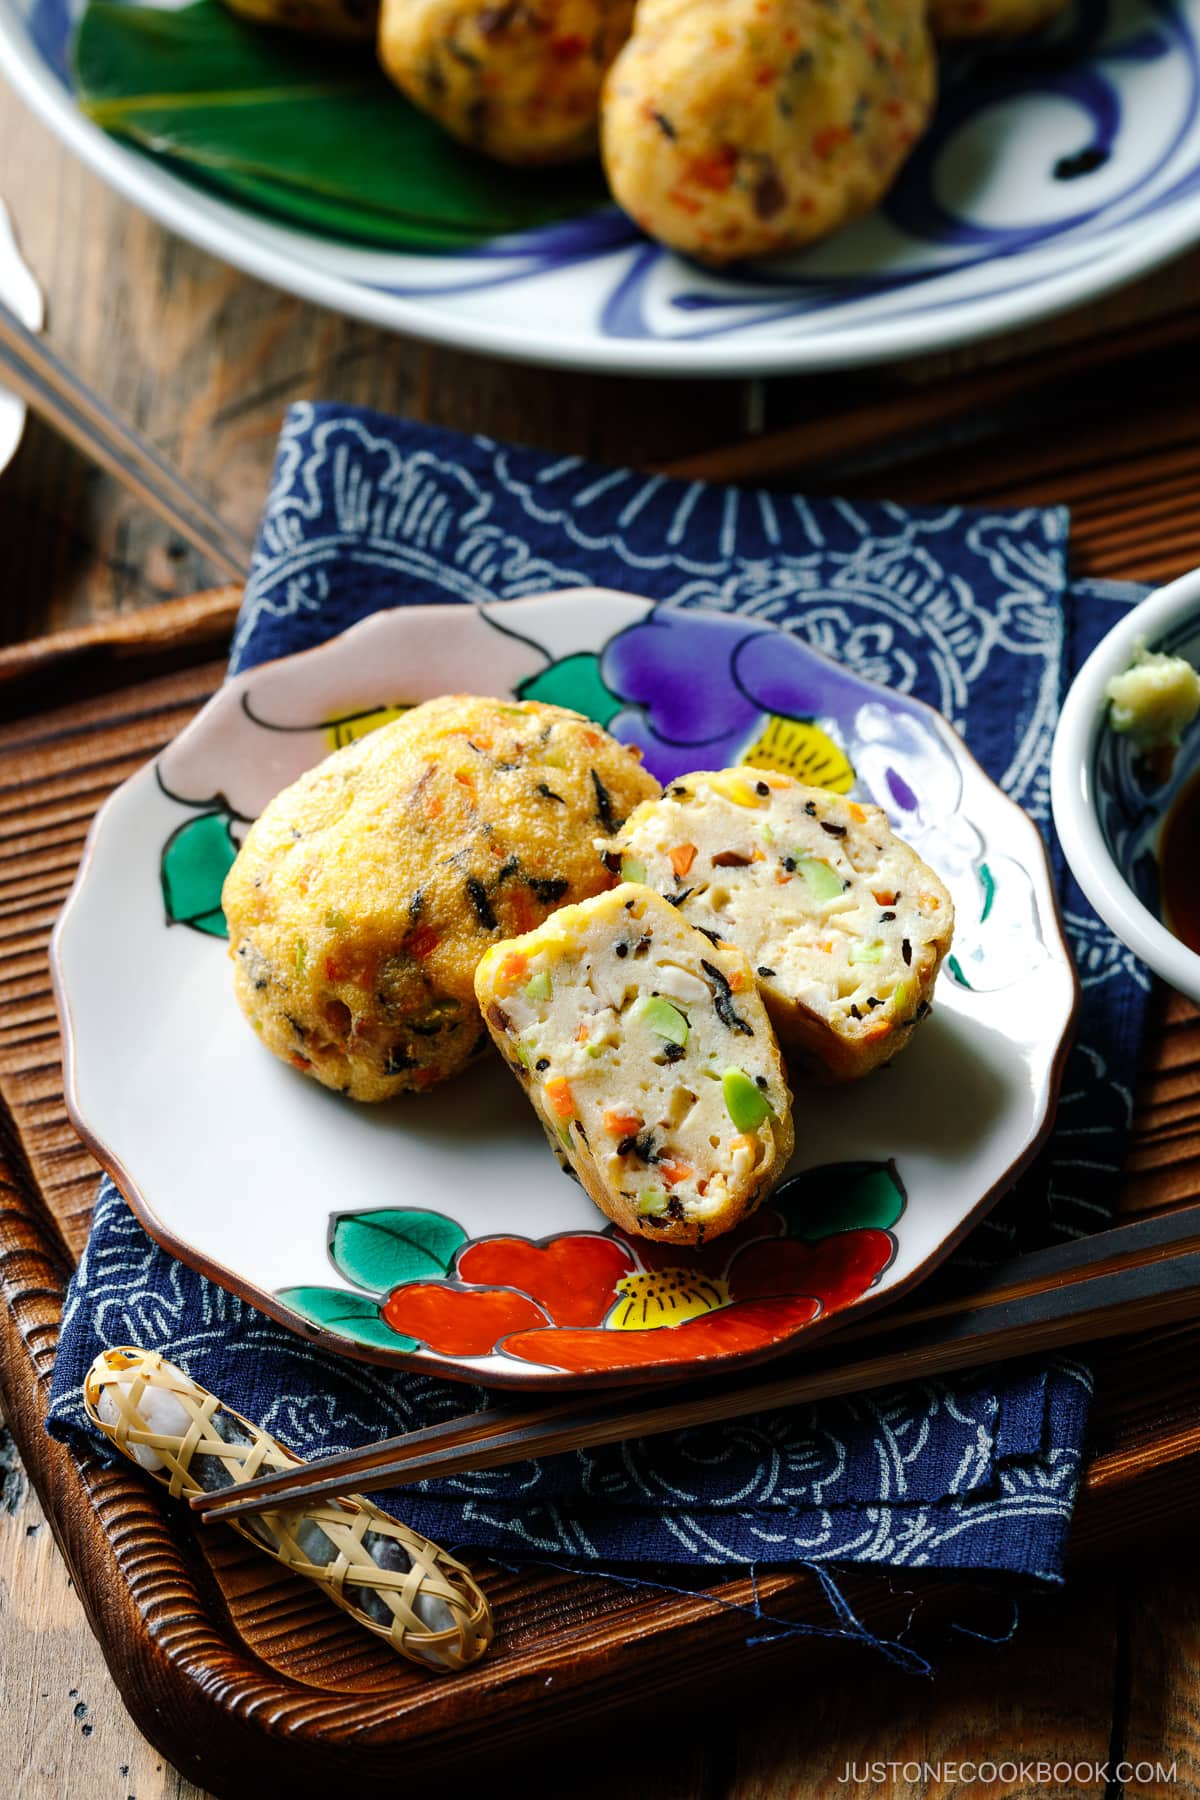
What are Ganmodoki?
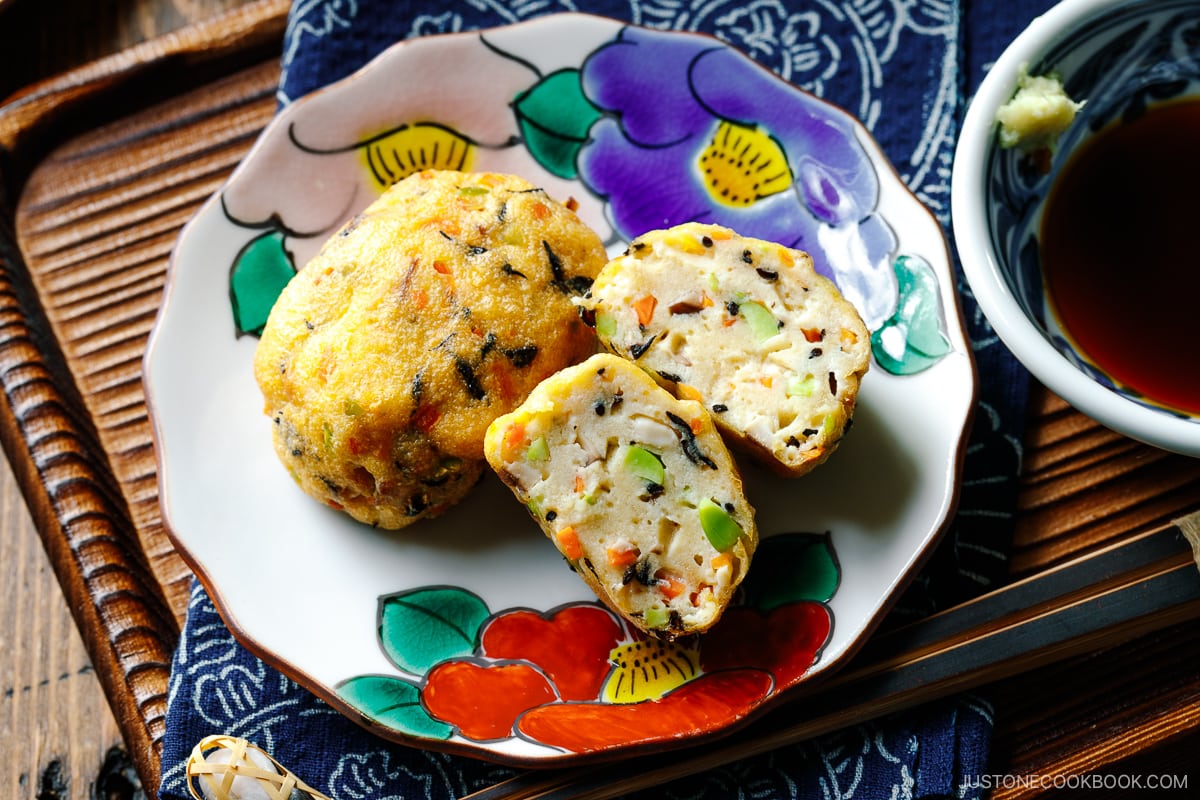
Ganmodoki (がんもどき) refers to Japanese deep-fried tofu patties made of mashed tofu as a base, mixed with minced carrots, shiitake mushrooms, finely chopped edamame (soybeans), and dried hijiki seaweed. Some other common ingredients include lotus root, burdock root, snow peas, green beans, and kombu strips. All the ingredients are bound together with beaten eggs before they are formed into small patties and deep-fried until golden brown. For vegans, you can use mountain yam (called nagaimo or yamaimo in Japanese) to replace the eggs.
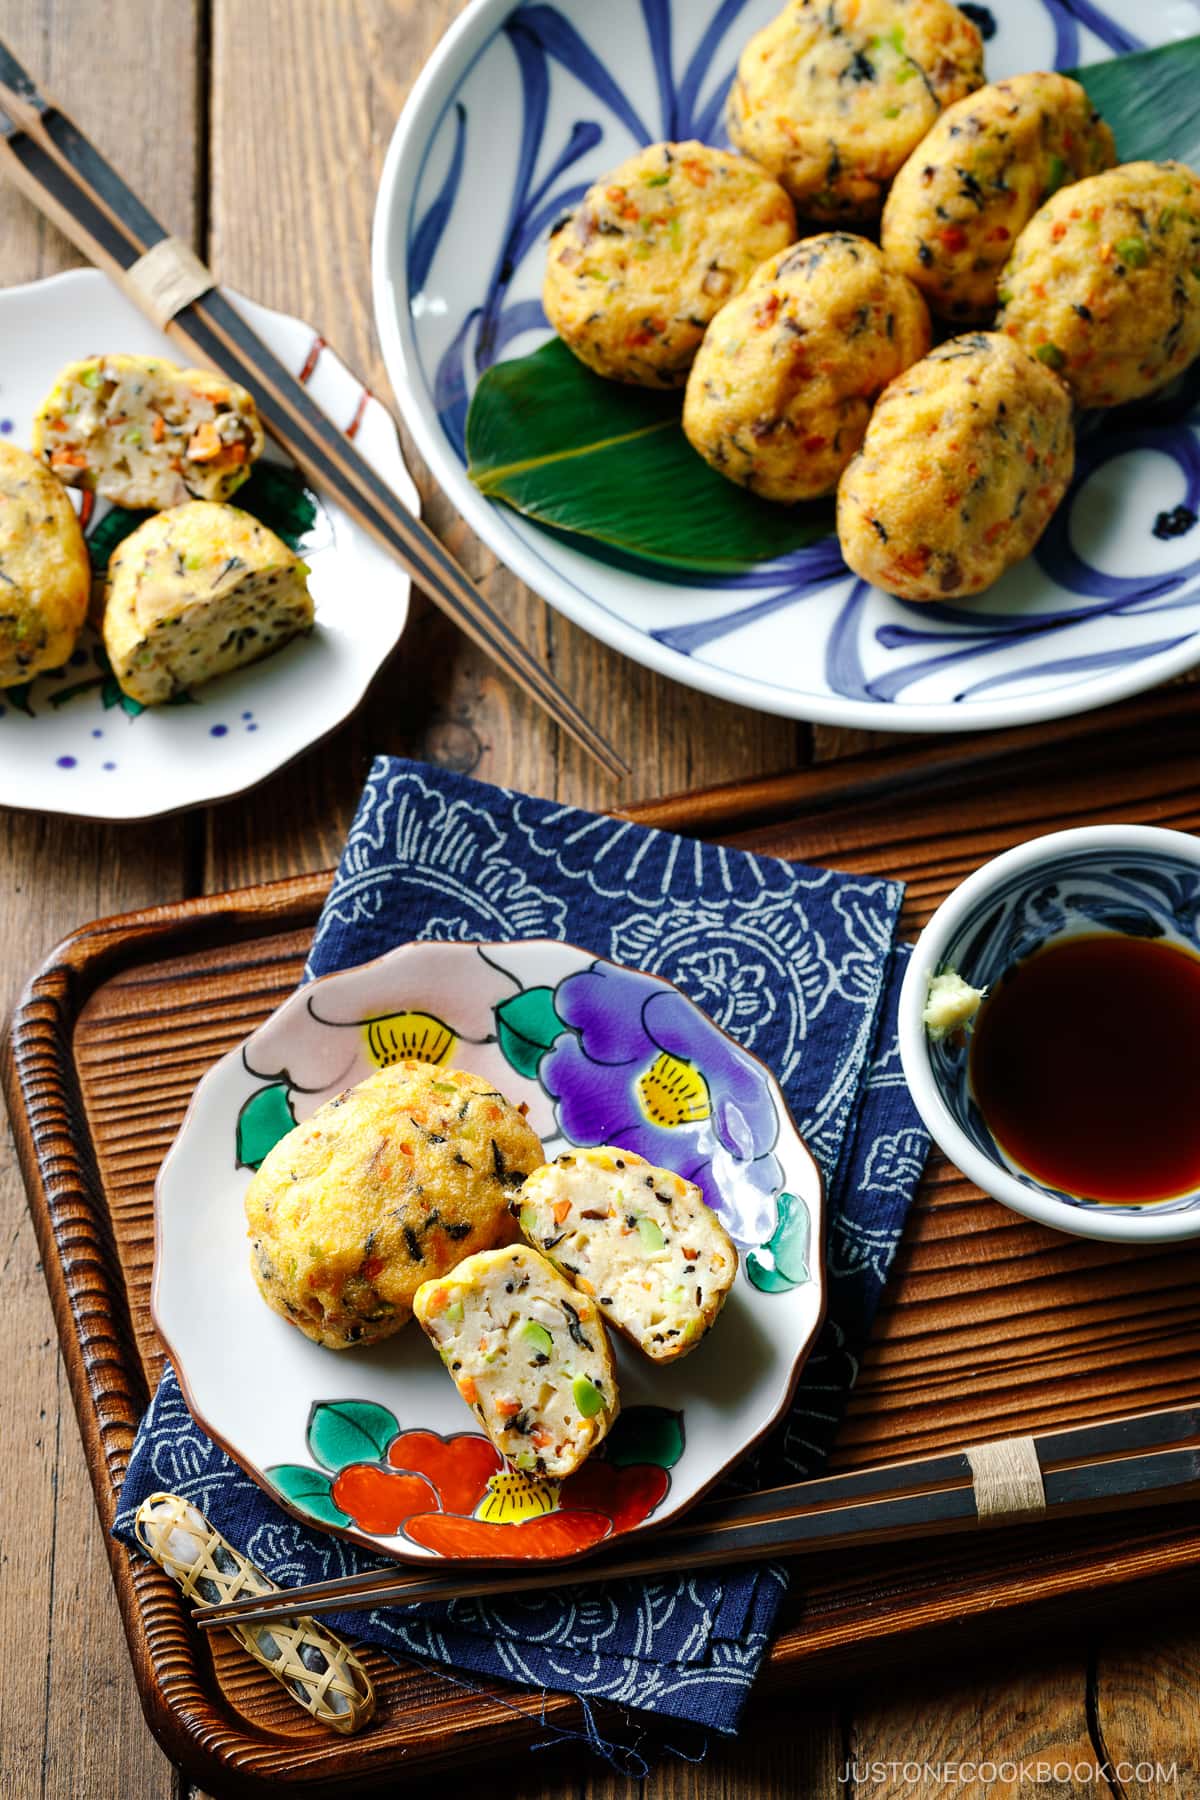
Japanese people enjoy ganmodoki as is by dipping them in soy sauce with grated ginger. Some use ganmodoki for Oden (Japanese Fish Cake Stew) or cook them in dashi broth (called Simmered Ganmodoki).
For those interested in Japanese Buddhist Cuisine or shojin ryori (精進料理), these tasty vegetarian tofu “nuggets” were invented in the Edo period as a shojin ryori dish. Originally made with konnyaku (konjac) to retain a meat’s chewy texture instead of tofu, ganmodoki was given its name as its taste resembled wild goose meat, earning it the moniker “pseudo-goose” in Japanese.
Ganmodoki is also called hiryouzu (飛竜頭) in the Kansai (Osaka) region.
Ingredients for Ganmodoki
You’ll need tofu, egg, or nagaimo/yamaimo (for vegan), and frying oil, but other than these, you’ll find this recipe forgiving. I’ve provided plenty of substitution options below:
- Tofu – Use medium or medium-firm tofu and drain it for a few hours. Firm or extra-firm tofu is too tough. Never use silken or soft tofu, as it takes forever to drain.
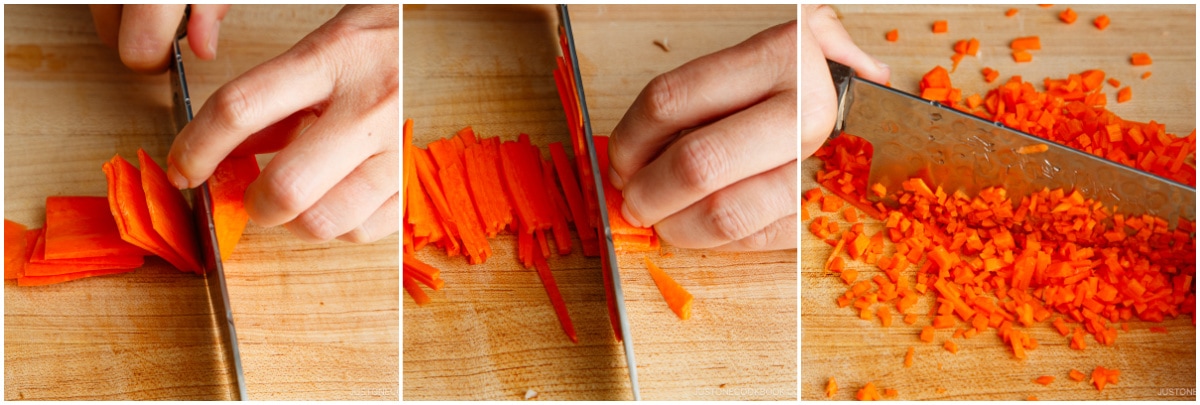
- Carrot – Finely chop the carrots. Keep one hand on top of the blade and rock it back and forth as you move it across a pile of carrots.
- Shiitake mushrooms – Both fresh and reconstituted dried shiitake mushrooms work.
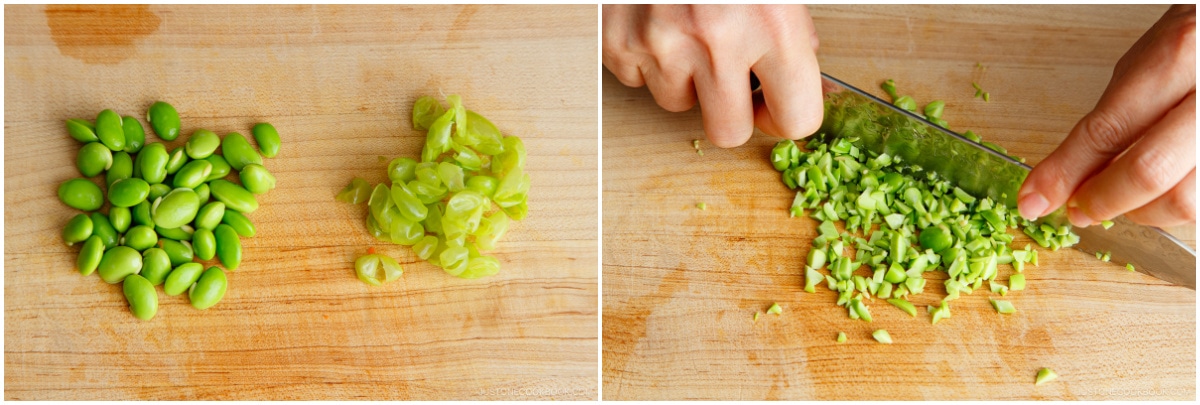
- Edamame – If using frozen edamame, cook according to the package instructions. Remove the thin layer of skin around the edamame.
- Dried hijiki seaweed – This is one of the popular dried seaweed used in Japanese cooking, besides nori and wakame.
- Egg or nagaimo/yamaimo (vegan) – I’ve tried using just the egg or nagaimo in the past, and both worked perfectly.
- Frying oil – Use neutral oil of your choice.
Substitutions and Variations
You can certainly use and experiment with other ingredients as well. Try lotus root, burdock root, ginkgo nuts (ginnan), snow peas, green beans, black sesame seeds, reconstituted wood ear mushrooms, kombu strips, etc.
However, keep the following in mind:
- Make sure to mince ingredients so they bind together. When ingredients are chunky, tofu breaks apart while handling or deep frying.
- When using dense root vegetables like lotus root or burdock root that are not edible raw, you may need to blanch them or microwave them till crisp-tender (al dente).
- Choose ingredients that are at least three different colors.
How to Make Ganmodoki
Just like hamburger patties, these fried tofu patties come together quickly (*after draining and pressing the tofu). It’s a perfect weeknight dish for everyone, including vegetarians/vegans!
- Press tofu in advance. Once this step is done, everything happens in one go.
- Start mincing all the ingredients when the tofu is almost done with pressing.
- (Optional step) Pass the tofu through a fine-mesh sieve or run the tofu in a food processor for a refined, smooth texture. I’ve tried with and without this step; it’s a personal choice. In a pinch, you can skip it.
- Mix all the ingredients and form small patties.
- Deep fry until the patties are golden.
Cooking Tips and Techniques
For a successful result, please read the following key points before cooking.
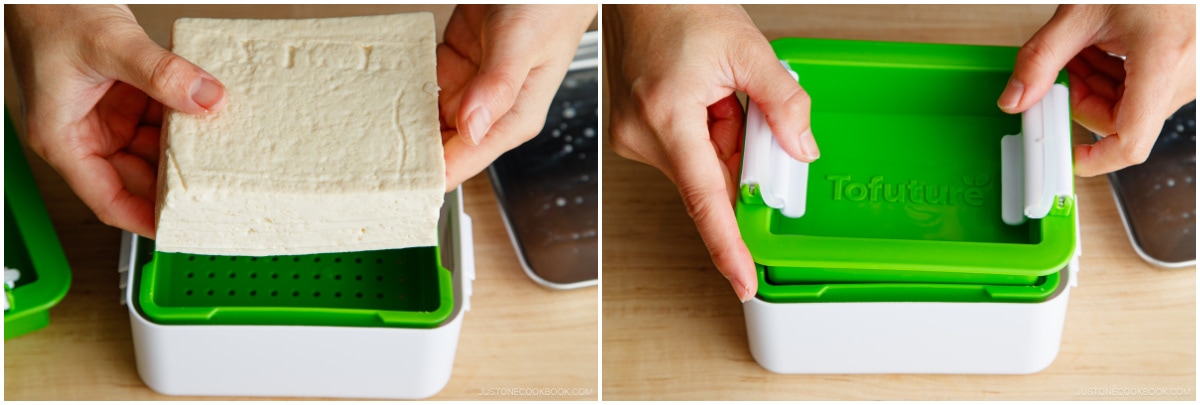
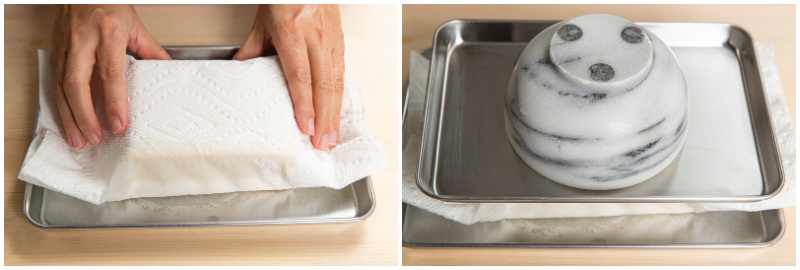
- Drain the tofu well. Whether you use a tofu press (I love mine!) or old fashion method with a heavy object, it takes about two hours with the tofu press and 4 to 6 hours with the old-fashioned method. For the latter method, wrap the tofu with a paper towel and place it on a baking sheet. Put another baking sheet on the tofu and put a heavy object (like a pot filled with water) on top.
- Finely mince the carrots by rocking the knife’s blade back and forth as you move it across a pile of carrots. When ingredients are chunky, tofu breaks apart while handling or deep frying. Also, big pieces of carrots may stay raw after deep frying. If you can’t mince them, you can also blanch them first, but that takes an extra step.
- Add beaten egg (or grated yam) in two parts. Just in case your vegetables or tofu have more moisture than mine, it’s best to be careful and add the egg (or grated yam) gradually. If half the portion provides enough moisture in the mixture, do not add the rest.
- Make uniform-sized patties for equal cooking time. I use this large cookie scoop to portion out. Alternatively, you can divide the mixture first before forming patties.
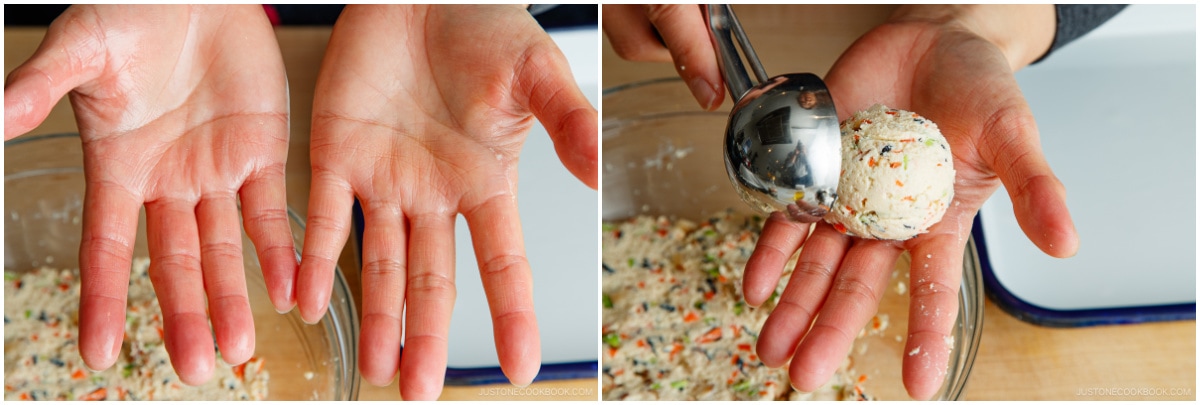
- Greasing your hands makes it easier to form patties. Thinly coat your hands with cooking oil before forming the patties. This way, you can create a nice, smooth surface.
- Deep fry the tofu patties slowly at 320ºF (160℃) until they are golden. Fry a few pieces at a time. When you add too many pieces, the oil temperature drops drastically. If you’re new to frying food, read my guide on How to Deep Fry Food at Home.
The Carbon Steel Wok I’m Using in This Recipe
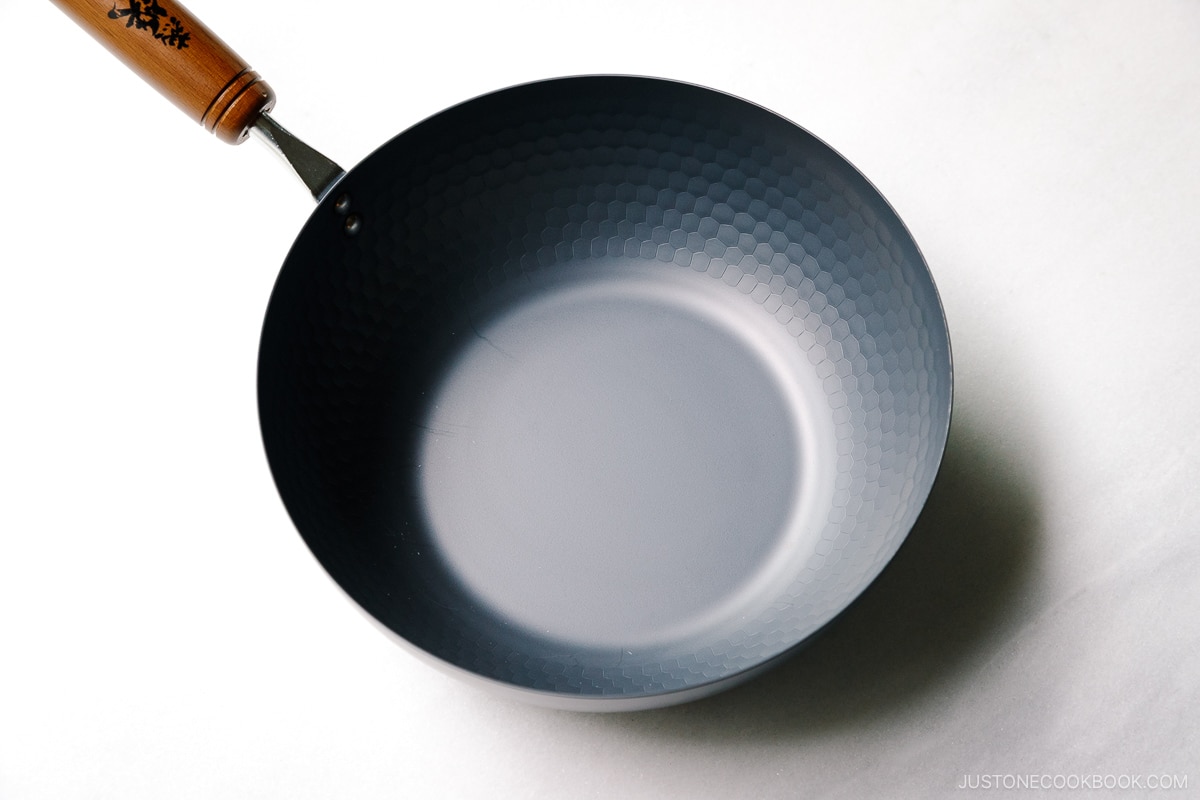
I’m partnering with MTC Kitchen, my favorite Japanese kitchen store in NYC, to try out this carbon steel wok, and I love it!
This nitrogen-hardened wok, a new series of iron cookware from Summit Japan, is infused with nitrogen, offering durability, rust resistance, and all the benefits of traditional carbon steel cookware. They are compatible with induction, gas, or electric stoves. Compared to standard carbon steel cookware, these are extremely durable and rust-proof due to the nitrogen treatment.
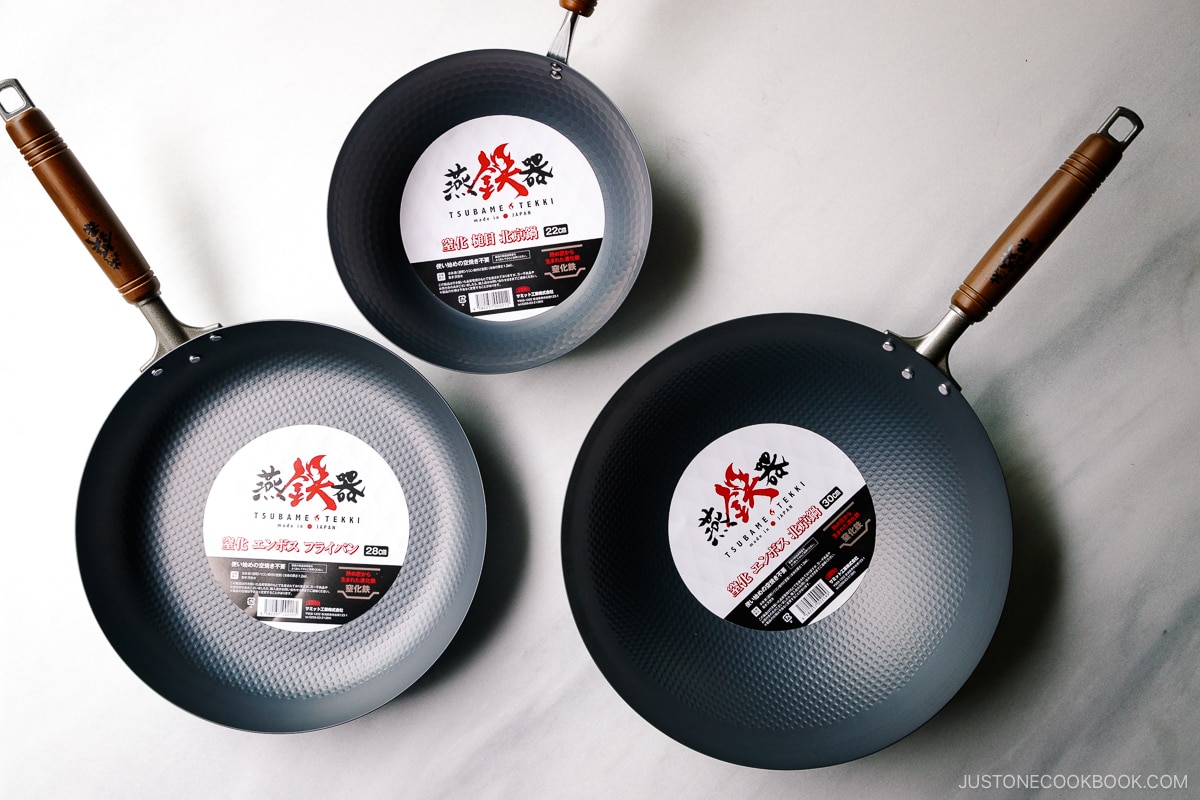
These pans are made from carbon steel so I can use them for high-temperature cooking, including deep frying. Since the pans are thin and durable, the oil heats up very quickly compared to cast iron pots. Their excellent heat conductivity makes them perfect for frying, stir-frying, and grilling—essential for Asian cooking! If you’re looking to invest in a carbon steel wok, I highly recommend them as they will last for years with proper care.
- Summit Nitrogen Hardened Iron Beijing Wok Pan (hammered) 8.7″ Diameter (use JOC10 for 10% off!)
My Favorite Tofu Press
I don’t like to crowd my already-packed kitchen space with gadgets that I barely use, so I was reluctant to get a tofu press. As you know, you can still press tofu with a heavy object like a pot filled with water. However, I wanted to speed up the pressing time and make it more compact when doing this process, so I tried this well-received product on Amazon.
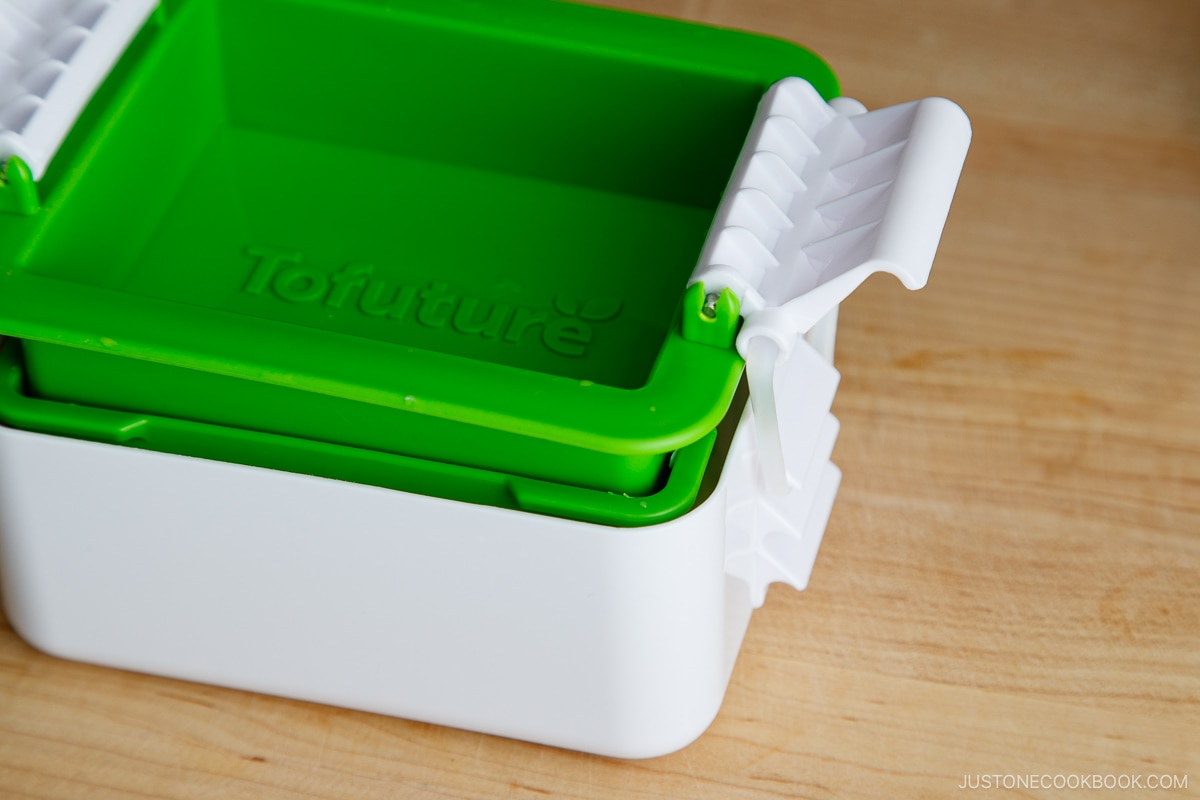
I have to admit how much I love this product and slightly regret that I didn’t get it sooner. It’s easy to use and doesn’t take up much space. I think this latter part sold me. Compared to my old-fashioned method with two trays sandwiching the tofu and a heavy object above the tofu that could wobble, I feel at ease leaving this tofu press alone. If you have been on the verge of getting a tofu press already, don’t wait—just get this one!
How to Store and Reheat Fried Tofu Patties
While tofu is not suitable for freezing (due to the moisture inside, it loses its original texture), ganmodoki is freezer-friendly! Make it ahead or prepare a big batch and store them in the freezer.
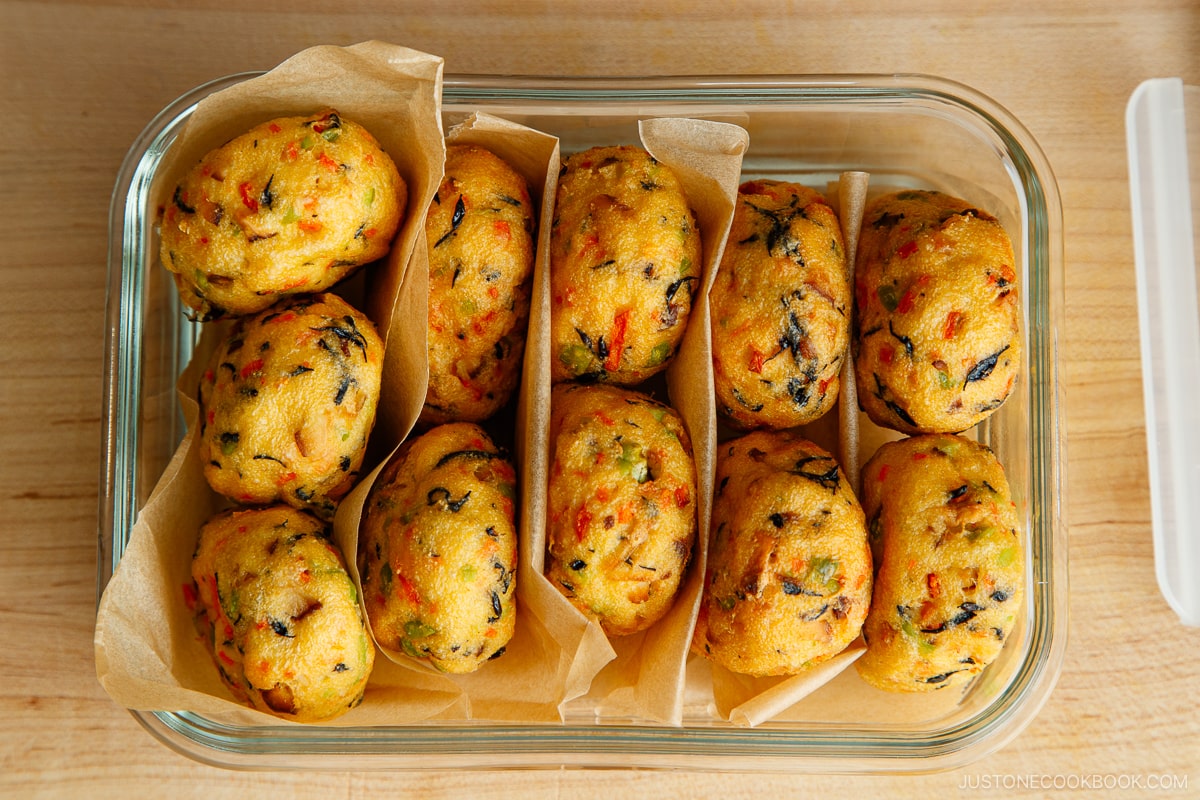
I separate the patties with parchment paper so I can take just a few pieces out to pack them in kids’ lunch box. I love that this dish is meal-prep friendly!
- To Store: Let cool completely. Keep it in an airtight container and store it in the refrigerator for up to 3 days or in the freezer for up to a month.
- To Reheat: Thaw in the refrigerator overnight. If you’re using it for Oden (Japanese Fish Cake Stew) or Simmered Ganmodoki, you can cook it while frozen without thawing it.
What to Serve with Fried Tofu Patties
- Main: Stir-Fried Mushrooms and Eggs with Ankake Sauce, Napa Cabbage Stir-Fry
- Side: Japanese Spinach Salad with Sesame Sauce, Miso Glazed Eggplant
- Rice: Japanese Mushroom Rice, Japanese Corn Rice, Japanese Brown Rice
- Soup: Classic Miso Soup, Kenchinjiru, Daikon and Fried Tofu Miso Soup
Recipes Using Ganmodoki
Wish to learn more about Japanese cooking? Sign up for our free newsletter to receive cooking tips & recipe updates! And stay in touch with me on Facebook, Pinterest, YouTube, and Instagram.

Ganmodoki (Japanese Fried Tofu Patties)
Ingredients
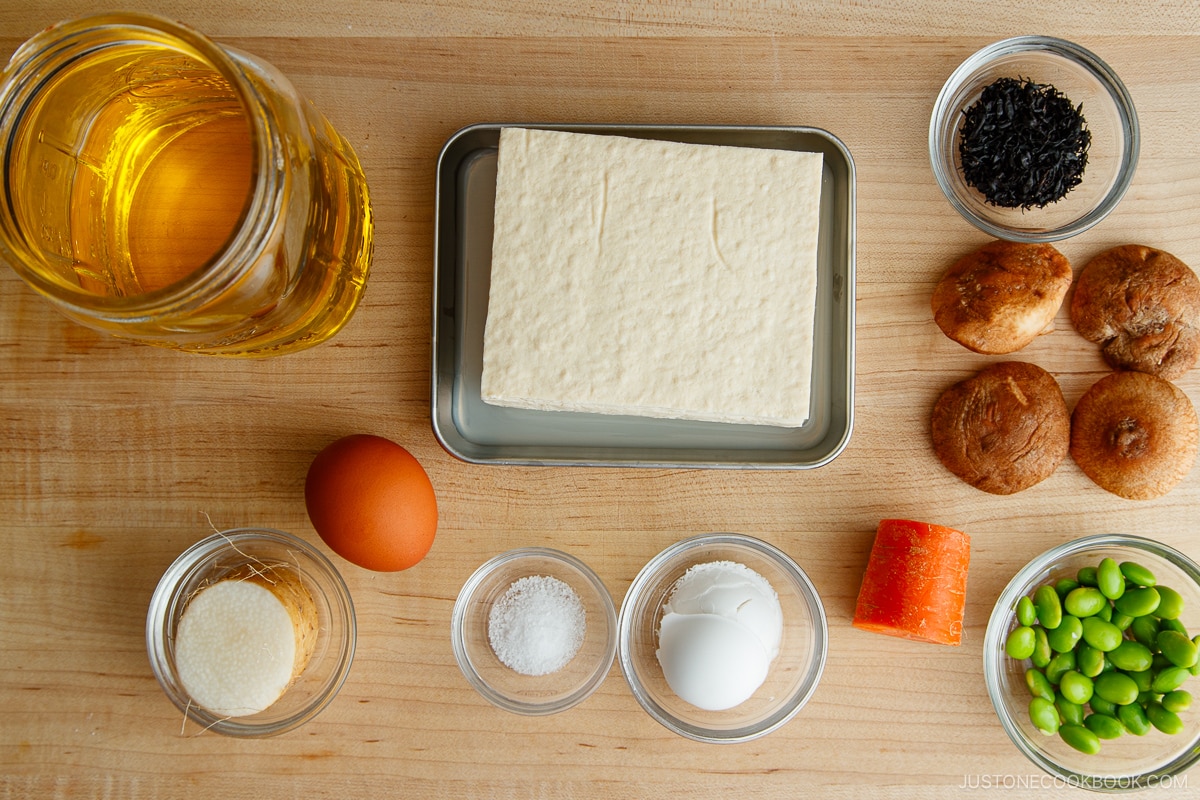
- 1 medium-firm tofu (momen dofu) (14 oz, 397 g)
- 1 inch carrot (use the thick top part; 1 oz, 30 g)
- 4 shiitake mushrooms (medium)
- 1 oz shelled edamame (about 3 Tbsp, cooked)
- 1 Tbsp dried hijiki seaweed (0.1 oz, 3 g; I used the small, soft “buds“ of the hijiki plant called mehijiki (芽ひじき); you can use the long, chewy “stems” called nagahijiki (長ひじき) as well)
- 1 large egg (50 g each w/o shell) (skip for vegan and substitute 1¾ oz, 50 g of mountain yam called nagaimo/yamaimo)
- ½ tsp Diamond Crystal kosher salt
- 2 Tbsp potato starch or cornstarch
- neutral oil (for greasing your hands and deep-frying)
For Serving
- ginger (grated, with juice)
- soy sauce
Instructions
- Before You Start: Please note that this recipe requires draining the tofu for 2–4 hours, depending on the method you use (see the next step). Now, gather all the ingredients.
To Drain the Tofu
- Press 1 medium-firm tofu (momen dofu) to drain the liquid very well. You can either press it for 2 hours with a tofu press (I use one and love it), or drain it for 4–6 hours under a heavy object (the old-fashioned way).
- For the traditional method, wrap the tofu block with a paper towel or tea towel. Place it on a plate or tray. Then, put another plate or tray on top of it. Add a heavy item, like a can of food or a marble mortar, on top to apply pressure. Let it sit for 4–6 hours. Tip: The weighted item should be heavy enough to press out the liquid, but not so heavy that it crushes the tofu.
To Mince the Vegetables
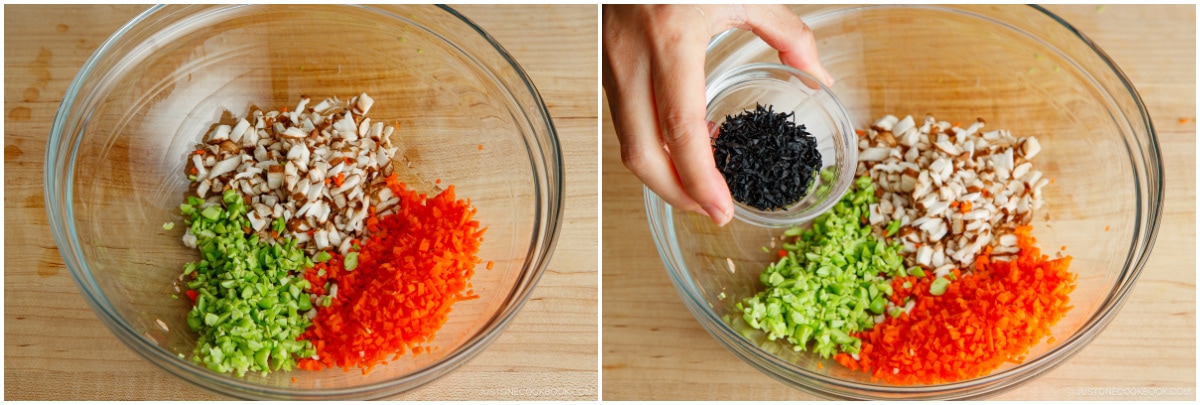
- Peel 1 inch carrot and slice into thin slabs. Cut the slabs into thin sticks, then mince them. Rock your knife back and forth through the pieces to mince finely. This way, they will bind together with the tofu mixture. If the vegetables are too chunky, the patties will break apart when you handle or deep-fry them. Tip: If you want to substitute the carrots with dense root vegetables like lotus root or burdock root that are not edible raw, make sure to blanch or microwave them first until crisp-tender (al dente).
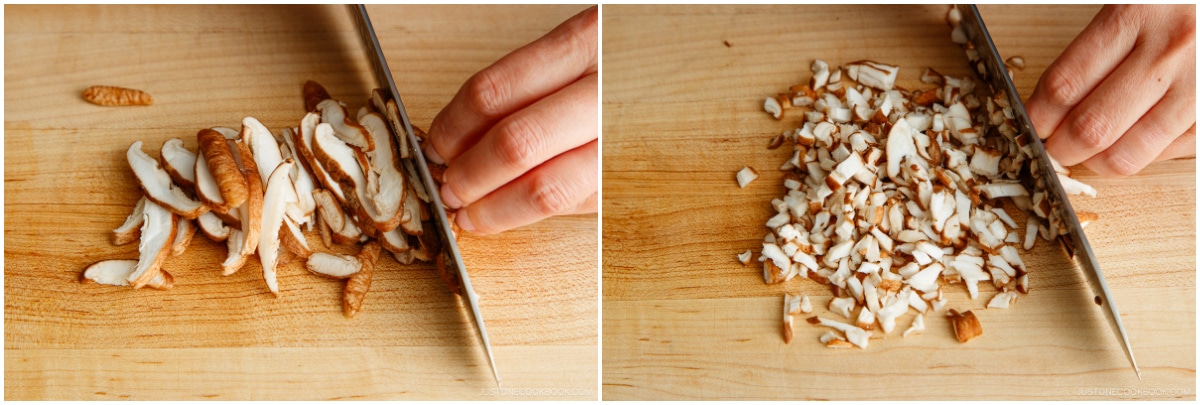
- Remove and discard the stems of 4 shiitake mushrooms. Thinly slice the caps, then mince them finely.
- Peel off and discard the thin outer skin of 1 oz shelled edamame. Then, finely chop the edamame.
- Place the carrots, mushrooms, and edamame in a large bowl. Add 1 Tbsp dried hijiki seaweed.
To Mash the Tofu
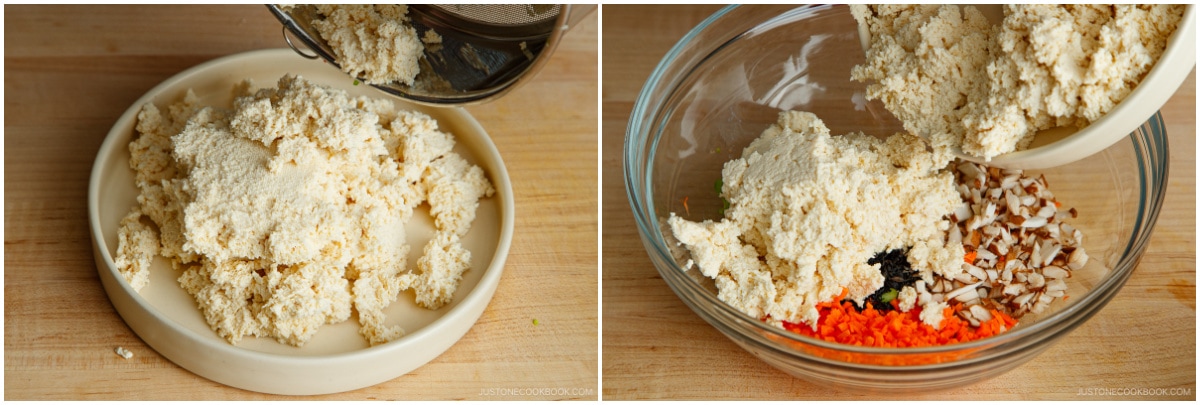
- After pressing the tofu, pass it through a fine-mesh sieve (uragoshi-ki) into a clean plate for a very smooth consistency. Use a spatula to help mash it through the strainer. You can also use a food processor.
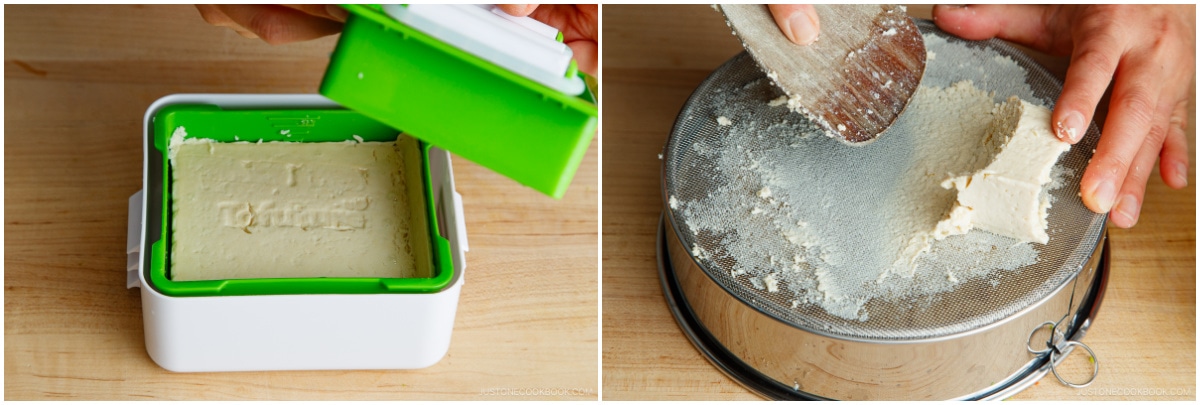
- Add the mashed tofu to the bowl with the vegetables.
To Combine the Tofu Mixture
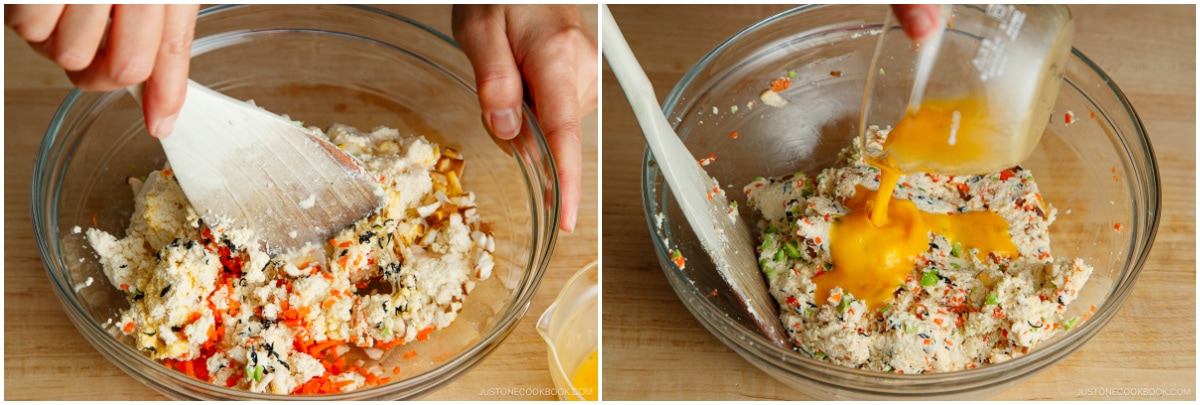
- Beat 1 large egg (50 g each w/o shell). Add half of the beaten egg to the bowl with the tofu. (For vegan, skip the egg and use nagaimo instead; see Step 3 below.)
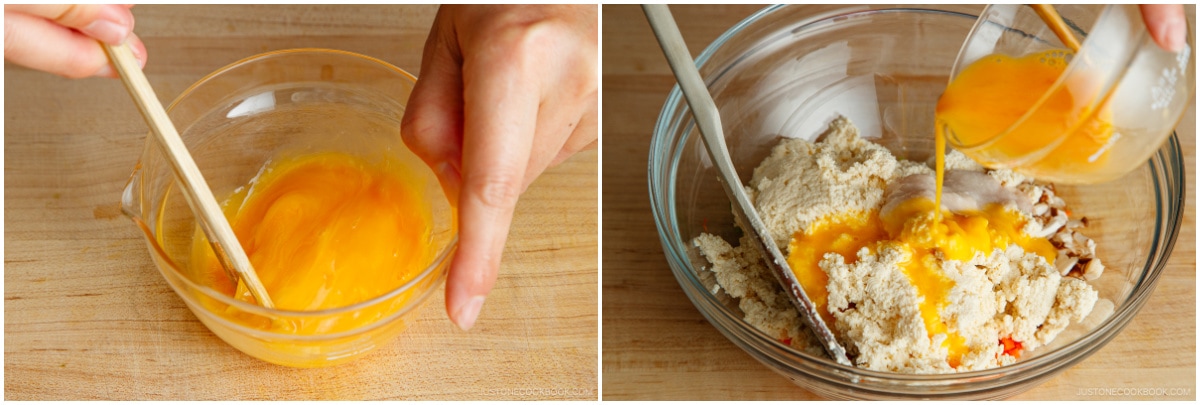
- Mix the egg, tofu, and vegetables until well combined. Now, check the consistency. If it‘s too wet and soft to form a patty, don‘t add the rest of the egg. If not, add the rest of it.
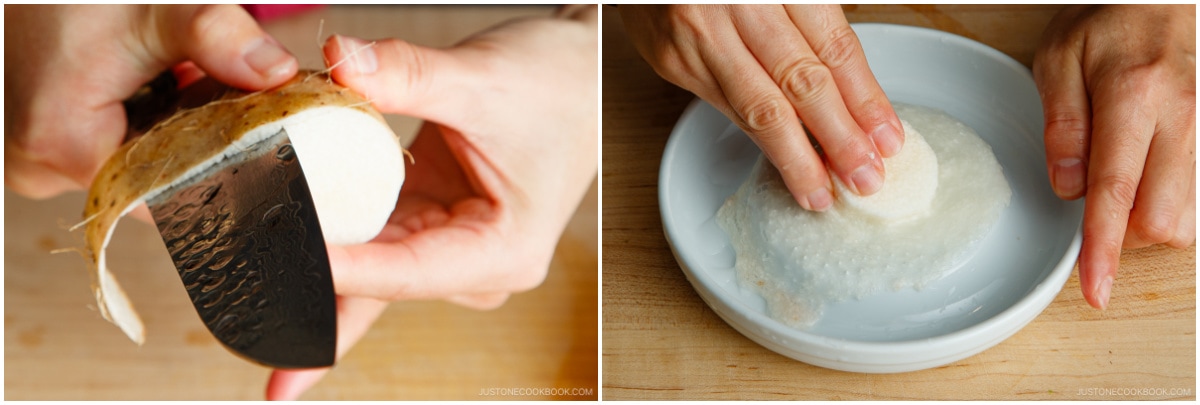
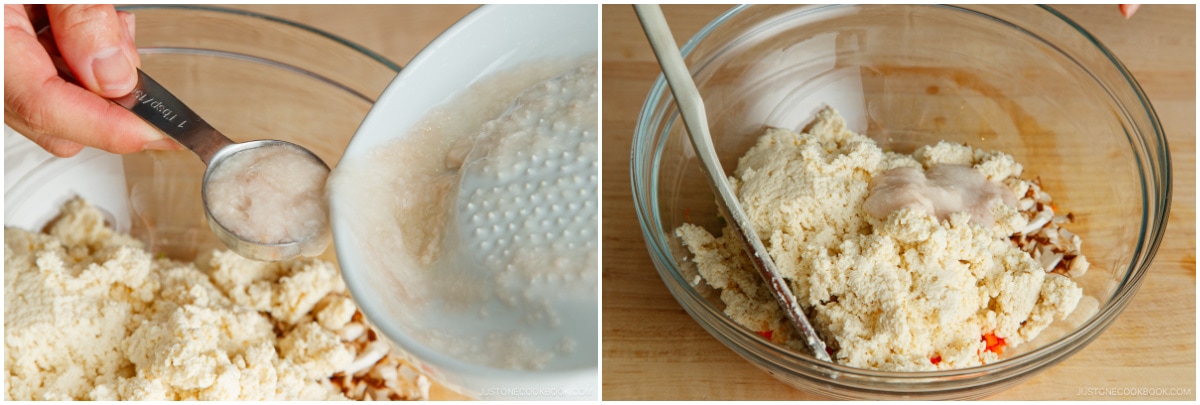
- Vegan option: Skip the egg. Instead, peel and grate 1¾ oz, 50 g of mountain yam (nagaimo/yamaimo). Add half of it to the tofu mixture and check the consistency before adding the remaining grated nagaimo.
- I added just a little bit of nagaimo.
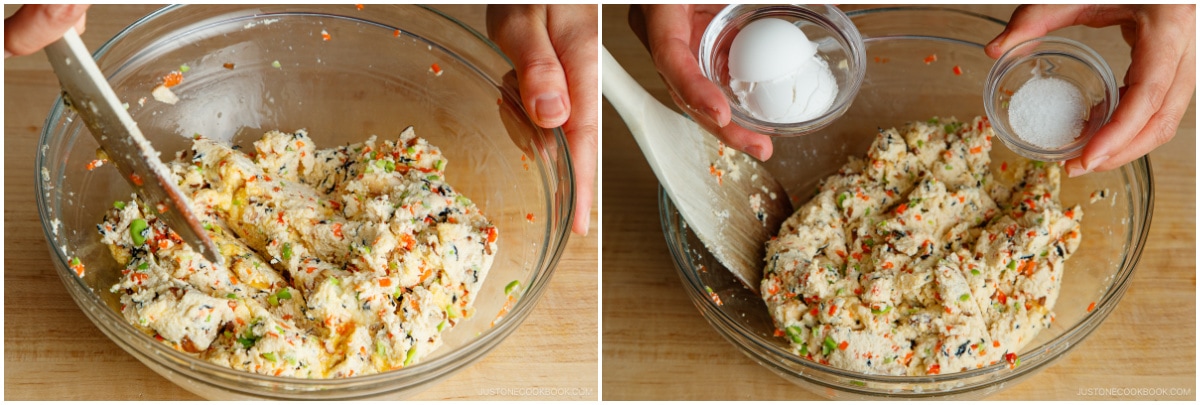
- Mix well. Add 2 Tbsp potato starch or cornstarch and ½ tsp Diamond Crystal kosher salt and combine thoroughly.
To Form the Patties
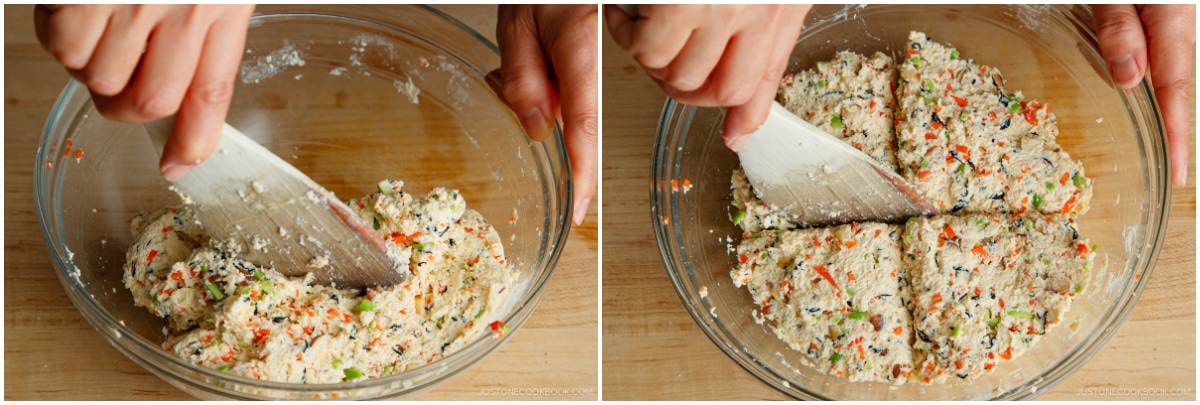
- Roughly divide the tofu mixture into 10 portions. Alternatively, you can use a large cookie scoop to portion the patties as you go.
- Grease both palms with some neutral oil. Then, scoop one portion of the mixture into your hand.
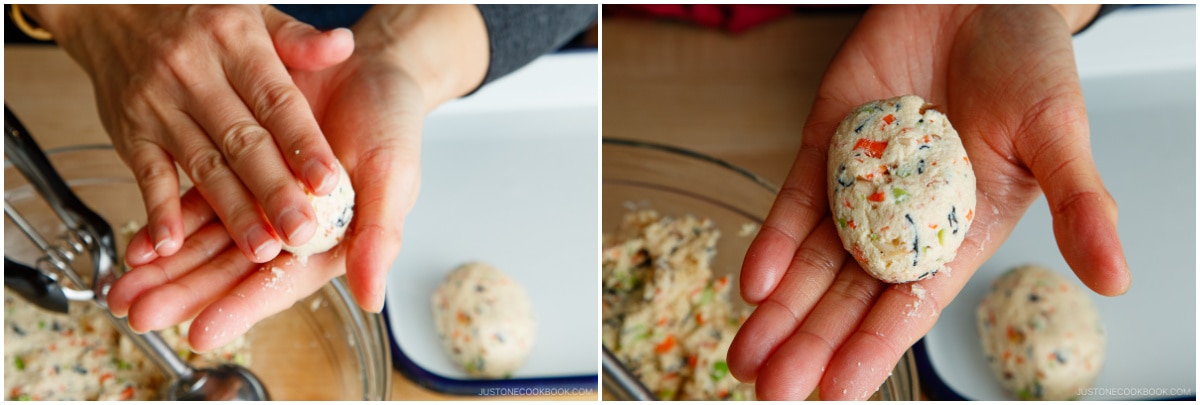
- Shape it into an oval patty. Place it on a tray. Continue making patties with the rest of the mixture.
To Cook the Ganmodoki
- To a medium-sized pot, add neutral oil to a depth of 1–1½ inches (2.5–3.5 cm). Heat over medium heat until the oil reaches 320ºF (160℃).
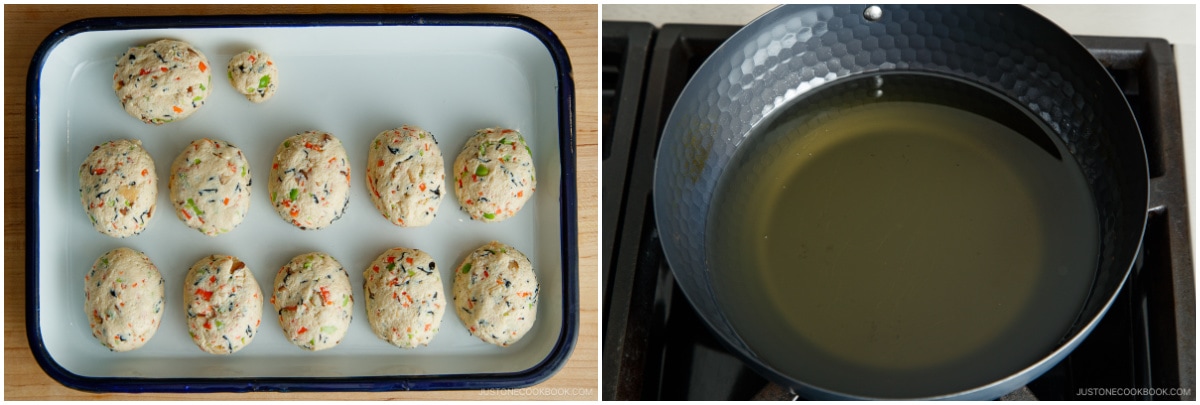
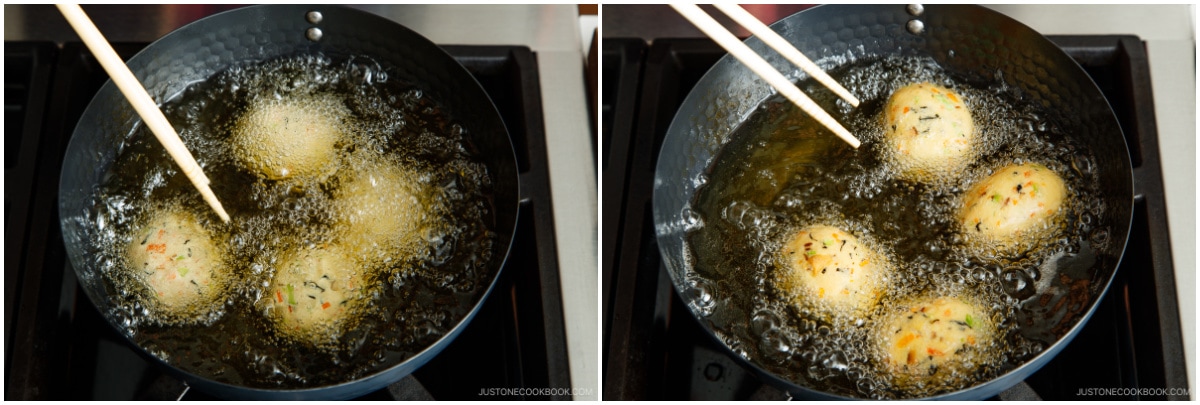
- Check the oil temperature with an instant-read thermometer or by sticking wooden chopsticks into the oil. If you see small bubbles forming around the tips, the oil is ready. When it reaches 320ºF (160℃), add the tofu patties in batches. Based on my pot‘s size, I added four patties per batch. Do not add too many at once, and maintain the right temperature at all times. Tip: Do not crowd the pot because the oil temperature will drop quickly. Your patties should take up no more than half of the oil surface area at any one time. For more helpful hints, read my post on how to deep-fry food.
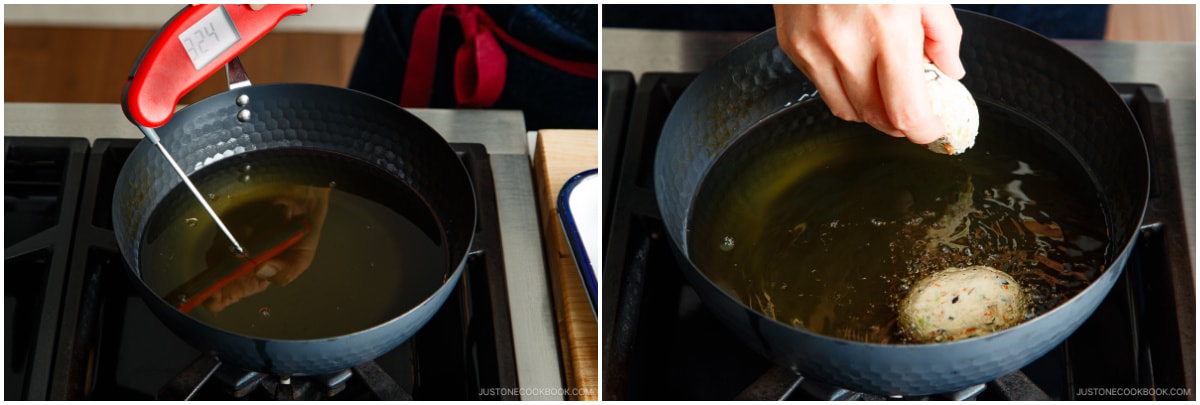
- Fry the patties until golden, about 5–6 minutes, flipping halfway through.
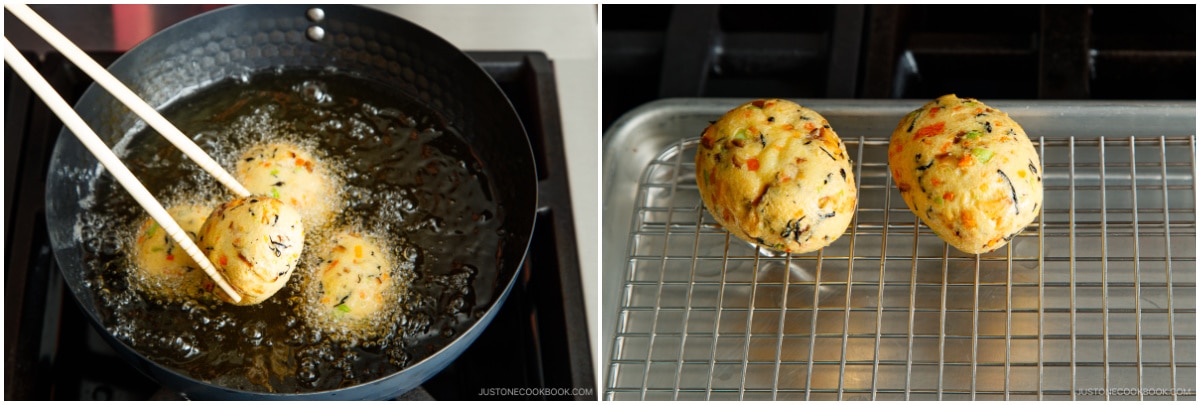
- Once a golden color, remove the Ganmodoki from the oil. Transfer them to a wire rack or paper towel to drain the excess oil.
- Continue with the next batches until you‘ve fried all the patties.
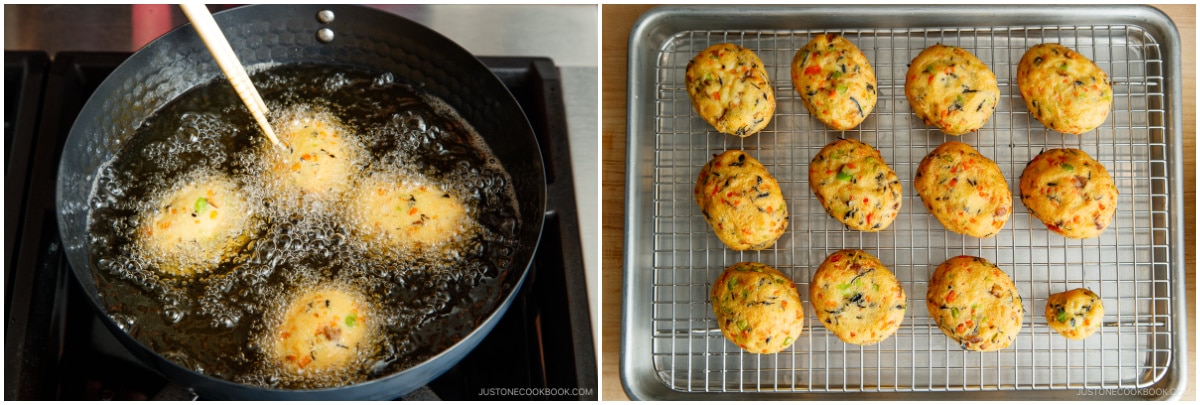
To Serve
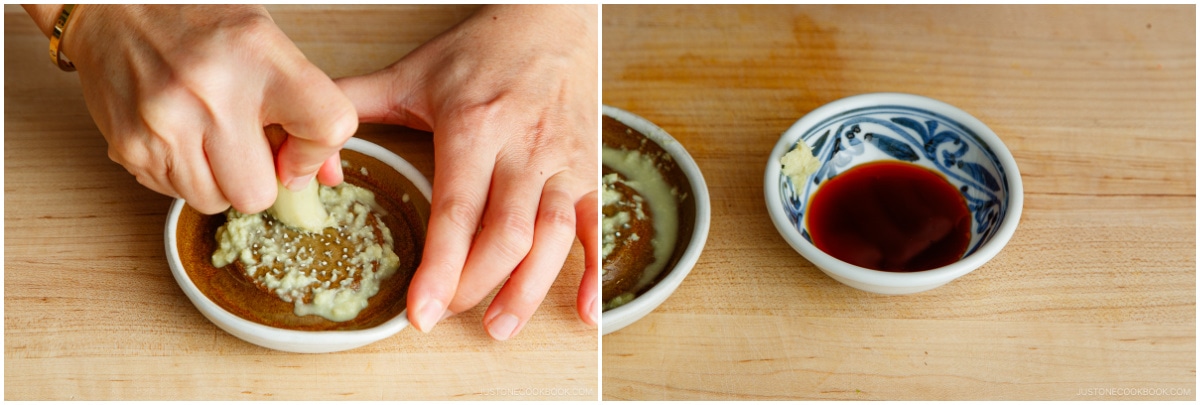
- Grate the ginger (I use the motoshige brand grater here but always use this ceramic grater). Pour soy sauce into individual small plates for dipping and add some grated ginger to taste. Dip the hot Ganmodoki in the sauce and enjoy!
To Store
- Transfer the leftovers to an airtight container and let cool completely. Keep them the refrigerator for up to 3 days or in the freezer for up to a month. You can thaw frozen Ganmodoki in the refrigerator overnight. If you’re adding it to Oden (Japanese Fish Cake Stew) or Simmered Ganmodoki, you can use it directly from frozen.

How to Reuse or Dispose of the Oil
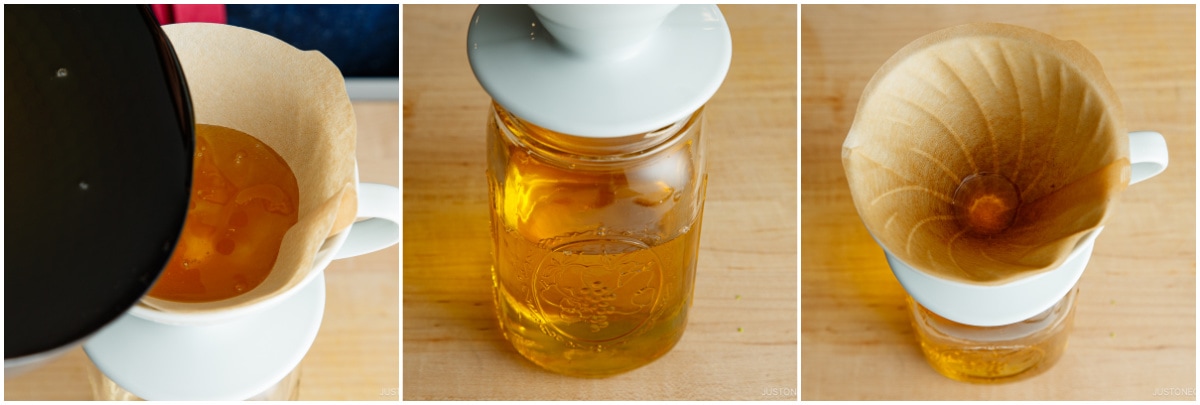
- The oil used to fry Ganmodoki is usually clean enough to reuse, if you wish. First, let the oil cool completely. Then, use a fine-mesh strainer or coffee filter to strain the oil into a glass container. Label it with the date and store in a cool, dark place. Reuse it within 2-3 weeks. Dispose of it sooner if the oil turns rancid (looks cloudy, starts to foam, or has a foul odor).
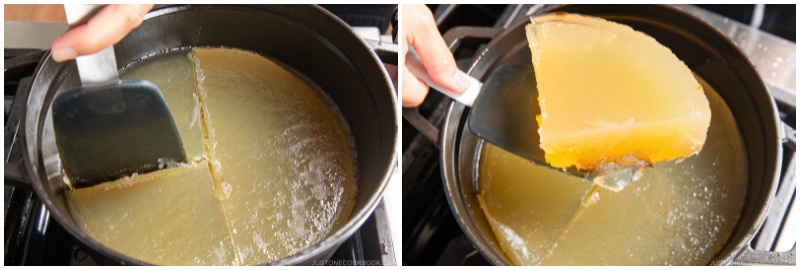
- To dispose of your frying oil, please follow your local guidelines. In my neighborhood, the local recycling center accepts used cooking oil. To use Japanese oil solidifier, add the powder to the hot oil and mix well. Set it aside to solidify as it cools (this may take overnight). Cut it into small pieces and discard in the trash.
Nutrition
Editor’s Note: This post was originally published on February 14, 2024. It was republished on April 9, 2024.


Hei Nami! My name is Dana, I write You from Romania. I love what You cook and present. Regarding the tofu patties recipe I want to ask You that they also be made in the oven and if another eggs substitute, for example aquafaba can be used. Thank You!
Hello Dana! Thank you for reading Nami’s post and trying her recipe from Romania!
We haven’t tested this recipe with aquafaba, but it might work. If you decide to give it a try, please let us know how it turns out.
When cooking the Ganmodoki in the oven, it will have a different texture—more like quiche—and will be drier than when deep-fried. I hope this helps!
Hello Nami ! I had an AMAZING Obanzai Ryori dish in Kyoto that looked like fried eggplant stuffed with this tofu paste and served warm with some Tsuyu (I think). Does that dish ring a bell ? I’d love a recipe for that if you have it as I couldn’t find anything online, otherwise I’ll try to improvise mixing this recipe and the Eggplant Agebitashi. Thanks for all these great recipes !
Hello, Sophie. Thank you for investigating Nami’s recipe.
Unfortunately, we do not have the recipe. As you mentioned, combining this recipe with the Eggplant Agebitashi recipe would be the best way to start. We hope this helps!
Loved these. Made them tonight with homemade tofu and using arame instead of hijiki
Hello, Brigid! Wow! That’s awesome! Homemade tofu must be tasty!
Thank you for trying Nami’s recipe and sharing your experience with us.
Happy cooking!
Has anyone tried to “pan fry” this dish? I’m trying to reduce the oil. . .
Hi, Yosh! It is possible to pan-fry. However, make sure to turn the Ganmodoki and cook it thoroughly.
We hope you like the homemade Ganmodoki!
The weight of the tofu it’s before taking the liquid out?
Hello, Aitana. Thank you for trying Nami’s recipe.
The weight of the tofu is before the liquid is removed. It’s usually just one packaged tofu. We hope this helped!
I have a very old soy milk – tofu maker that I have lost the instructions for. Is there a current soy milk/tofu-maker that you can suggest? There are so many to choose from yet none of them sound like they have a way to discard the okara once the milk is “finished”. I have to wonder if they simply don’t strain anything out of the ‘milk’…. Thank You! Love your recipes!
Hi, Alice! Thank you very much for reading Nami’s post.
We do not have a specific brand to recommend at this time, however, they typically include a strainer cup or filter to separate Okara.
I hope you discover the perfect fit for your needs. Homemade soy milk and tofu are always the best!
I recently purchased a Tribest soy milk maker specifically because it has a stainless steel strainer built in that separates the milk from the okara. It works wonderfully.
This was wonderful! It was a little time consuming to prepare the vegetables, but the final product was worth it. I will double the recipe next time- my family devoured the entire batch!
Hi AliceK, Aww. We are so happy to hear your family enjoyed the homemade Ganmodoki!
Thank you so much for taking the time to read Nami’s post and try her recipe. Happy Cooking!
Hi Nami! Could we use any other type of seaweed other than hijiki?
Hi JinX! I’ve seen some people use TINY strips of kombu and I think that should work. Don’t use nori or wakame seaweed as they are kind of different type of seaweed.
will using a airfryer work for this instead of deep frying ?
I don’t own one but I do believe it works! Cook less time with an air fryer. 🙂
Just wondering if there’s another way to cook these other than deep frying?
Hi Viv! I haven’t tried other ways since this is a deep-fried tofu dish. I’m curious how air-frying turns out… My friends who own an air fryer always tell me air frying is not the same as deep-frying so I can’t be sure how authentic air frying ones turn out to be…
I made the tofu mixture too runny and the patties fell apart when deep-frying, so I ended up baking it in the oven as one big ‘cake’, It came out really well, more like a savoury flan, and I do this all the time now. Once fully baked I leave it to cool a bit and then slice it into small squares. It’s not the same as fried but I find it lighter and easier to digest.
this sounds yummy! what temperature and time do you use?
Similar to a quiche. About 30-40 min at 180C. It is ready when you insert a skewer and it comes out clean.
This looks delicious, can’t wait to make it.
Can they be air fried?
I am going to try to airfry the paties at 356F for 15 minutes and see what happens.
Hi Gwen! Please keep us posted! 🙂
I think a better idea is to stuff this inside a bitter melon, cut it into 2 inch segments. Then cook it in broth. My tofu press just arrived.. I looking forward to making this.
Hi there! I don’t own an air fryer, but I do believe it works. Cook less time with an air fryer even at the same temperature.
Hope you enjoy the recipe, Aimee!