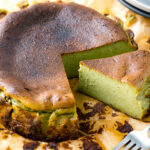
Matcha Basque Burnt Cheesecake
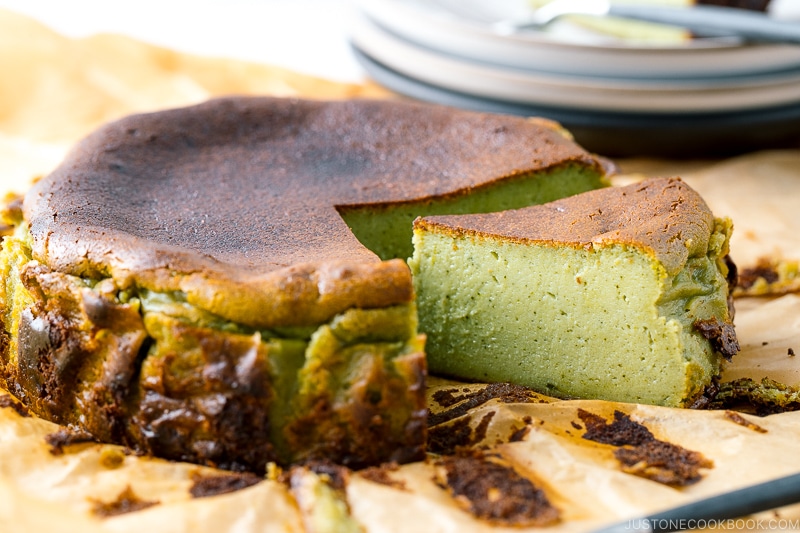
My heavenly Matcha Basque Burnt Cheesecake is creamy and custardy with caramel notes and an earthy sweetness. Its iconic deep-brown top contrasts beautifully with the vibrant green tea color inside. This dreamy Japanese-style cheesecake is lighter than the classic version and is surprisingly easy to make.
Servings: 8 (8 slices per 6-inch cake)
Calories: 277kcal
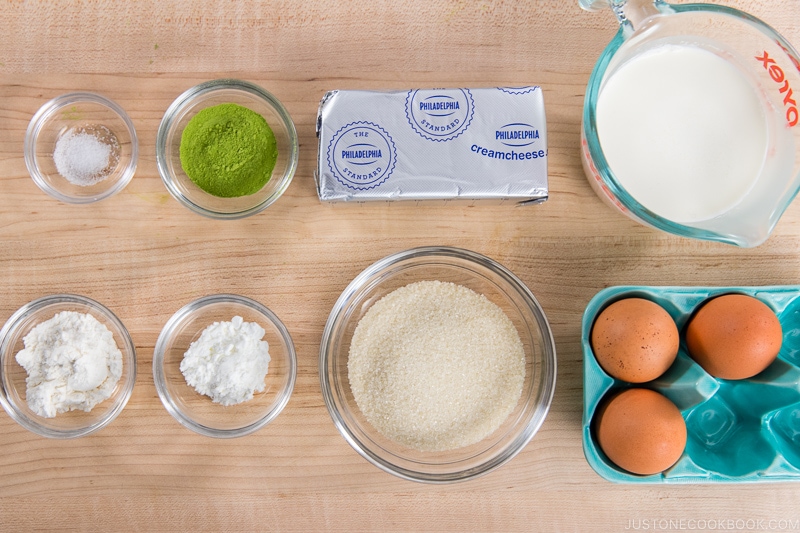
Ingredients
- ½ lb cream cheese (1 block; I used Philadelphia brand; at room temperature)
- ½ cup sugar
- 2 large eggs (50 g each w/o shell) (at room temperature)
- 1 large egg yolk (at room temperature)
- 1 Tbsp matcha (to make a classic version without matcha, substitute with 1 Tbsp lemon juice instead)
- 4 tsp cake flour (or use all-purpose flour; use rice flour for gluten-free)
- 2 tsp cornstarch (or use all-purpose flour)
- 220 ml heavy (whipping) cream (1 cup minus 4 tsp; at room temperature)
- ⅛ tsp Diamond Crystal kosher salt
Instructions
Before You Start...
- Please note that this cake requires 2–3 hours of cooling time. You can serve it either at room temperature or chilled in the refrigerator for an additional 4 hours.
- Gather all the ingredients.
To Preheat the Oven
- Preheat a convection oven (with fan) to 450ºF (230ºC). If you don’t have an oven with a fan, preheat a conventional oven to 475ºF (245ºC). If your oven doesn’t heat up very well, you can preheat it for 30–60 minutes to the hottest oven temperature—mine is 550ºF (290ºC)—then turn it down to the target temperature. As for the oven rack, I used the middle position in my convection oven (the fan circulates the air, so the middle rack is ideal). If you use a conventional oven, move the rack slightly higher as heat rises and the temperature toward the top of the oven is higher. However, keep in mind that a 3-inch deep cake pan needs extra space for rising.
To Prepare the Cake Pan
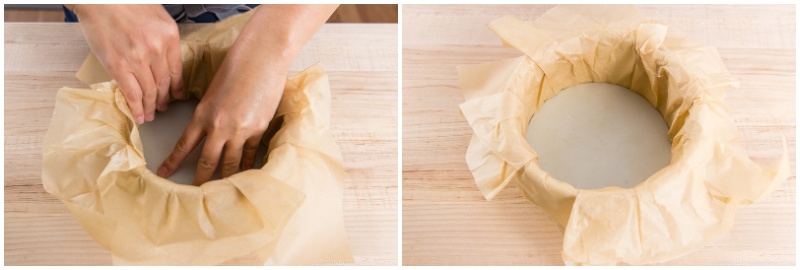
- For 1 6-inch (15-cm) round cake pan, prepare 2 rectangular sheets of parchment paper long enough to hang over the sides by 2 inches (5 cm). Place them crisscross to maximize the coverage on all sides. (You can use just one sheet instead of two if your parchment paper is extra wide.) Fold them twice into quarters, like a paper napkin.
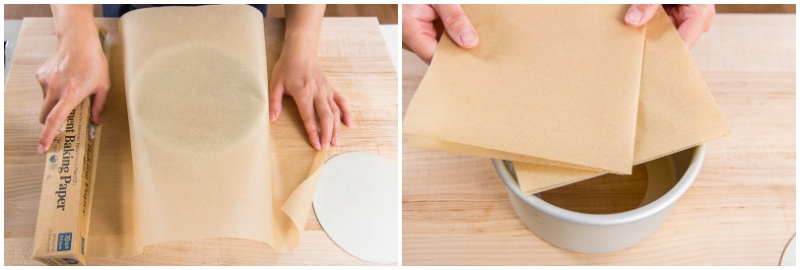
- Open the folded sheets and place them crisscross as before. Find the center point of the crisscrossed sheets. Where the creases intersect will also indicate the center of the cake pan. Center the parchment sheets over the cake pan ring, then center the removable bottom on top of the sheets.
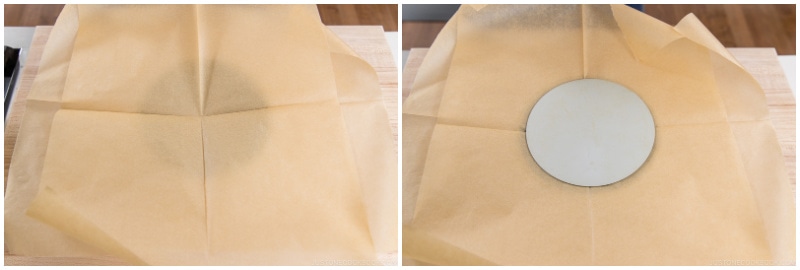
- Press down the removable bottom and the parchment sheets into the cake pan, creasing the paper against the bottom and inside of the pan to fit snugly. Press and crease the paper edges down around the outside of the cake pan, too.
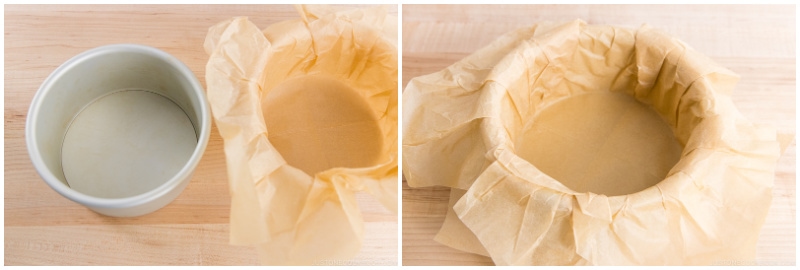
- Gently take out both the removable bottom and the parchment sheets, which are now molded into the shape of the pan. Place the removable bottom back into the cake pan (as it should be). Then, fit the molded parchment paper back into the cake pan on top of the removable bottom. Press the paper down to fit snugly.
To Blend the Cream Cheese Mixture
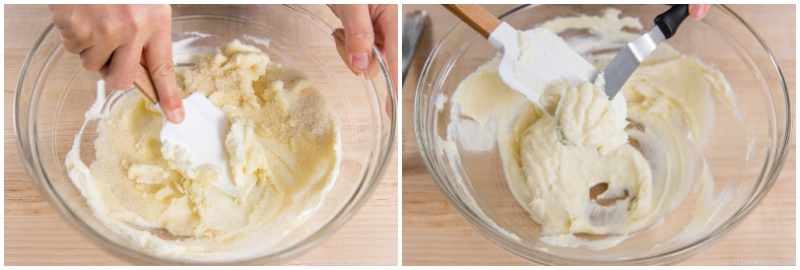
- Place ½ lb cream cheese in a large bowl. Make sure the cream cheese is at room temperature. If not, microwave the cold cream cheese at half power (50%) for 45 seconds, or microwave it in 15-second increments until it's at room temperature.
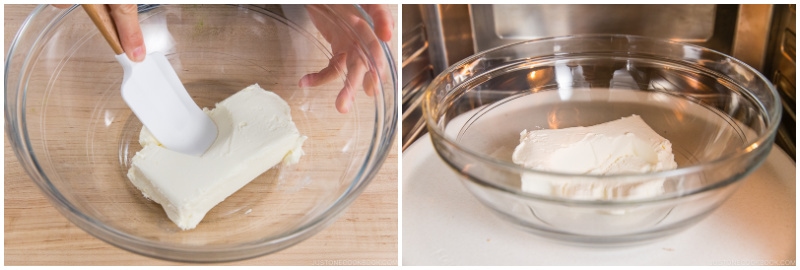
- Press down on the cream cheese with a spatula to soften it. Then, add ½ cup sugar.
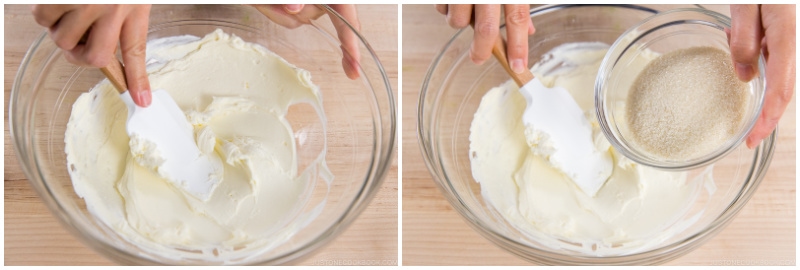
- Combine the cream cheese with the sugar by rubbing the mixture against the sides of the bowl with the spatula. The cream cheese will become fluffy and smooth as the sugar granules dissolve. Scrape both the bowl and spatula often to ensure that the ingredients are well incorporated and there are no lumps.
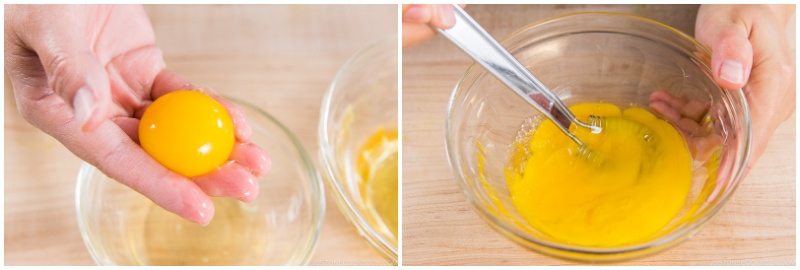
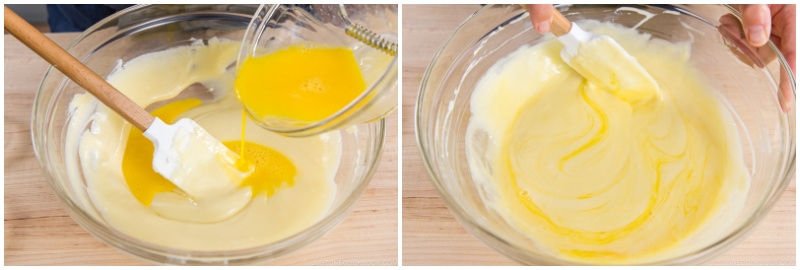
- In a separate bowl, whisk 2 large eggs (50 g each w/o shell) and 1 large egg yolk well.
- Slowly and gradually add one-third of the beaten eggs to the cream cheese mixture. Blend completely and thoroughly, making sure the batter is smooth and without lumps before adding more egg.
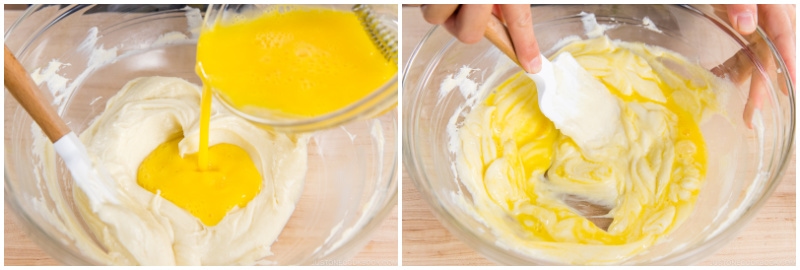
- Add another one-third of the eggs to the cream cheese mixture, blending completely.
- Add the remaining egg and blend well. Option: To make this cheesecake with a classic flavor instead of a matcha flavor, add the lemon juice now and blend well. Then, skip to the To Finish the Batter section.
To Incorporate the Matcha
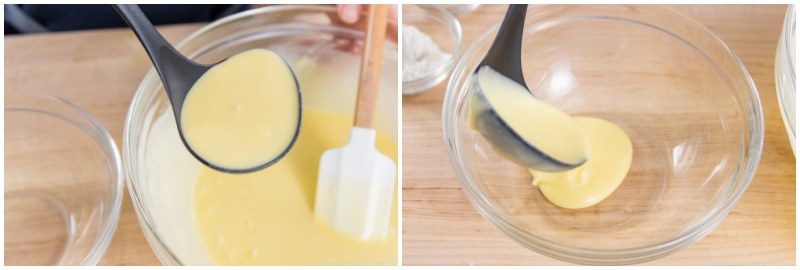
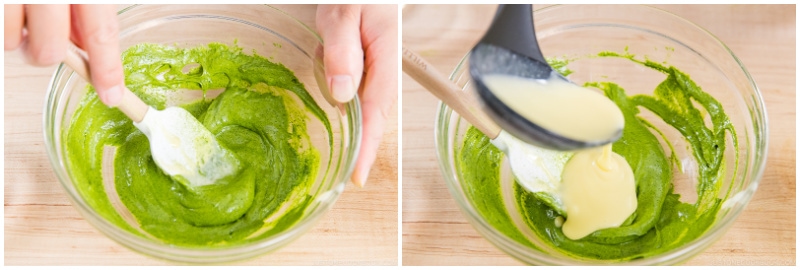
- With a ladle, transfer about two scoops of the batter to a clean, medium-sized bowl.
- Now, blend in the matcha. Use a small, fine-mesh sieve to sift 1 Tbsp matcha into the two scoops of batter, a little bit at a time. Stir as you go to blend the powder into the batter completely before adding more. Continue until you‘ve sifted and blended in all the matcha. Tip: Matcha is a fine powder that becomes lumpy if you add it to a large volume of liquid. Therefore, we have to make a paste with the matcha before adding it to the rest of the batter.
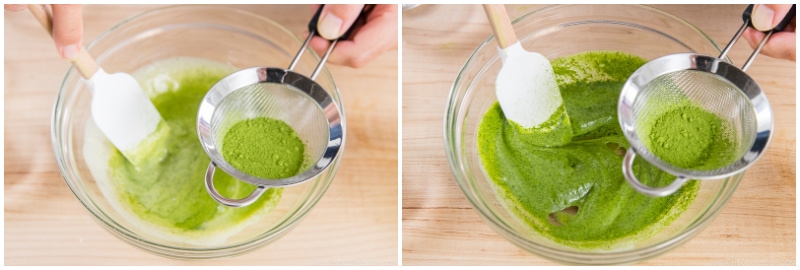
- Mix it all together, making sure there are no lumps and that the matcha is well incorporated into the liquid. Now, it is a thick batter.
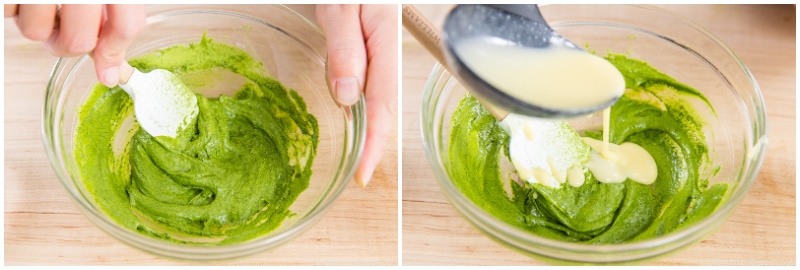
- Continue to blend until the matcha batter is completely smooth and without lumps. Then, add one more scoop of the main batter and blend well to loosen up the matcha batter further.
- Now transfer the matcha batter back into the main batter.
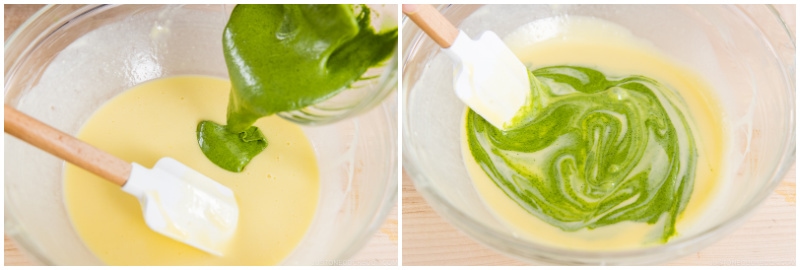
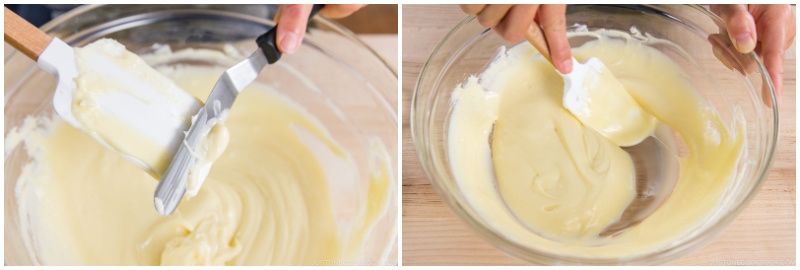
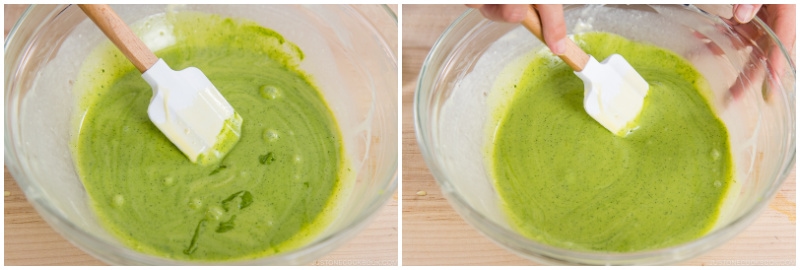
- Blend the two batters very well until you have a smooth consistency.
To Finish the Batter
- Next, add 4 tsp cake flour and 2 tsp cornstarch to a fine-mesh sieve. Holding the sieve in one hand, sift a little bit of the flour and cornstarch into the cream cheese mixture while you stir with a spatula. Incorporate the ingredients well before adding more. Keep sifting and blending until you‘ve added all the flour mixture. Take your time doing this. You don’t want any lumps.
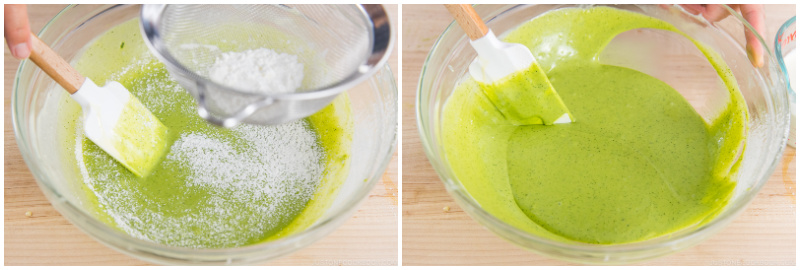
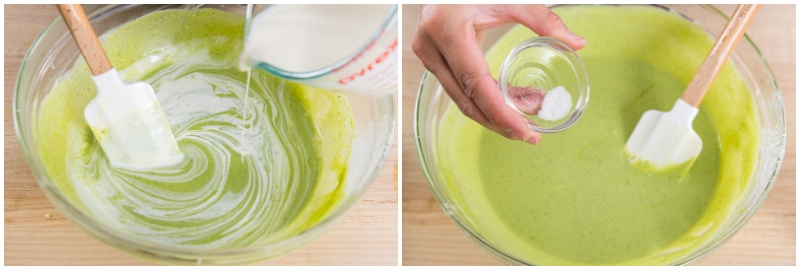
- Make sure at this stage that there are no lumps. Then, gradually add 220 ml heavy (whipping) cream (1 cup minus 4 tsp) while you stir. Mix until it’s all combined. Add ⅛ tsp Diamond Crystal kosher salt and blend it all together.
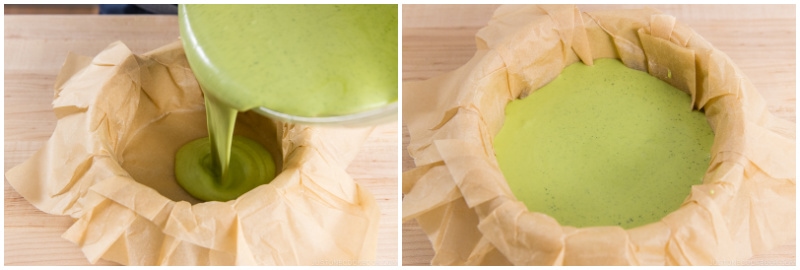
- Pour the cake batter into the prepared pan in one go (avoid stop-and-go) so you don't create any air pockets.
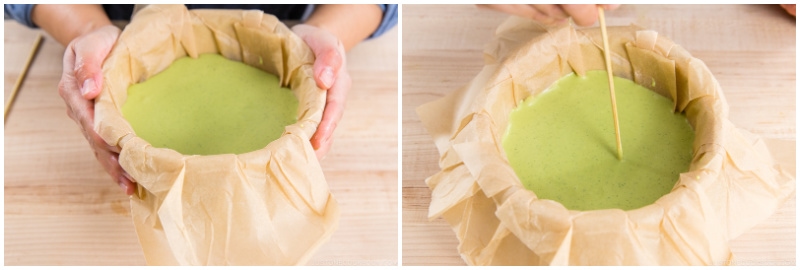
- Tap the cake pan on the countertop a few times to eliminate air pockets. With a bamboo skewer or toothpick, pop the air bubbles if there are any. Then, run the skewer through the batter to remove any bubbles.
To Bake
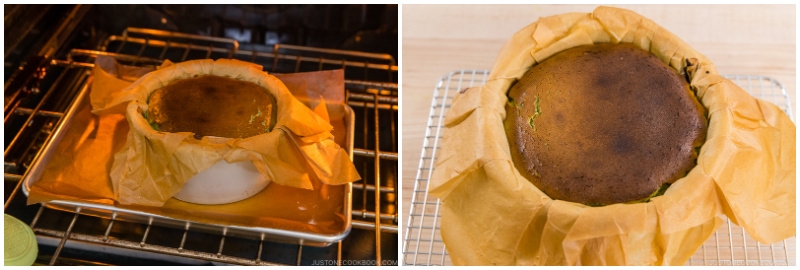
- Since the cheesecake may overflow during baking, place the cake pan on a baking sheet, just in case. Mine never did, but I still use a baking sheet as it helps to transfer the cake pan to and from the oven. Next, transfer the baking sheet with the cake pan to the oven. Bake at 450ºF (230ºC) for a convection oven or 475ºF (245ºC) for a conventional oven. Bake until the top is dark amber/brown and the center is still very jiggly, about 30 minutes; please keep an eye on your cheesecake because every oven is different. The top of my cheesecake starts becoming dark at the 30-minute mark, then gets dark brown within 5 minutes. If you love a “gooey“ or “oozy“ texture, then you may bake for less time than I suggested, but you must chill your cake well to firm it up before serving. NEVER extend the bake time and thus overcook the cake, even if the top hasn‘t turned dark. The filling will curdle and you can‘t fix it. If the top doesn‘t darken within 30–35 minutes, you will probably need to adjust the oven temperature (or oven rack or preheating time) the next time you make it.

To Cool
- Take out the cake when the surface is dark, burnt color. The cake should wobble when you gently shake the pan. Let the cheesecake cool in the pan on a wire rack until it reaches room temperature, about 2–3 hours. Tip: Don’t put it on the countertop directly and make sure the air can circulate under the cake pan. For example, you can place it on top of a burner grate of a gas range, if it‘s is not in use.
To Chill
- You can serve the cake either chilled or at room temperature (which we like, too). For a chilled or firmer cheesecake, cover the cake in the pan with a tea towel (don‘t use plastic, as condensation may drip onto the cake), and place in the refrigerator for 4 hours.
To Serve
- Remove the cheesecake from the cake pan and carefully peel back the parchment paper. If you have chilled the cake, let it stand at room temperature for at least 30 minutes or up to 2 hours before serving.
To Store
- You can store the cheesecake in the refrigerator for up to 3 days.
Notes
This Matcha Basque Cheesecake is based on this recipe, originally adapted from Rumi Kojima's Basque Cheesecake recipe. All images and content on this site are copyright protected. Please do not use my images without my permission. If you’d like to share this recipe on your site, please re-write the recipe in your own words and link to this post as the original source. Thank you.
Nutrition
Serving: 1 slice · Calories: 277 kcal · Carbohydrates: 16 g · Protein: 5 g · Fat: 22 g · Saturated Fat: 12 g · Trans Fat: 1 g · Cholesterol: 138 mg · Sodium: 138 mg · Potassium: 81 mg · Fiber: 1 g · Sugar: 13 g · Vitamin A: 977 IU · Vitamin C: 1 mg · Calcium: 56 mg · Iron: 1 mg