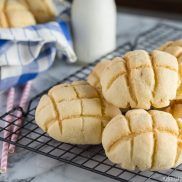
Melon Pan
Learn how to make freshly baked Melon Pan in your own kitchen! This classic Japanese sweet bread is covered in a thin and crisp cookie (biscuit) crust with a signature gridline pattern on top. Knead it either by hand or with a stand mixer.
Servings: 10 Melon Pan
Calories: 309kcal
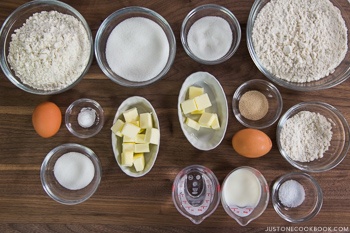
Ingredients
For the Bread Dough
- 225 g bread flour (1¾ cups + 2 Tbsp; plus more for dusting; please weigh your flour; click the Metric button for weights; or learn how to measure flour with a measuring cup)
- 25 g cake flour (3½ Tbsp; please weigh your flour; you can make Homemade Cake Flour)
- 1 tsp Diamond Crystal kosher salt
- 3 Tbsp granulated sugar
- 1¼ tsp instant yeast (to use active dry yeast, see Notes)
- 1 large egg (50 g each w/o shell) (beaten)
- 50 ml whole milk (3 Tbsp + 1 tsp; at 86ºF/30ºC)
- 50 ml water (3 Tbsp + 1 tsp; at 86ºF/30ºC)
- 35 g unsalted butter (2½ Tbsp; cubed; at room temperature)
For the Biscuit Dough
- 60 g unsalted butter (¼ cup, ½ stick, or 4 Tbsp; cubed; at room temperature)
- 100 g granulated sugar (½ cup)
- 1 large egg (50 g each w/o shell) (beaten)
- 200 g cake flour (1⅔ cups; please weigh your flour; click the Metric button for weights; you can make Homemade Cake Flour)
- ½ tsp baking powder
For the Topping
- 2 Tbsp granulated sugar
Instructions
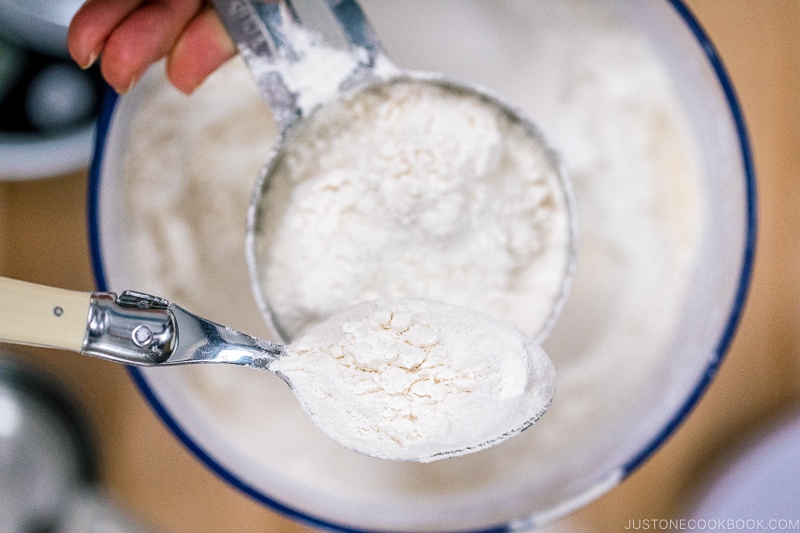
- Before You Start: I highly encourage you to weigh your ingredients using a kitchen scale. For weights, click the Metric button above to convert the measurements to metric. If you don't have a scale, here's how to measure flour with a measuring cup: Fluff the flour with a spoon, sprinkle it into the measuring cup, and level it off. Otherwise, you may scoop more than you need.
- Gather all the ingredients. I have 2 videos to help you with this recipe: The hand-kneading method and the stand mixer method. Once you‘ve made the bread dough and biscuit dough—either by hand or using a stand mixer—proceed to Steps 3–5.
★ For the Hand-Kneading Method (Steps 1 & 2) ★
Step 1: To Make the Bread Dough
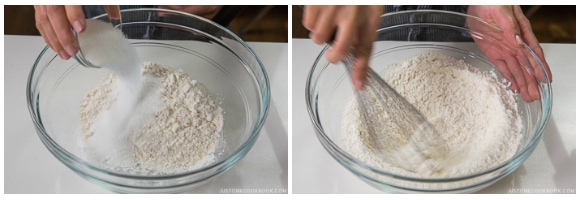
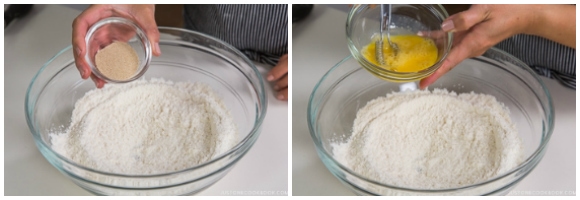
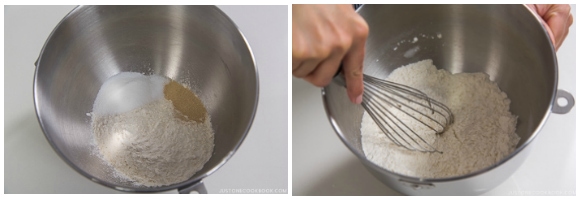
- Mix: Add 225 g bread flour (1¾ cups + 2 Tbsp), 25 g cake flour (3½ Tbsp), 1 tsp Diamond Crystal kosher salt, and 3 Tbsp granulated sugar to a large mixing bowl. Whisk to combine.
- Add 1¼ tsp instant yeast and whisk to combine. Then, add 1 large egg (50 g each w/o shell), beaten.
- Add 50 ml whole milk (3 Tbsp + 1 tsp) and 50 ml water (3 Tbsp + 1 tsp), both at 86ºF (30ºC). Gently mix the ingredients together with a silicone spatula or your fingers until combined. Tip: I highly recommend using whole milk instead of reduced-fat milk.
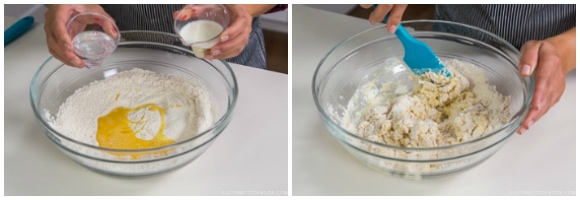
- In the beginning, the dough will feel very sticky and wet, but keep mixing until it forms a loose, sticky ball. This step should take about 2 minutes. Use the dough ball to pick up any flour on the sides of the mixing bowl. Transfer the dough to a work surface lightly dusted with bread flour.
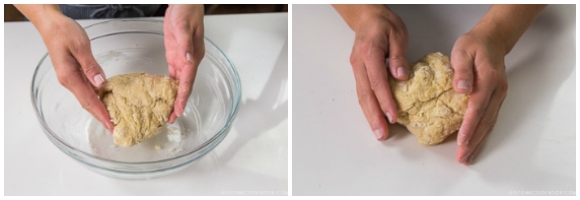
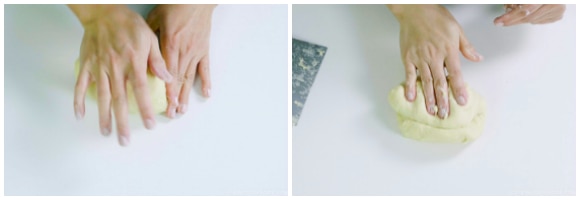
- Knead: Press the heels of your hands into the dough, pushing forward slightly. Fold down the top half of the dough back toward you. Then, rock forward on the lower part of your palm to press the dough flat and away from you.
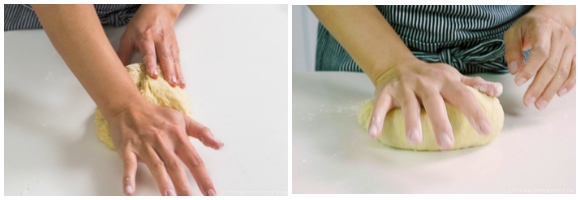
- Rotate the dough clockwise slightly, fold the dough down in half, and rock into it again with the lower part of your palm. Knead to lengthen and stretch the gluten strands to make the dough more elastic. Repeat this rotate, fold, and knead process for 5 minutes or so. Tip: Lightly dust your hands with bread flour to keep the dough from sticking too much. If it's still too sticky to knead, sprinkle a tiny bit of bread flour on top and work it into the dough. Add only the minimum necessary to keep it from sticking to your hands, as adding too much flour will make the dough dry and hard. Aim for a moist, soft dough that is smooth and pliable and holds a ball shape.
- Knead in the Butter: After kneading for 5 minutes, the dough will get more elastic. Next, press and stretch the dough until it‘s a flat log about 10 inches (25 cm) long. Put the small cubes of 35 g unsalted butter (2½ Tbsp; at room temperature) all over the top of the dough. Roll up the dough, tucking in the butter. Then, continue to knead as before.
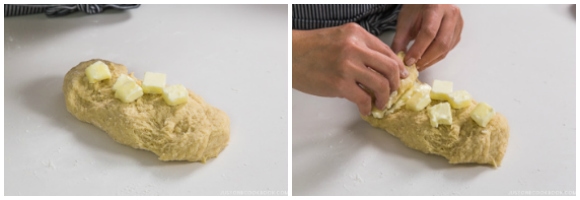
- Your hands, the dough, and the work surface will get greasy and messy in the beginning. Don‘t panic; the dough will eventually absorb the butter as you continue to knead. I recommend using a metal or silicone dough scraper once in a while to collect the dough stuck on the work surface. Keep kneading.

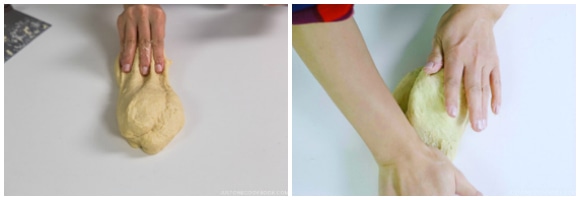
- Slam and Fold: Once the dough becomes very smooth and easy to work with, “slam and fold“ the dough to further develop its gluten (elasticity). First, hold one end of the dough and slam the other end onto the work surface. Bang! Next, fold the bottom end up and over away from you. Then, knead the dough with the lower part of your palm. Pick up the dough, turn it 90 degrees, then repeat this slam-and-fold process. Continue until the dough is smooth, supple, and silky, about 10 minutes. Tip: Don’t let go of the dough when you are banging it onto the work surface and don’t let it rest for too long between turns.
- The Windowpane Test: When the dough feels silky and smooth, it‘s time for the windowpane test to see if the dough‘s gluten is well developed. Hold the dough in both hands and gently pull it into a square with your fingers. It should be very elastic, smooth, and shiny. If it‘s strong enough to stretch to a super-thin membrane without tearing and light can pass through the center, your dough passes the test. If it doesn’t stretch or it tears too easily, knead it again for another 2 minutes and test again.

- Form the dough into a ball by pulling and tucking all edges toward the bottom and pinching them together. Place the dough in a bowl with the seam side down.
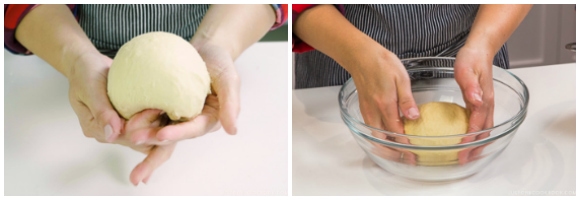
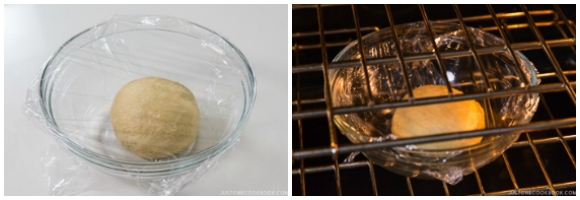
- Bulk Fermentation: Cover the bowl with plastic wrap and let the dough rise in a warm place until it doubles in size, about 1–2 hours. I use the Proof setting (100ºF/38ºC) in my oven. Tip: If you live in a cooler environment and your oven doesn't have a Proof setting, place small baking dishes of boiling water at the four corners on the lower-middle rack. Then, place your dough in a bowl in the center of the rack and close the door. The steam and heat from the boiling water will create a warm environment for bulk fermentation. If you live in a warmer environment, you may not need to do this; your proof time also may be shorter.
Step 2: To Make the Biscuit Dough
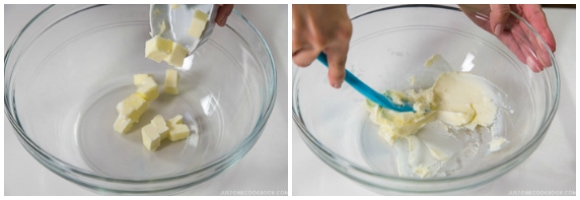
- Mix: To a large bowl, add the small cubes of 60 g unsalted butter (¼ cup, at room temperature) and mash it with the silicone spatula until it becomes smooth.
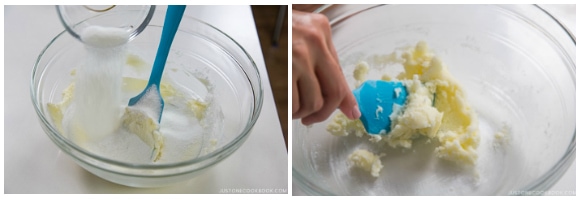
- Add 100 g granulated sugar (½ cup) to the butter. Mix with the silicone spatula until well blended.
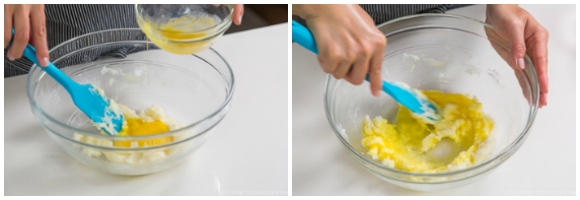
- Slowly add a very small amount of 1 large egg (50 g each w/o shell), beaten, to the bowl and blend well with the butter mixture. Then, add another small amount of beaten egg and blend. Continue until all the egg is well incorporated.
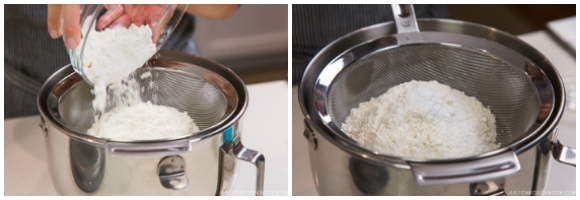
- Sift 200 g cake flour (1⅔ cups) and ½ tsp baking powder into the mixture.
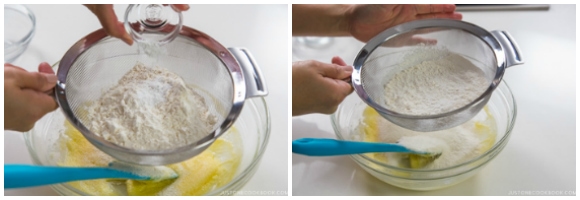
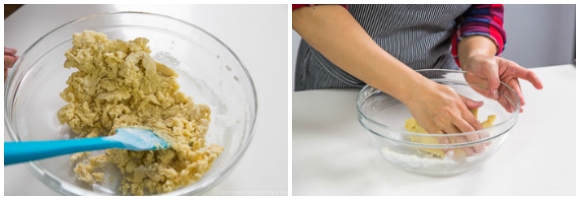
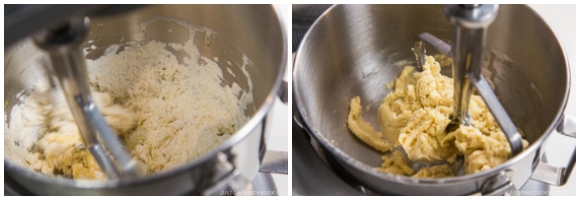
- Using the silicone spatula, mix well until the dry ingredients are just incorporated. Collect the dough with your hands and roll it into a ball.
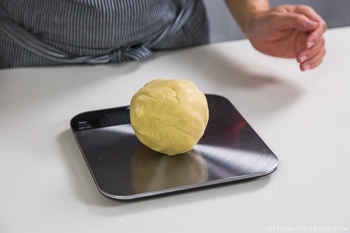
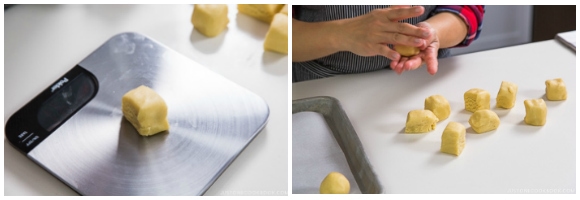
- Divide: Weigh the biscuit dough on a scale. Remember this weight, as you’ll need it later to measure one-tenth portions of the dough. The total dough weight for 10 melon pan should be around 400–410 g.
- Roughly cut the dough into 10 pieces.
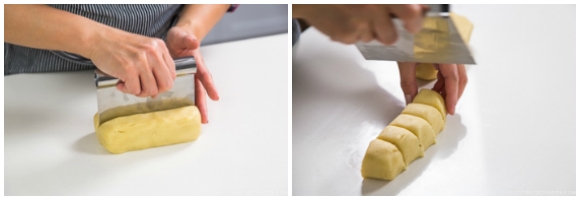
- Divide the total dough weight by 10 to get the target weight of each piece (40–41 g, in my case). Weigh the biggest piece first. Pinch off some dough if it‘s heavier than the target weight, then weigh again. Repeat until the dough piece reaches the target weight. Repeat with the other dough pieces, pinching off a bit of dough from a larger piece or adding some to a smaller piece by stuffing some dough inside.
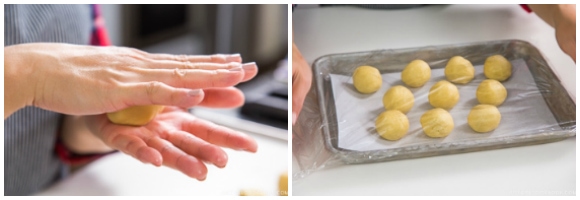
- Pre-shape: Roll the divided biscuit dough into balls. Place them on a baking sheet lined with a silicone baking mat or parchment paper. Cover with plastic wrap and rest in the refrigerator for 10 minutes until it hardens a bit so it‘s easier to handle. Proceed to Step 3: To Divide and Pre-Shape the Bread Dough.
★ For the Stand Mixer Method (Steps 1 & 2) ★
Step 1: To Make the Bread Dough
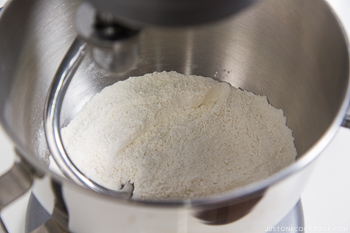
- Mix: Add 225 g bread flour (1¾ cups + 2 Tbsp), 25 g cake flour (3½ Tbsp), 1 tsp Diamond Crystal kosher salt, 3 Tbsp granulated sugar, and 1¼ tsp instant yeast in a stand mixer bowl. Mix together with a hand whisk.
- Set the mixer bowl on the stand mixer fitted with a dough hook attachment.
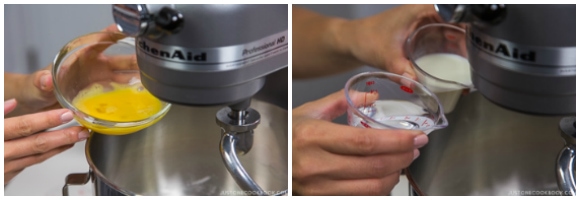
- Add 1 large egg (50 g each w/o shell), beaten, to the dry ingredients. Add 50 ml whole milk (3 Tbsp + 1 tsp) and 50 ml water (3 Tbsp + 1 tsp), both at 86ºF (30ºC). Tip: I highly recommend using whole milk instead of reduced-fat milk.
- Start the mixer on low speed (Speed 2) to combine the ingredients. Use a silicone spatula to scrape the sides and bottom of the bowl a couple of times.
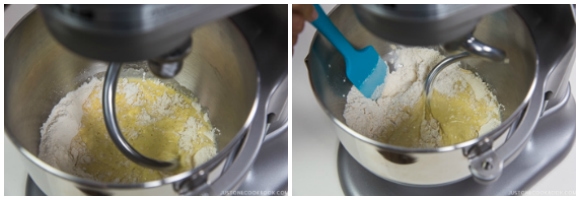
- Continue to mix until the dough clings to the hook and cleans the sides of the bowl.
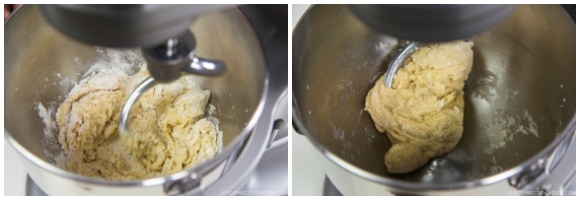
- Knead in the Butter: Once the dough starts to come together, add the small cubes of 35 g unsalted butter (2½ Tbsp; at room temperature). Continue to stir on low speed until the butter is incorporated and no streaks remain. Then, increase the speed to medium (Speed 4 or 6) and knead until the dough is silky, smooth, and elastic.
- The Windowpane Test: When the dough feels silky and smooth, it‘s time for the windowpane test to see if the dough‘s gluten is well developed. Hold the dough in both hands and gently pull it into a square with your fingers. It should be very elastic, smooth, and shiny. If it‘s strong enough to stretch to a super-thin membrane without tearing and light can pass through the center, your dough passes the test. If it doesn’t stretch or it tears too easily, knead for another 2 minutes and test again.
- Form the dough into a ball by pulling and tucking all edges toward the bottom and pinching them together. Place the dough in a bowl with the seam side down.
- Bulk Fermentation: Cover the bowl with plastic wrap and let the dough rise in a warm place until it doubles in size, about 1–2 hours. I use the Proof setting (100ºF/38ºC) in my oven. Tip: If you live in a cooler environment and your oven doesn't have a Proof setting, place small baking dishes of boiling water at the four corners on the lower-middle rack. Then, place your dough in a bowl in the center of the rack and close the door. The steam and heat from the boiling water will create a warm environment for bulk fermentation. If you live in a warmer environment, you may not need to do this; your proof time also may be shorter.
Step 2: To Make the Biscuit Dough
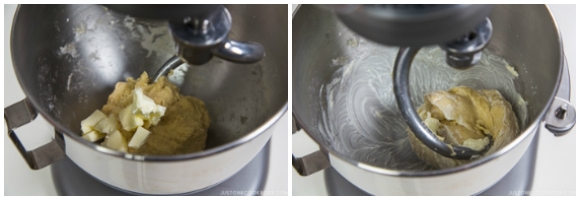
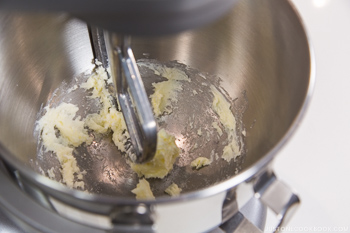
- Mix: Set a clean mixer bowl on a stand mixer fitted with a paddle attachment. Add the small cubes of 60 g unsalted butter (¼ cup, at room temperature) and 100 g granulated sugar (½ cup) to the mixer bowl.
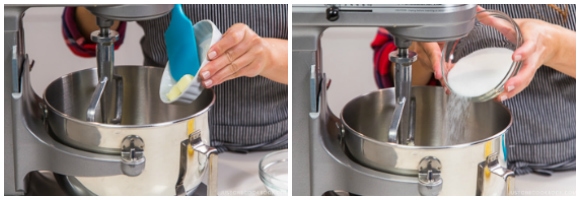
- Stir the butter and sugar on medium low (Speed 4) until well blended and smooth.
- Slowly add a very small amount of 1 large egg (50 g each w/o shell), beaten, to the bowl and blend well with the butter mixture. Next, add another small amount of beaten egg and blend. Continue until all the egg is well incorporated.

- Sift 200 g cake flour (1⅔ cups) and ½ tsp baking powder into the mixture.
- Mix well until the dry ingredients are just incorporated, then stop the mixer. Take out the dough and form it into a ball with your hands.
- Divide: Weigh the biscuit dough on a scale. Remember this weight, as you’ll need it later to measure portions of the dough. The total dough weight for 10 melon pan should be around 400–410 g.
- Roughly cut the dough into 10 pieces.
- Divide the total dough weight by 10 to get the target weight of each piece (40–41 g, in my case). Weigh the biggest piece first. Pinch off some dough if it‘s heavier than the target weight, then weigh again. Repeat until it reaches the target weight. Repeat with the other pieces, pinching off a bit of dough from a larger piece or adding some to a smaller piece by stuffing it inside.
- Pre-shape: Roll the divided biscuit dough into balls. Place them on a baking sheet lined with a silicone baking mat or parchment paper. Cover with plastic wrap and rest in the refrigerator for 10 minutes until it hardens a bit so it‘s easier to handle. Proceed to Step 3: To Divide and Pre-Shape the Bread Dough.
★ For Both Hand-Kneading and Stand Mixer Methods (Steps 3, 4, & 5) ★
Step 3: To Divide and Pre-Shape the Bread Dough
- The Finger Test: Once the bread dough has doubled in size, dust your index finger with flour and use it to poke the center of the dough. If the hole does not close up when you remove your finger, then the dough is ready for the next step. If the dough closes up immediately, then proof the dough a little longer.
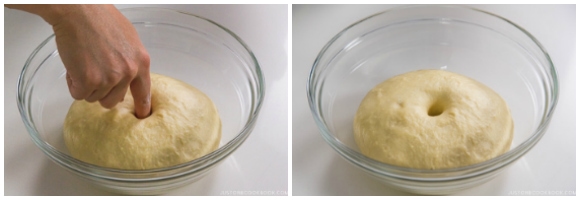
- Deflate and Roll: Remove the dough from the bowl with a silicone scraper and transfer to a lightly floured work surface. Press the dough with your hands to deflate it and release any gas.
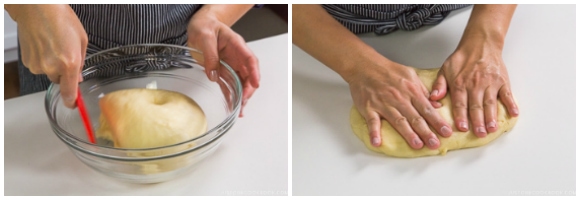
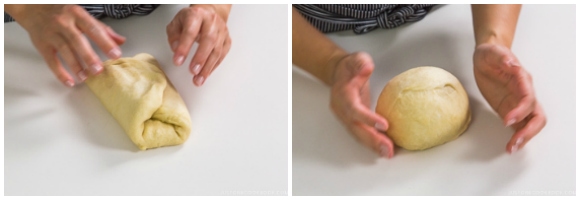
- Fold the sides of the dough in thirds toward the center, and then fold the bottom and top in thirds. Flip over to keep the seam side down. Roll the dough into a ball. To close the seam line, rotate the dough clockwise with both hands while the seam line is touching the work surface.
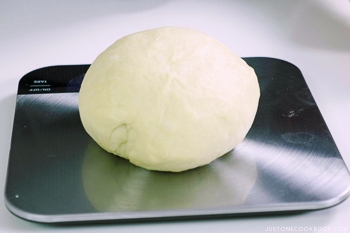
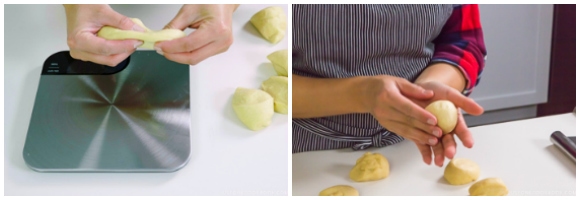
- Divide: Measure the total weight of the bread dough. It should weigh around 460–470 g for 10 melon pan. Remember the weight, as you’ll need it later to measure portions of the dough.
- Using a dough scraper, roughly cut the dough into 10 equal pieces. Divide the total dough weight by 10 to determine the target weight of each piece (46–47 g, in my case). Weigh the biggest piece first. Pinch off some dough if it‘s heavier than the target weight, then weigh again. Repeat until the dough piece reaches the target weight.
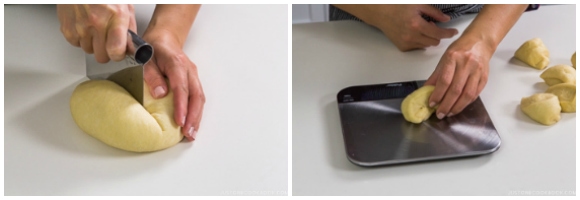
- Repeat with the other dough pieces, pinching off a bit of dough from a larger piece or adding some dough to a smaller piece by stuffing it inside. Knead to combine well. Pre-shape each dough piece into a nice round ball, pulling from all the sides and tuck the edges into the bottom. Place the dough on the palm of your non-dominant hand, and rotate it with your dominant hand, keeping the seam side on the bottom.
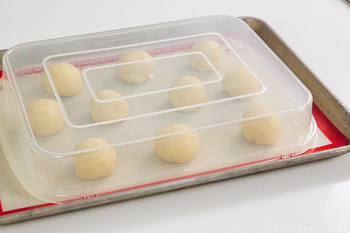
- Rest: Put the dough on a baking sheet lined with parchment paper or a silicone baking mat. Cover the dough with plastic wrap (I use a portable cupcake holder lid) to prevent it from drying. Rest the dough for 15 minutes at room temperature.
Step 4: To Shape the Melon Pan
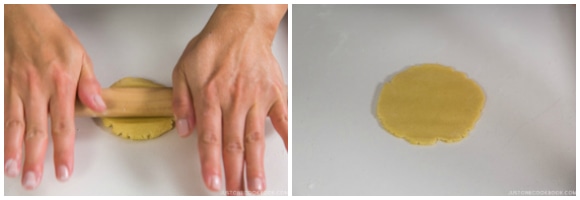
- Roll the Biscuit Dough: While the bread dough is resting, shape the biscuit dough. Put one ball of the biscuit dough on a lightly floured work surface and flatten it with your hand.
- Using a rolling pin, roll it into a 4-inch (10–12 cm) flat circle. Set aside. Continue to roll out the rest of the biscuit dough pieces.
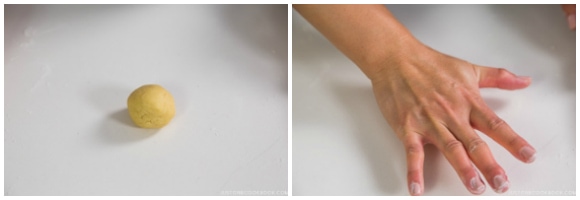
- Shape the Bread Dough: After 15 minutes of resting, the bread dough is ready to shape. First, flatten a ball of bread dough with your hand. Then, fold the top and bottom in thirds toward the center.
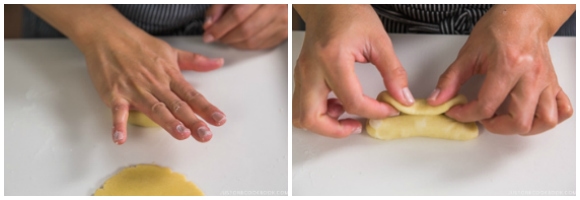
- Then fold in the left and right sides in thirds. Pinch both ends together to shape the dough into a ball.
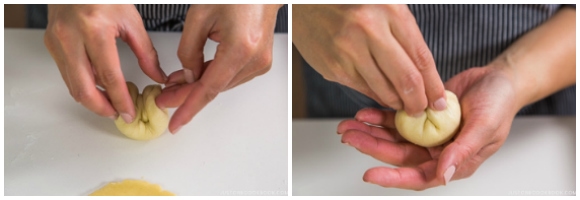
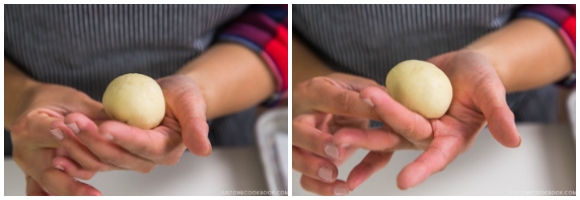
- Pull the dough from all sides towards the seam on the bottom. Place the bread dough on the palm of your non-dominant hand and rotate it with your dominant hand a few times, keeping the seam side on the bottom. Set aside. Repeat to shape the remaining balls of bread dough.
- Assemble the Melon Pan: Place a biscuit dough circle on your palm and put the bread dough ball in the middle, seam side up.
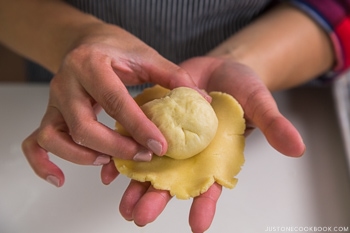
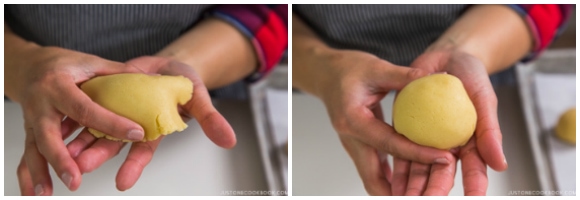
- Then flip them over together so the biscuit dough is on top. Gently pull all sides of the biscuit dough down to wrap around the bread dough. Don’t cover the base of the bread dough ball with the biscuit dough. Set aside and repeat to shape the rest of the melon pan dough.
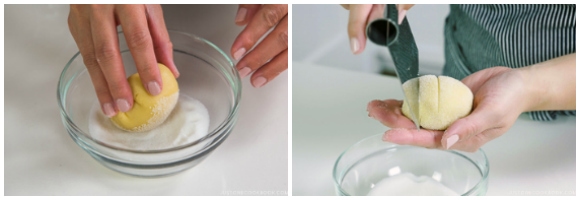
- Add the Sugar Topping and Score: Put 2 Tbsp granulated sugar in a small bowl. Dip to coat the biscuit dough in the sugar; remove the excess. Using a dough scraper or knife, gently score the biscuit dough in a crisscross pattern, about ⅛ inch (3 mm) deep. I scored 3 lines horizontally and 3 lines vertically. Repeat with the rest of the melon pan dough.
- Place the melon pan dough on the baking sheet, biscuit side up. Cover the dough with plastic wrap to prevent it from drying.
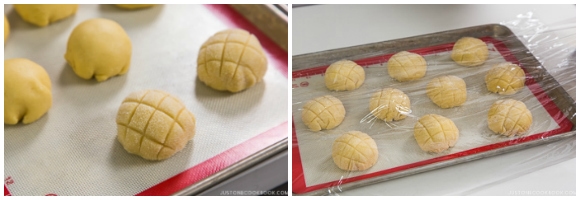
- Final Proof: Let the dough rise in a warm place until it increases one-and-a-half (1½) times in size, about 50 minutes. I used the Proof setting (100ºF/38ºC) in my oven.
- Preheat the Oven: When the dough has risen halfway, preheat the oven to 350ºF (180ºC). Set the oven rack in the middle position. Note: If you are using the oven for final proofing, you have to transfer the dough to a different warm place so you can preheat the oven.
Step 5: To Bake
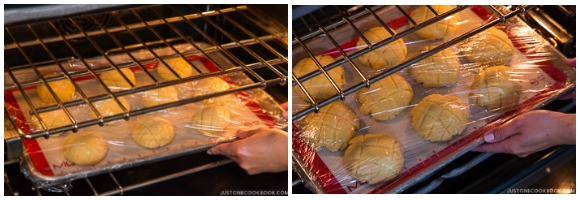
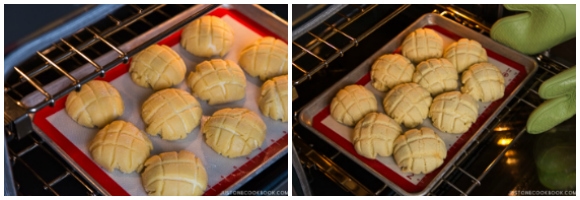
- When the oven is preheated well, remove the plastic wrap and place the baking sheet with the melon pan dough in the oven. Bake at 350ºF (180ºC) for 13–15 minutes, or until the biscuit crust is a light golden brown. If they are not browning evenly toward the end of baking, rotate the baking sheet once so that the crust gets an even color. Do not overbake, or the melon pan will be dry.
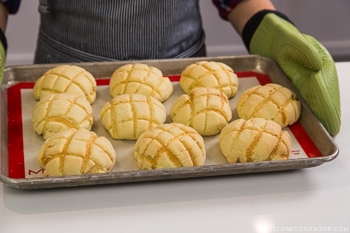
- Once done, remove them from the oven and transfer to a wire rack. Cool for 5 minutes and enjoy!
To Store
- Once the bread is cooled completely, individually wrap it in plastic to prevent drying. Then, put it in an airtight container or bag and refrigerate for up to 3 days, or freeze for up to a month. Defrost overnight in the refrigerator or microwave to warm it up inside. Then, bake it in the oven at 350ºF (180ºC) until crispy on the outside.
Notes
Active Dry Yeast: To use active dry yeast, it requires activation in a little bit of warm water (110ºF/43ºC) before being added to the rest of the ingredients. In this recipe, add the active dry yeast to warm (110ºF/43ºC) milk, hotter than the temperature specified in the recipe because if the milk is not hot enough, the yeast will not dissolve completely. Read more about the difference between instant yeast and active dry yeast.
Nutrition
Calories: 309 kcal · Carbohydrates: 49 g · Protein: 7 g · Fat: 9 g · Saturated Fat: 5 g · Polyunsaturated Fat: 1 g · Monounsaturated Fat: 2 g · Trans Fat: 1 g · Cholesterol: 57 mg · Sodium: 152 mg · Potassium: 81 mg · Fiber: 1 g · Sugar: 16 g · Vitamin A: 289 IU · Vitamin C: 1 mg · Calcium: 32 mg · Iron: 1 mg