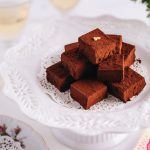
Nama Chocolate
Silky-smooth Nama Chocolate with fresh cream simply melts in your mouth. Rich, moist, and decadent, these sweets are a very popular gift item from Japan. With my copycat recipe of the famous ROYCE‘ chocolate, you can easily make this special treat at home.
Servings: 36 perfect squares + uneven squares
Calories: 17kcal
Ingredients
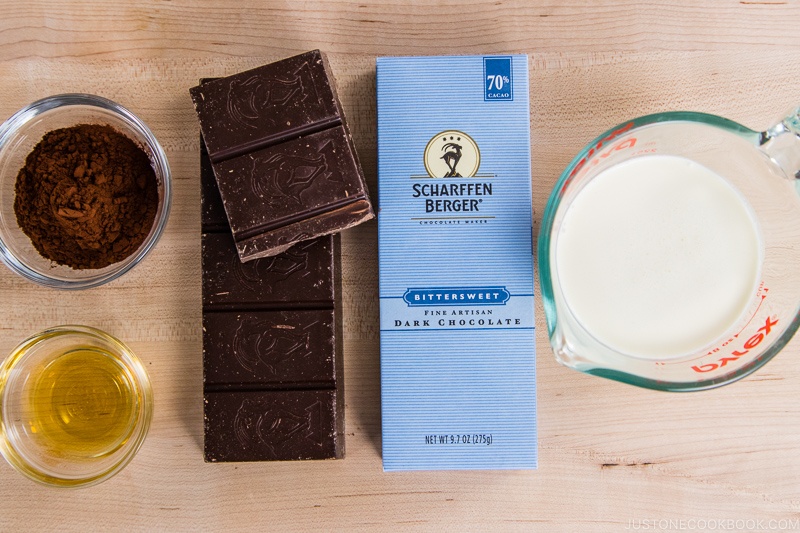
- 14 oz good-quality dark chocolate (70% cacao) (use semisweet chocolate if you prefer a less bitter taste)
- 200 ml heavy (whipping) cream (¾ cup + 4 tsp; 36% milkfat)
- 1 Tbsp liqueur of your choice (optional, to taste; I use brandy)
- Dutch-process cocoa powder (to coat the chocolate; you can buy it on Amazon)
Instructions
Before You Start...
- Please note that this recipe requires a chilling time of 4 hours. Also, read the Notes section at the end of this recipe card for important tips to successfully make this Nama Chocolate.
- Gather all the ingredients.
To Prepare the Nama Chocolate
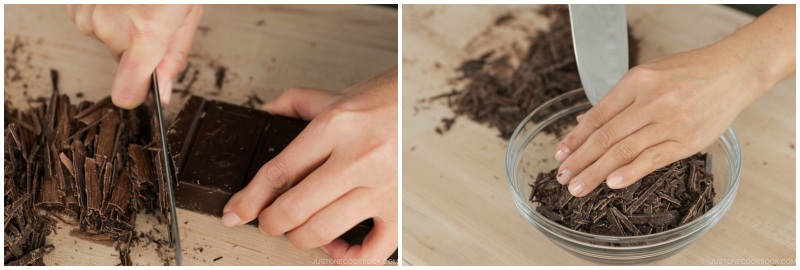
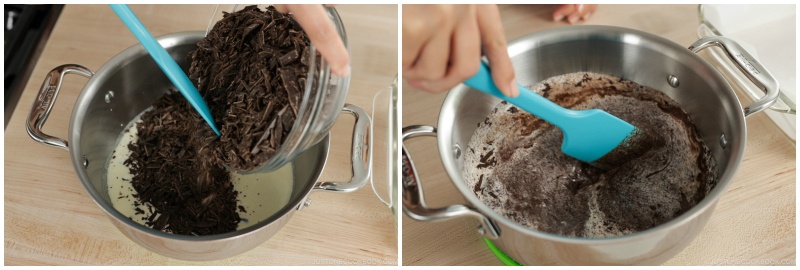
- With a sharp knife, chop 14 oz good-quality dark chocolate (70% cacao) into smaller pieces so that they will melt faster and more evenly.
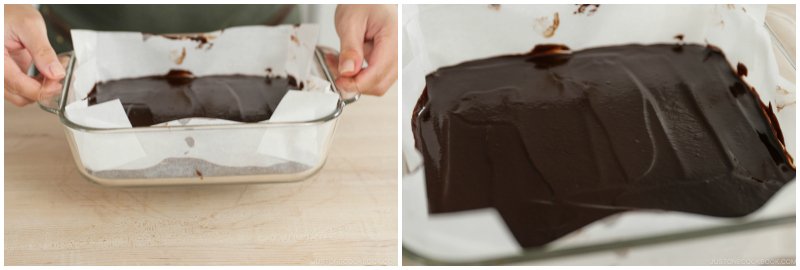
- Line an 8- x 8-inch (20- x 20-cm) baking dish with parchment paper. Tip: To make the chocolate the correct height, it‘s important to choose a dish or tray that‘s the right size; if you use a bigger tray, the chocolate will be flatter.

- Add 200 ml heavy (whipping) cream (¾ cup + 4 tsp) into a small saucepan over medium heat. Heat the cream to ALMOST a boil. Whisk lightly to evenly distribute the heat. Keep an eye on the cream to make sure it doesn‘t boil. Tip: Overheating the cream may cause the chocolate to separate in the next step (see Notes below for more information).
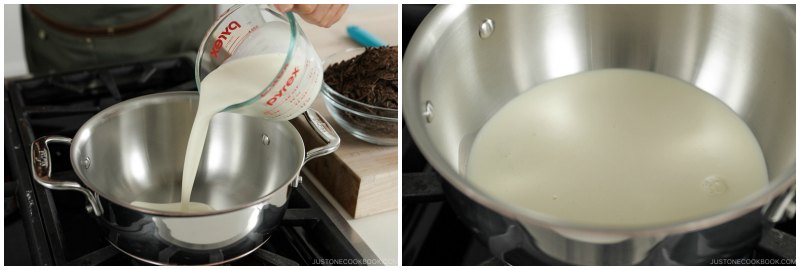
- When you see small bubbles form around the edges of the saucepan, remove it from the heat.

- Next, add the chocolate pieces into the cream and stir with a silicone spatula to combine. Tip: Make sure your utensil is completely dry; introducing even a tiny amount of water or steam may cause the melted chocolate to seize (see Notes below for more details).
- Mix until the chocolate is melted and there are no more lumps. The chocolate and cream mixture should be completely smooth.
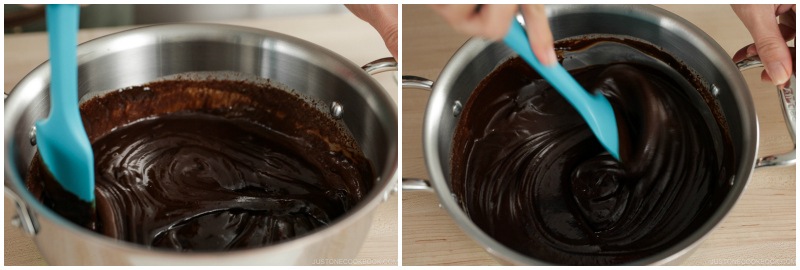
- If you‘d like, add 1 Tbsp liqueur of your choice (optional), and stir to incorporate.
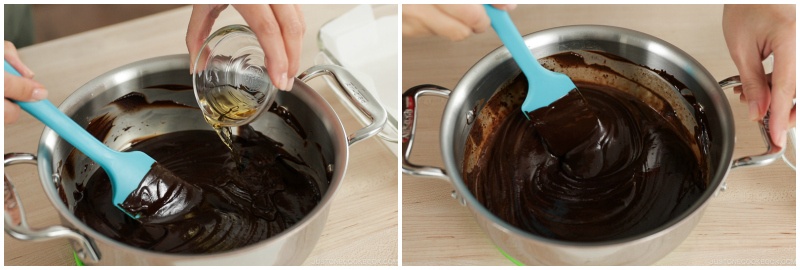
- Pour the mixture into the prepared baking dish and smooth the surface with the silicone spatula.
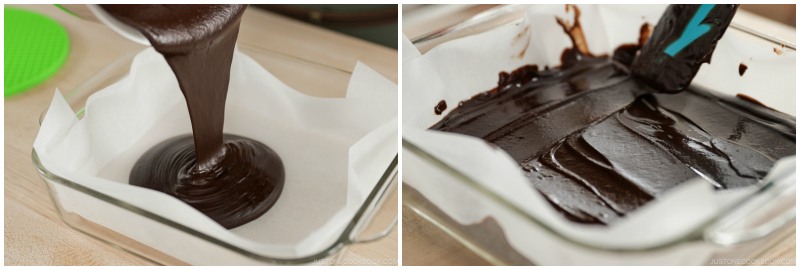
- Tap the baking dish onto the counter a few times to make sure the chocolate is evenly distributed. Refrigerate until firm, about 4–5 hours.
To Cut the Chocolate
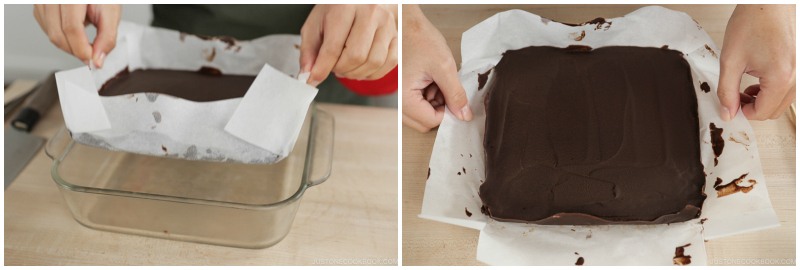
- After chilling for 4–5 hours, remove the chocolate with its parchment paper from the baking dish. Peel away the parchment paper from the sides.
- With a sharp knife, cut off the stray pieces of excess chocolate around the four sides to make sharp corners and edges.
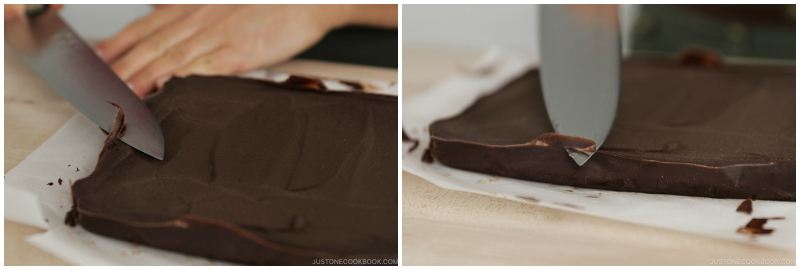
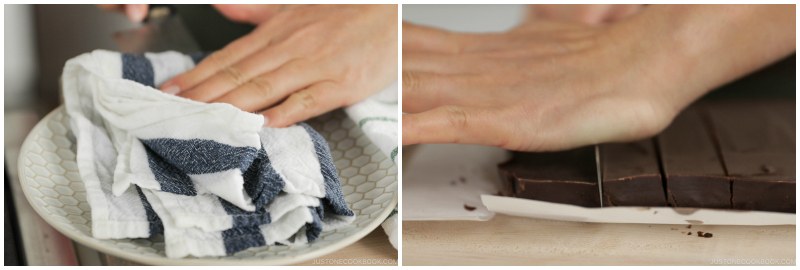
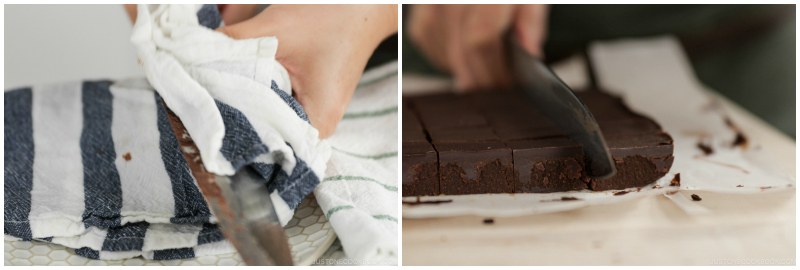
- Warm up the knife with a hot towel. Then, cut the chocolate slab into 1-inch (2.5-cm) strips. Make sure to clean and warm the knife before each cut to achieve a nice sharp cut.
- If your baking dish has curved edges and corners like mine, the edge strips may not be the ideal shape for cutting into neat chocolate cubes. If that‘s the case, cut off and save these chocolate pieces for yourself to enjoy.
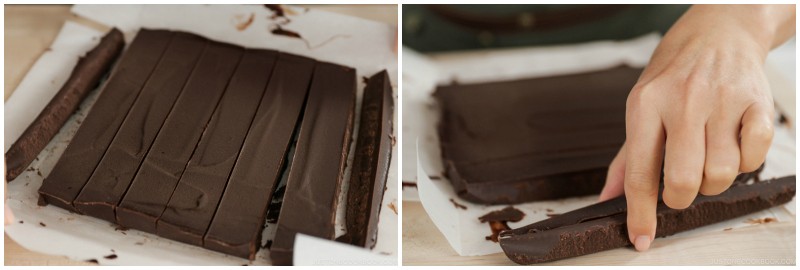
- Next, cut the strips into cubes. Remember to clean and warm up the knife before each cut.
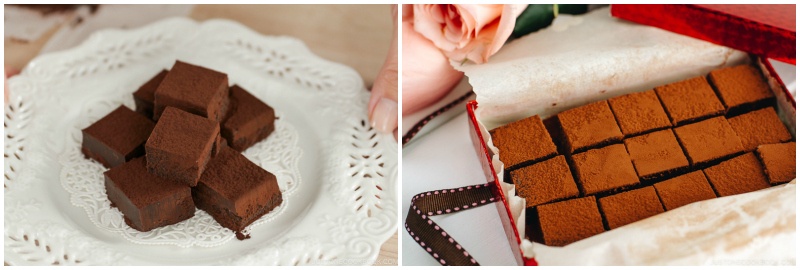
- Using a sugar duster or fine-mesh sieve, sprinkle the cubes on top with Dutch-process cocoa powder. Optionally, if you prefer the powder to completely cover the chocolate, you can dip each piece in the cocoa powder to coat all sides.

To Serve
- Keep the Nama Chocolate refrigerated. Serve it on a plate, or put it in a box as a gift. I recommend letting the chilled and firm chocolate sit at room temperature for 5–10 minutes before serving so it‘s soft enough to melt in your mouth.
To Store
- Keep in an airtight container and store in the refrigerator for up to 4 days or in the freezer for up to a month.
Notes
IMPORTANT: PLEASE READ BEFORE MAKING!
- Separation (when oil comes out of the chocolate) happens when you get the chocolate too hot. Never heat dark chocolate above 120ºF (49ºC) and never heat milk chocolate and white chocolate above 110ºF (43ºC). When chocolate gets too hot, the cocoa butter separates from the solids, and there is no way to salvage it (although you can bake with it and it tastes fine). The best way to prevent separation is to stir the mixture frequently. Since we're not using a double boiler in this recipe, make sure you do not bring the mixture to a full boil. Remove from the heat as soon as you see bubbles around the edges of the saucepan.
- Seizing happens when moisture is introduced to melted chocolate, even a tiny amount of liquid or steam. When this happens, a smooth bowl of liquid chocolate can suddenly become a lumpy, grainy mass. To prevent this, make sure the bowls and utensils that you are using are perfectly dry.
- To learn more details and how to fix overheated or seized chocolate, please read here.
- The ratio of heavy whipping cream and chocolate should be 1:2. Please do not replace the chocolate with white chocolate for this recipe. The ratio is not the same.
Nutrition
Calories: 17 kcal · Carbohydrates: 1 g · Protein: 1 g · Fat: 2 g · Saturated Fat: 1 g · Cholesterol: 7 mg · Sodium: 2 mg · Potassium: 4 mg · Sugar: 1 g · Vitamin A: 73 IU · Vitamin C: 1 mg · Calcium: 3 mg · Iron: 1 mg