
Nama Donuts
Donut lovers, rejoice! Meet the puffiest, pillowy-soft, and heavenly-tasting deep-fried treat: Nama Donuts. Filled with fresh custard cream, these yeast donuts are massively popular in Japan. Satisfy your craving today by making them at home.
Servings: 6
Calories: 439kcal
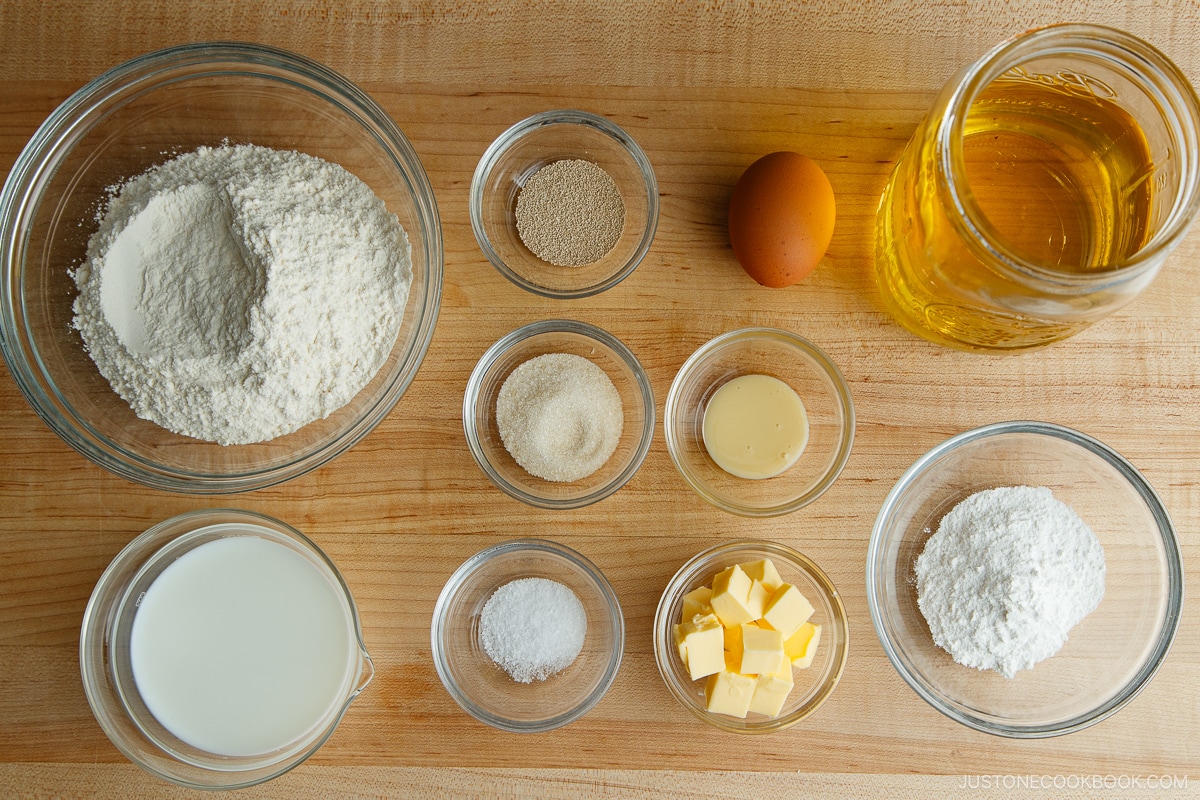
Ingredients
- 90 g whole milk (warmed to 104ºF, 40ºC)
- 3 g active dry yeast (DO NOT use old yeast that‘s more than 6 months old; due to high sugar content, DO NOT use instant dry yeast, unless it's Saf instant yeast GOLD)
- 30 g beaten egg (room temperature; 30 g is a little more than half a large egg)
- 15 g sugar
- 2.5 g Diamond Crystal kosher salt
- 5 g sweetened condensed milk
- 162 g bread flour (I use King Arthur brand)
- 30 g unsalted butter (cut into cubes and room temperature)
For the Custard (optional filling)
- 3 large egg yolks
- 400 g whole milk
- 75 g sugar
- 1 tsp pure vanilla extract (or vanilla beans)
- 30 g cake flour (you can make your own cake flour)
- 15 g unsalted butter
For the Donuts
- 3 cups neutral oil
- confectioners’ sugar (for dusting; I used non-melting snow sugar that you can get from King Arthur or Amazon)
Instructions
Before You Start
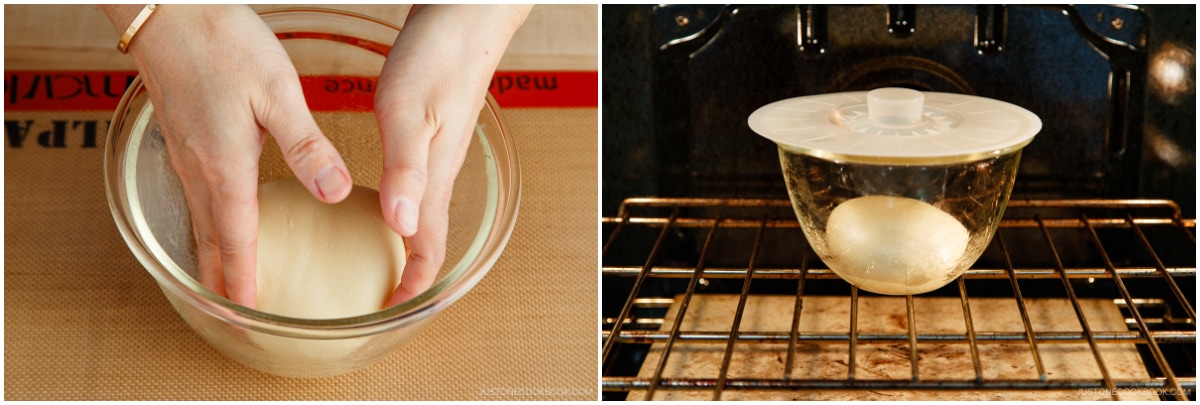
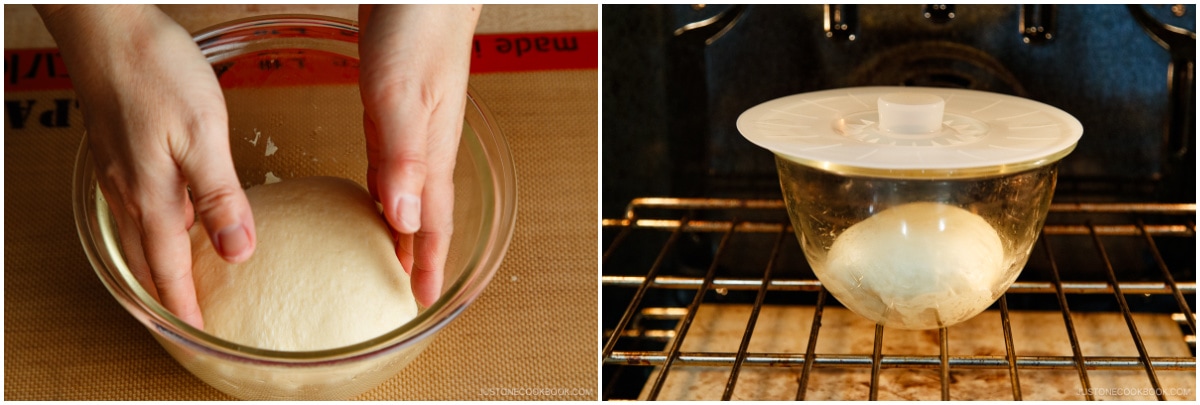
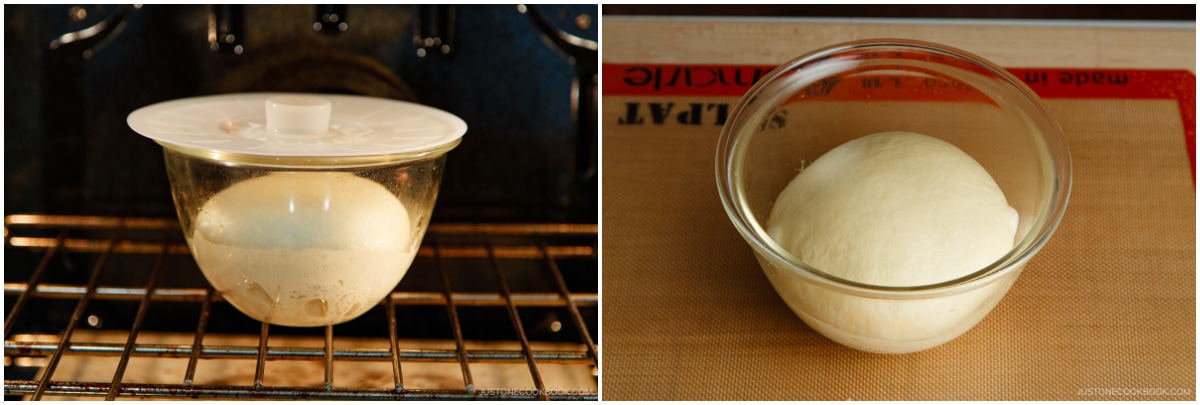
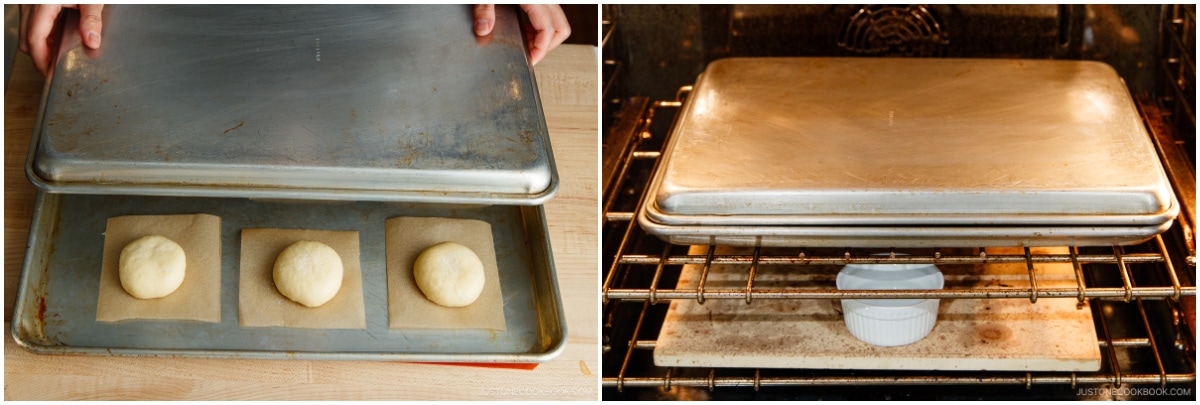
- To Create a Warm Environment for Bulk Fermentation: If your oven has a Proof setting, turn it to 100ºF (38ºC). Otherwise, place small baking dishes of boiling water on the lower-middle rack at the four corners. Then, place your dough in a bowl in the center of the rack and close the door. The steam and heat from the boiling water will create a warm environment for bulk fermentation. You can also proof bread dough with an Instant Pot using the Yogurt function on Low or the temperature setting. During the summer when humidity is high, you may not need to create a special environment.
To Make the Dough
- Gather all the ingredients. Precise measurement is extremely important for this recipe; therefore, please weigh your ingredients with a digital kitchen scale. My ingredients are premeasured here, but with a kitchen scale, you can press the Tare or Zero button to add each ingredient so you don‘t need any measuring spoons or prepping bowls.
- Warm up 90 g whole milk to 104ºF (40ºC) in the microwave. It should be warm, barely above body temperature. Add the milk to a stand mixer bowl. Tip: The milk can‘t be warmer than 110ºF (43ºC) or the yeast will die.
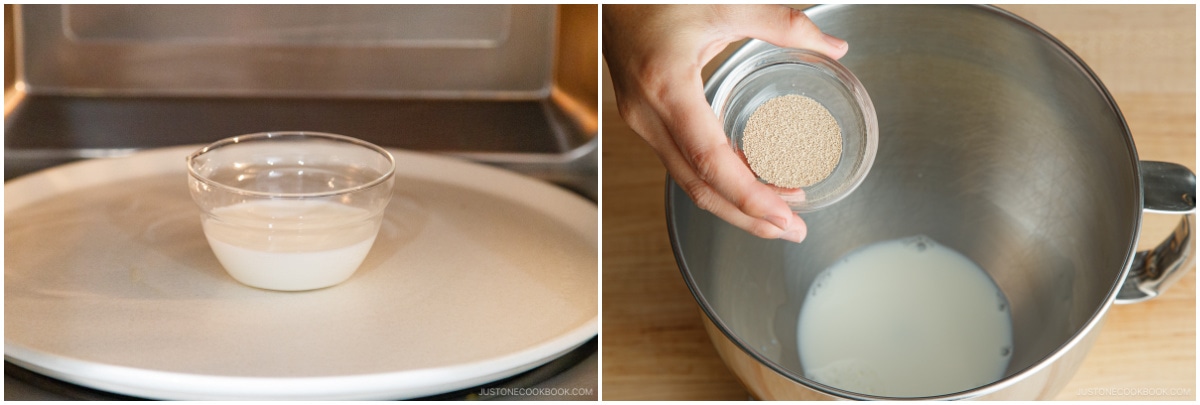
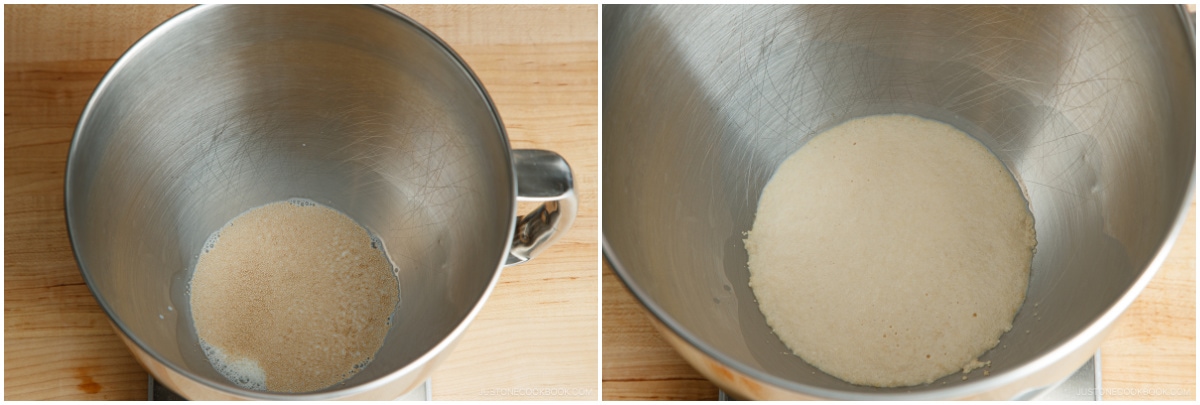
- Add 3 g active dry yeast to the milk. Give the mixture a quick stir, then allow it to sit for 10 minutes. The mixture will become foamy as proof that the yeast is alive. Tip: Proofing active dry yeast ensures that it will work in your dough. If the mixture does not get foamy, then you need new yeast. If your yeast is near its expiration date or you opened it more than a few months ago, it may no longer be alive.
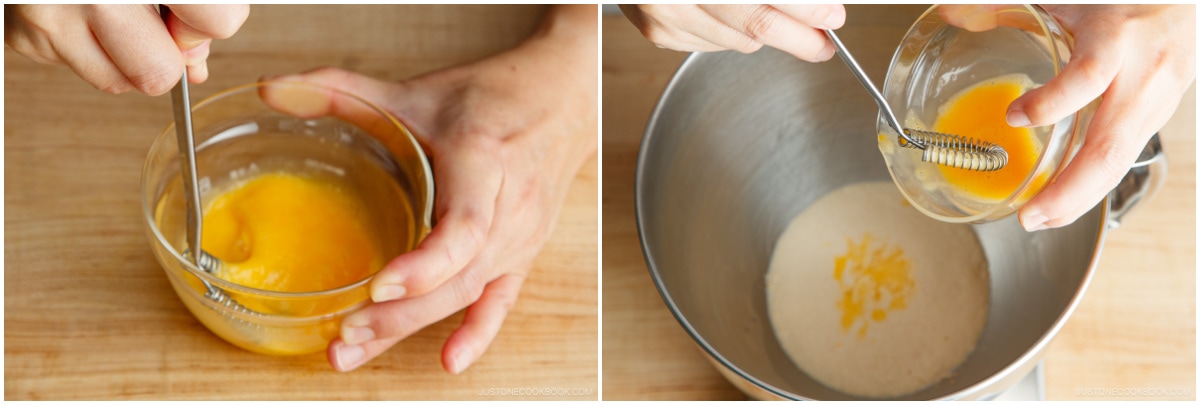
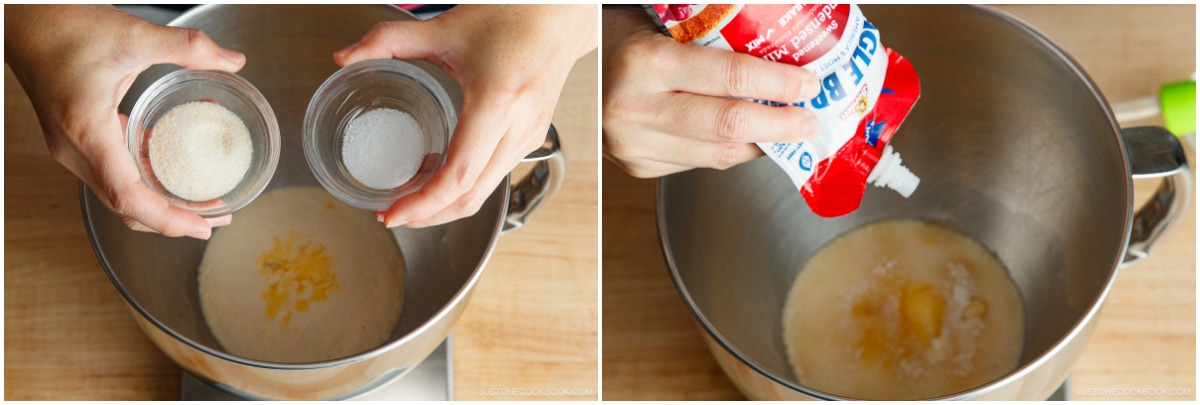
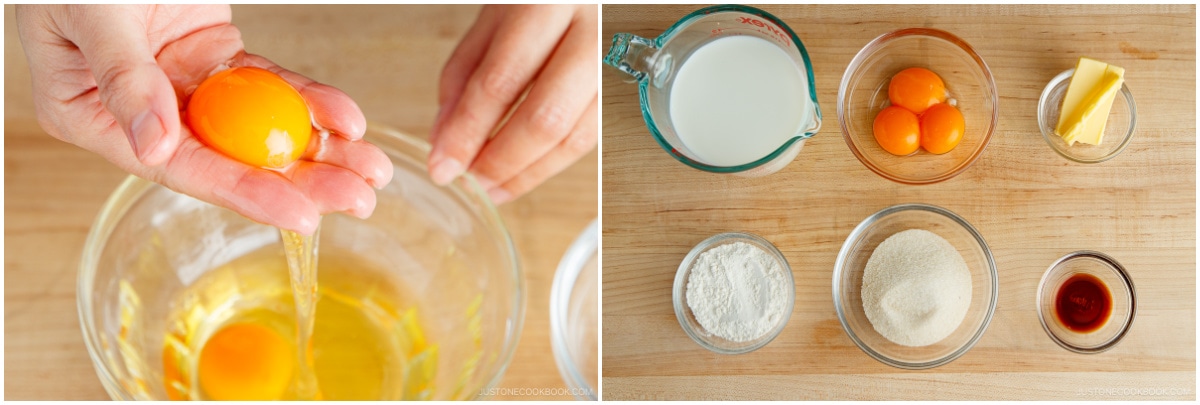
- Whisk the egg well, making sure the yolk and white are mixed well. Measure 30 g beaten egg and carefully drizzle it into the milk mixture.
- Next, add 15 g sugar, 2.5 g Diamond Crystal kosher salt, and 5 g sweetened condensed milk. Does salt kill yeast? No, don‘t worry.
- Add 162 g bread flour and 30 g unsalted butter (cubed).

To Knead the Dough in the Stand Mixer
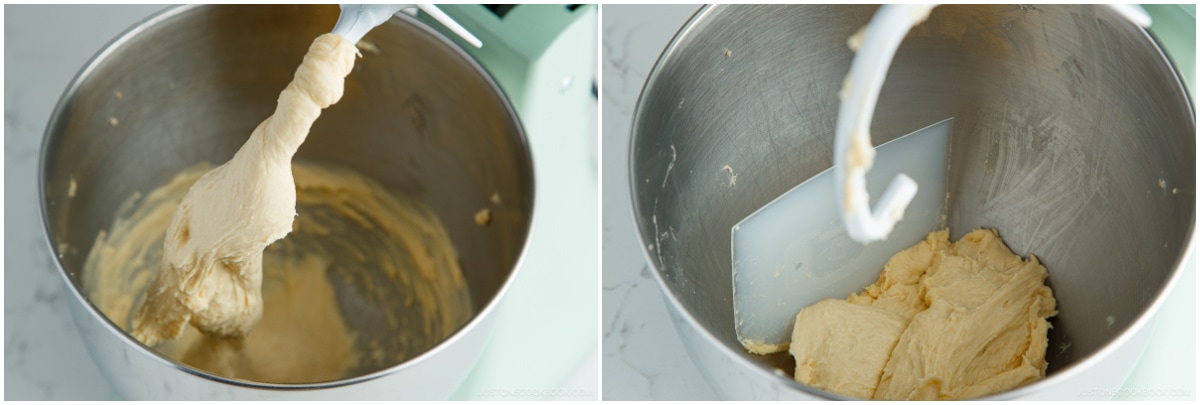
- Attach the bowl to your stand mixer fitted with a paddle attachment. Stir until the flour is incorporated, about 15 seconds. Then, switch to Speed 4 until there are no longer any streaks of butter, about 30–45 seconds.
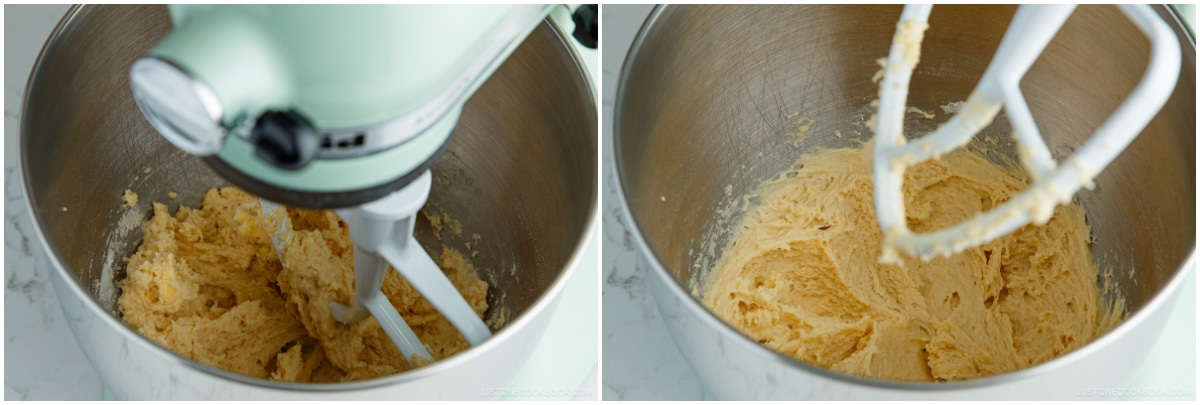
- Stop the mixer and scrape the dough from the bowl‘s sides with a dough scraper. Remove the paddle attachment and switch to a dough hook attachment. Then, start kneading on Speed 8 for 3 minutes (#1). Tip: If you‘re doubling the recipe, hold onto the stand mixer to keep it from rocking and moving.
- Stop the mixer, lift the hook, and scrape down the sides of the bowl.
- Knead on Speed 8 for another 3 minutes (#2). Tip: Knead on high speed to develop the gluten (elasticity) by lengthening and stretching the gluten strands in the dough.

- Stop the kneading, lift the hook, and scrape down the sides again.
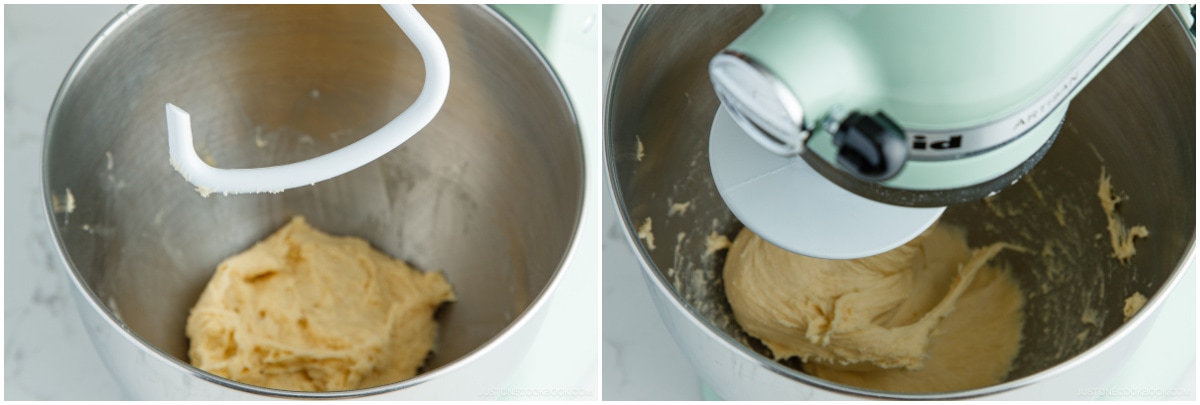
- Again, knead on Speed 8 for another 3 minutes (#3). During this time, the dough will become a solid mass and may cause the machine to rock and move, so you may want to hold down the mixer. You will see the dough start to separate from the bottom of the mixer bowl.
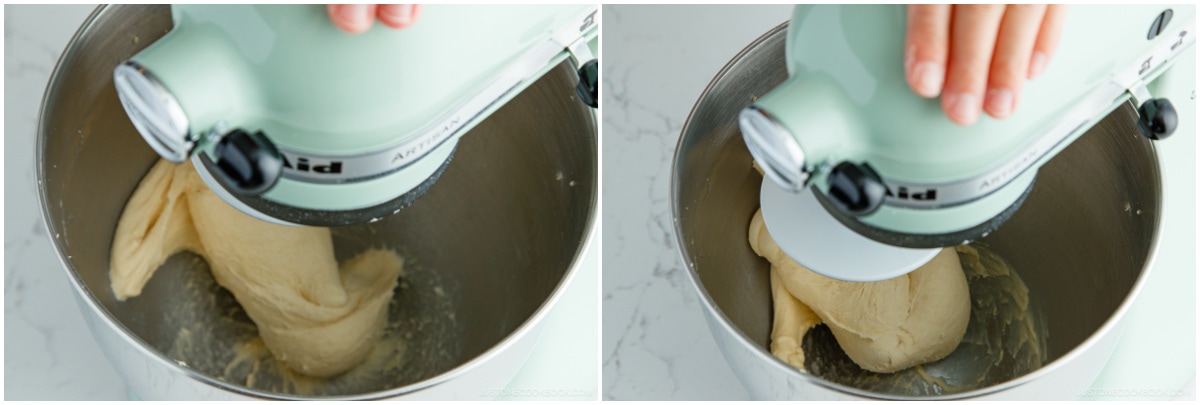
- Stop the mixer and lift the hook. We want to make sure the dough hook should be able to lift the entire dough mass. Not there yet, but almost there. Scrape down the sides.
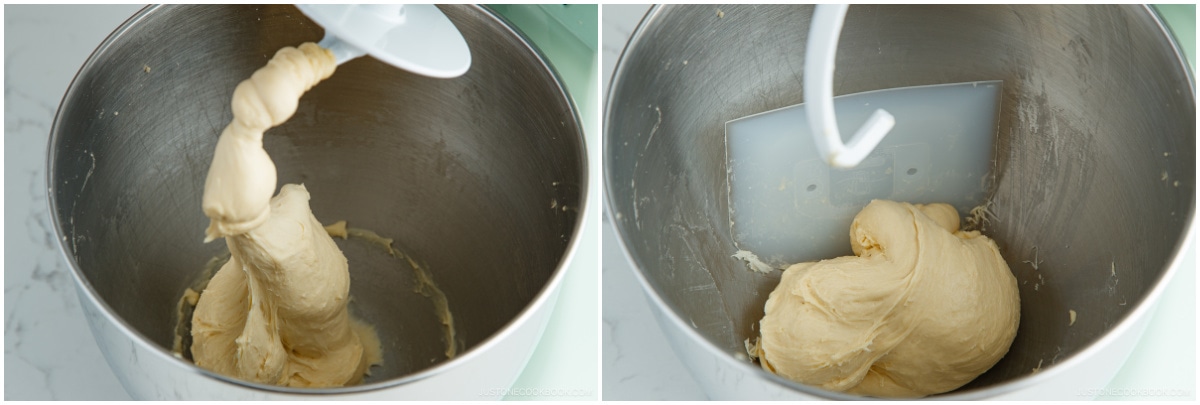
- Knead on Speed 8 again, but this time, I set the timer for 1–2 minutes (#4) since it's getting close. While kneading, you will see the dough separate from the bottom of the mixer bowl.
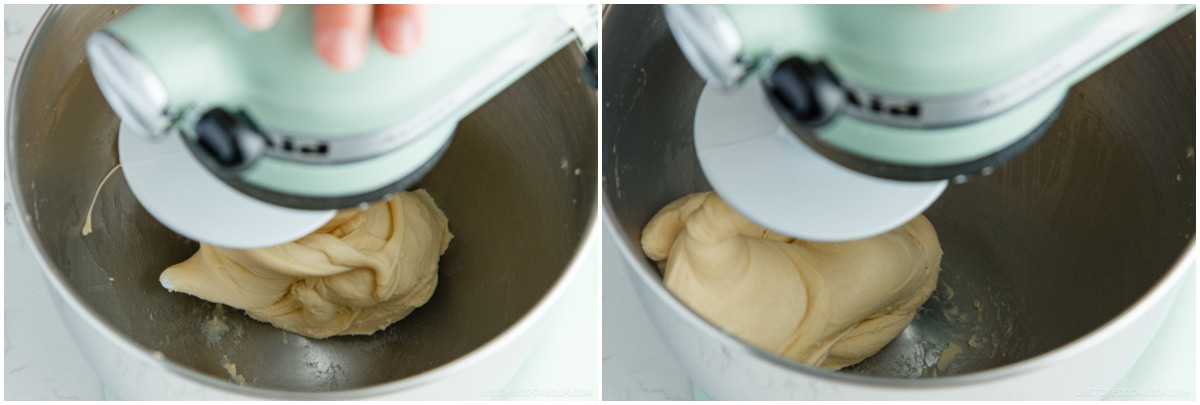
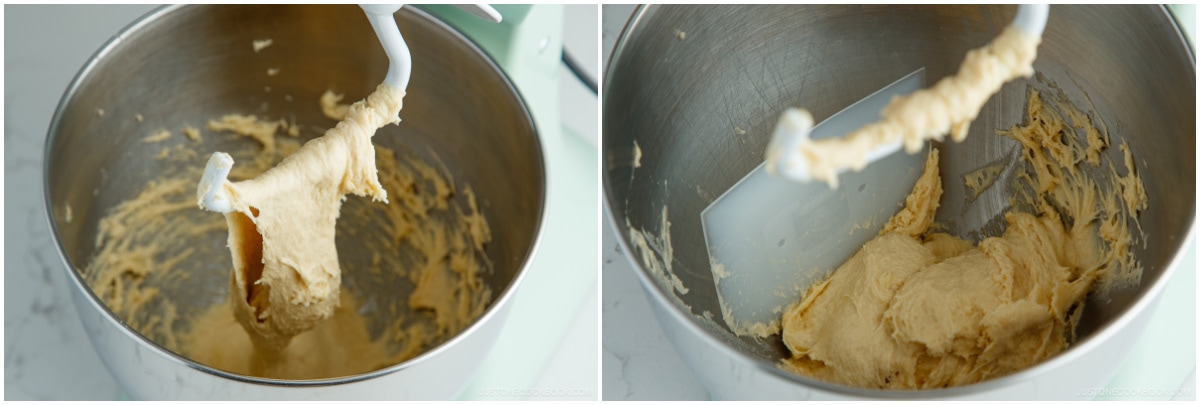
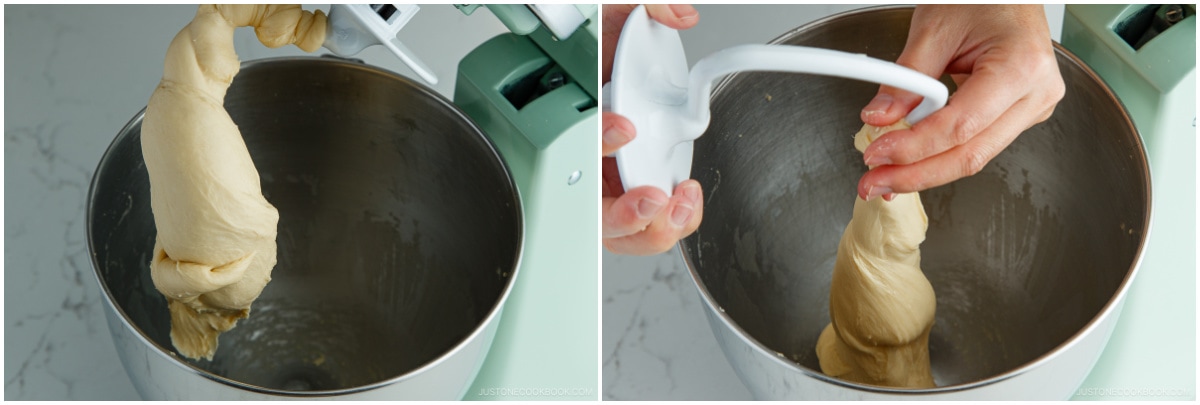
- Stop kneading and lift the hook. It should pick up all the dough in one piece. Yes! Now, knead on Speed 4 for 1 minute (#5) to loosen up and smooth out the dough.
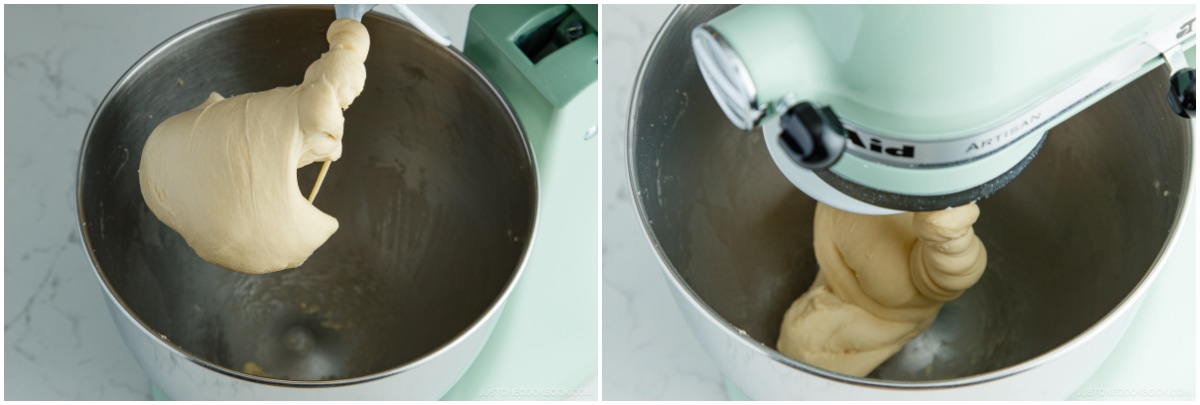
- The final dough should look shiny, silky, soft, and smooth (not sticky). Stop kneading, lift the hook, and release the dough from the hook.
To Slam and Roll the Dough
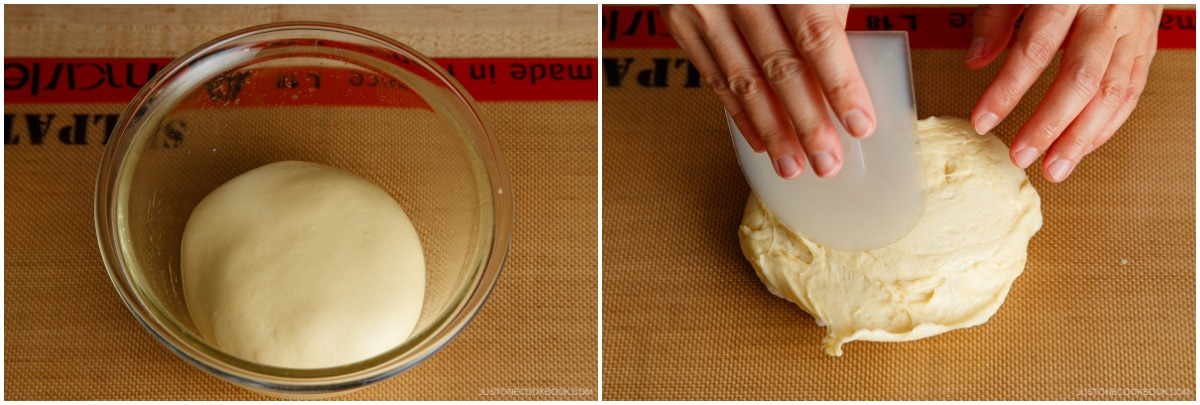
- Line your work surface with a nonstick silicone baking mat (I use Silpat), if you have one. Otherwise, lightly dust your work surface with bread flour. Use a dough scraper to carefully remove the dough from the bowl, keeping the smooth surface intact. Remember to keep one smooth surface on your dough at all times. Place the dough, smooth side up, on the silicone mat. Now, pick it up and slam the dough‘s smooth side onto the work surface. Bang!
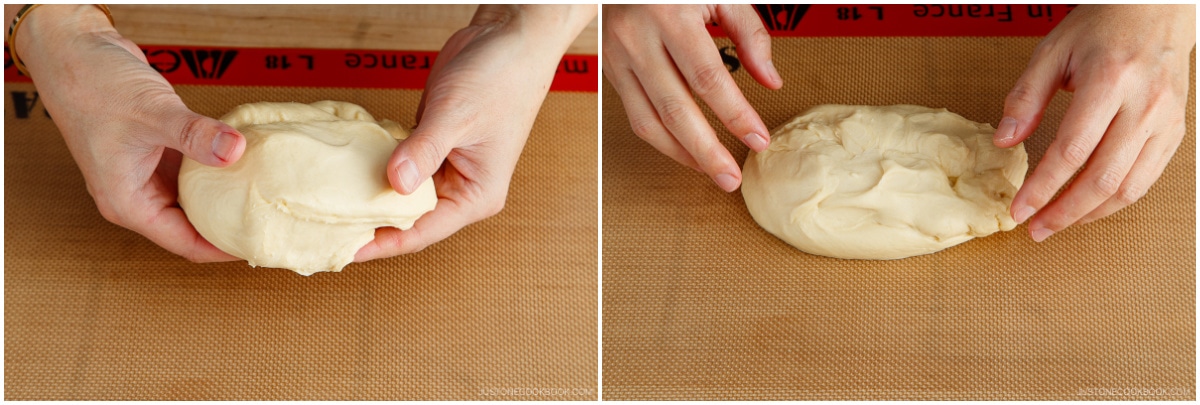
- Roll up the dough to the opposite side, revealing the smooth surface.

- Pick up the dough roll with the smooth side up (seam side down). Change the direction of the roll 90 degrees so it‘s vertically oriented. Now, slam the smooth surface of the dough onto the work surface a second time. Bang!
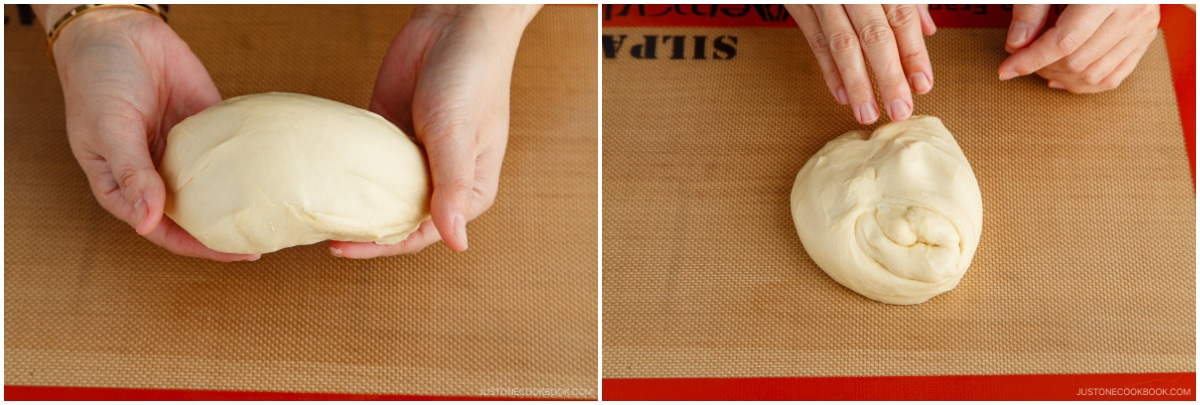
- Roll the dough a second time: Hold one edge of the dough and gently roll it up to the opposite side.
- Change the direction of the dough roll again. Then, slam the dough a third time.
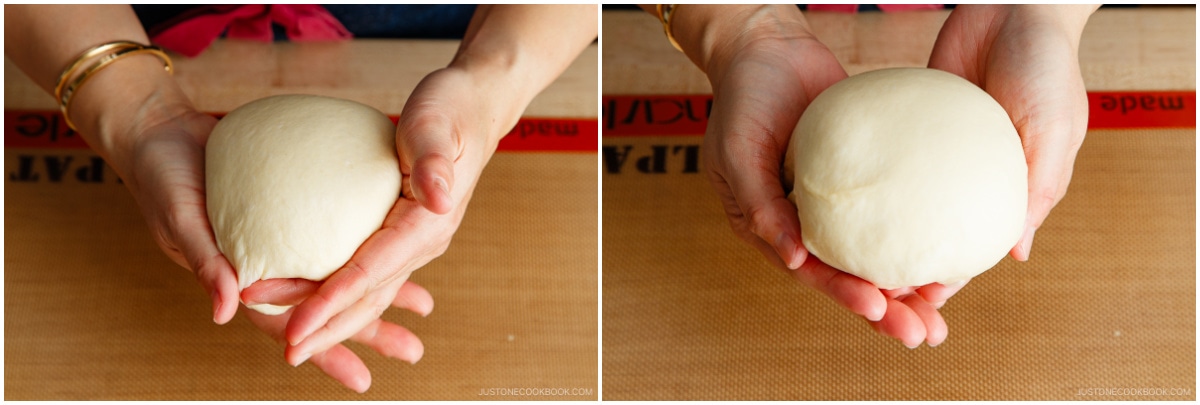
- Roll the dough a third time. Repeat this “slam, roll, and change the direction" process, until the dough ball has a smooth, taut skin. Then, pick it up and pull down the edges on all sides. Tip: If you kneaded the dough well, you may only need to repeat this 3–4 times. If you didn‘t knead enough, it might require 8–10 times.
- Once the skin is smooth and taut, tuck the edges underneath to hide them at the bottom.
The First Rise (Bulk Fermentation)
- Very thinly coat a medium bowl with neutral oil and place the dough inside. Cover the bowl with plastic. Let the dough rise until it becomes 3 times bigger in size, about 60 minutes. Halfway through at 30 minutes (you can set a timer), re-roll the dough ball; skip ahead to learn how. Tip: If you live in a cooler climate, it may take 1–1½ hours to triple in size. I use the Proof setting on my oven at 100ºF (38ºC). Please see the “Before You Start“ section for my proofing tips.
To Make the Custard
- Meanwhile, gather all the ingredients to make the custard filling.
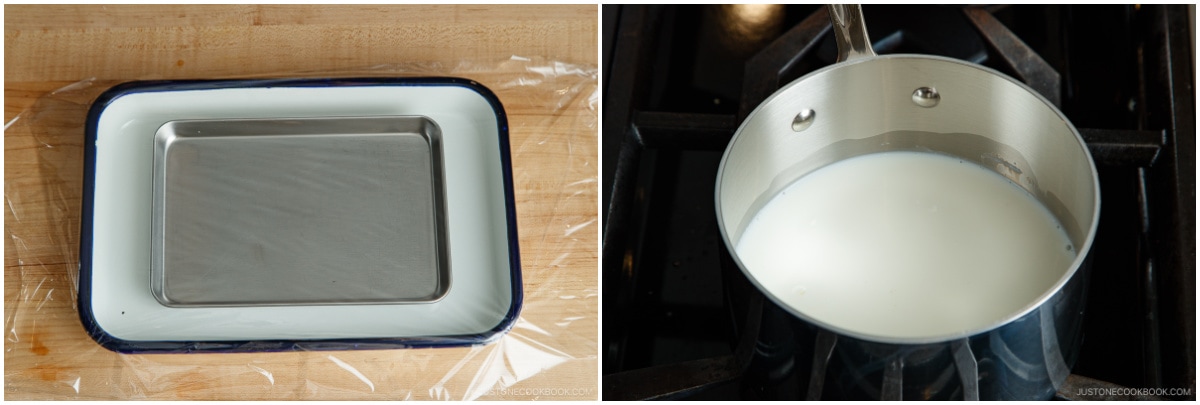
- Prepare a small rimmed tray and place a large sheet of plastic wrap on top, generously overlapping the edges. In a small saucepan, heat 400 g whole milk on low heat and slowly bring it to a bare simmer, or until bubbles start to appear around the edges. If you‘re using a vanilla bean, make a slit lengthwise on the bean pod, scrape off the vanilla seeds with a knife, and add to the milk.
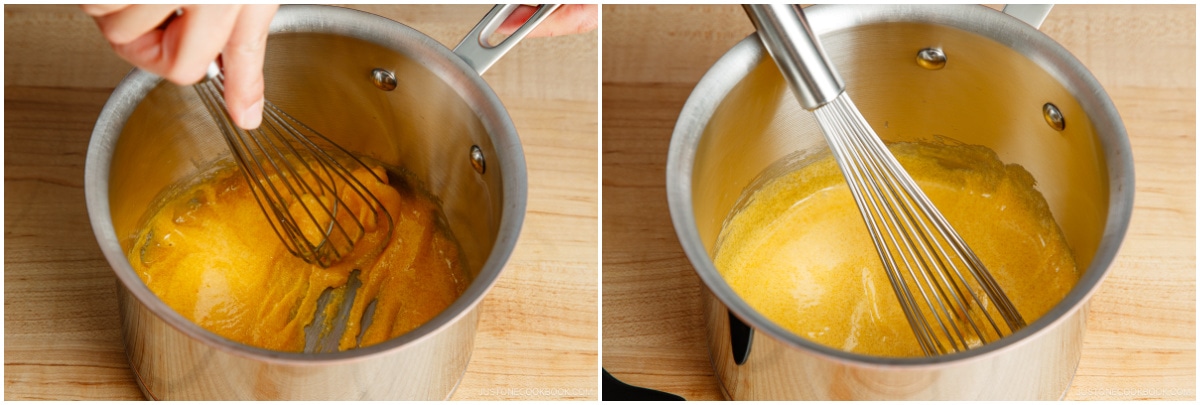
- While waiting for the milk to heat, set another small saucepan on your work surface; we‘ll start the egg mixture off the heat. Add 3 large egg yolks and 75 g sugar and whisk to combine.
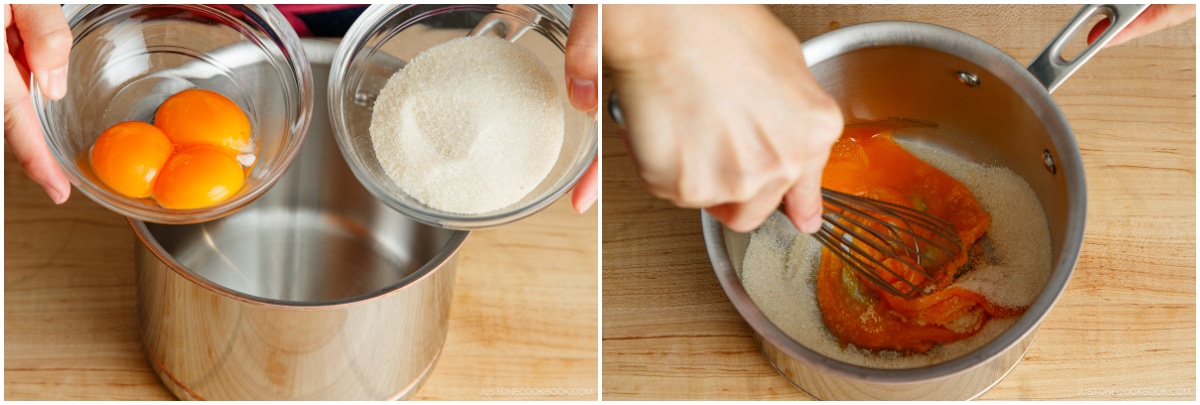
- Whisk the egg mixture until it turns pale yellow.
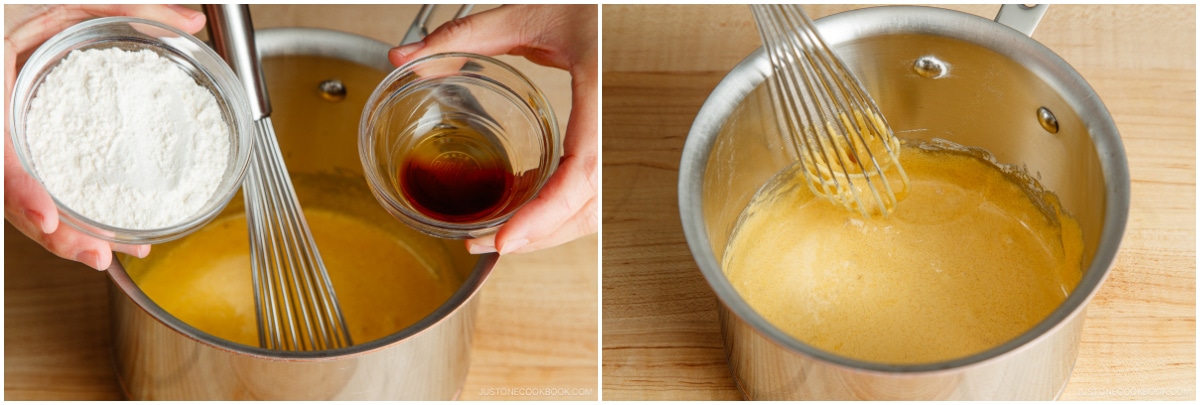
- Add 1 tsp pure vanilla extract to the egg mixture and stir well. Then, add 30 g cake flour and combine well. Keep this egg mixture to the side while you wait for the milk to come to a bare simmer; it‘s ready when bubbles start to appear around the edges.
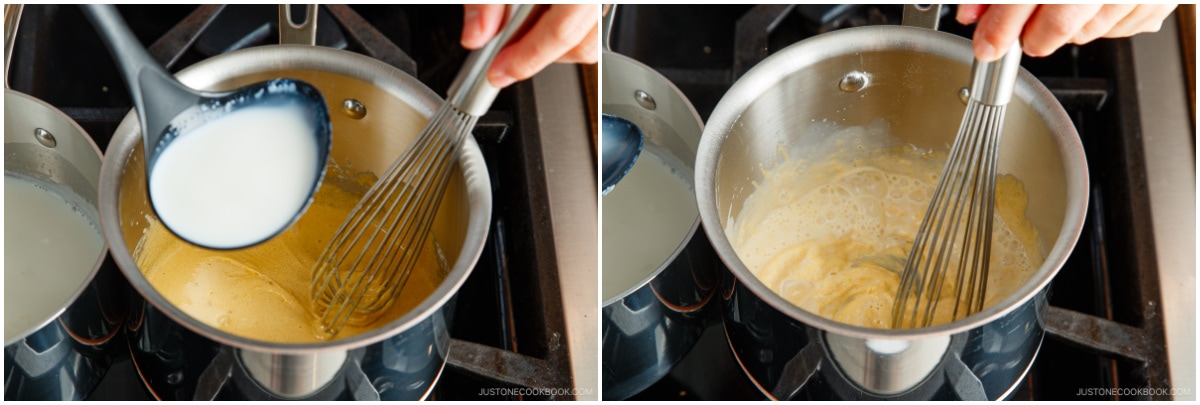
- When the milk is ready, temper the eggs: Gradually add a small portion of the hot milk to the cold egg mixture and quickly whisk to combine completely to avoid scrambling the eggs. Then, add another portion and whisk to combine completely.
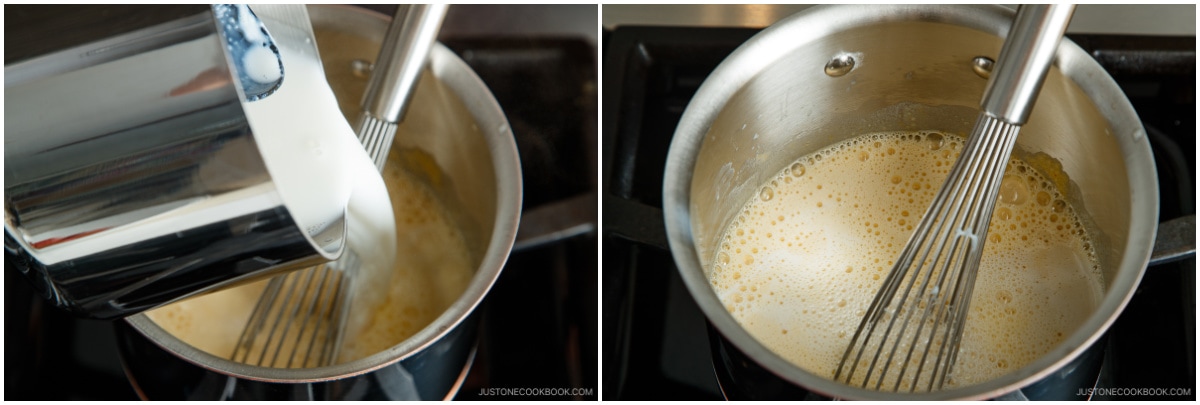
- Add the rest of the hot milk and whisk to combine.
- Now, cook the custard: Heat the saucepan over medium heat and cook, whisking continuously, until thickened. Keep whisking and do not walk away from it.
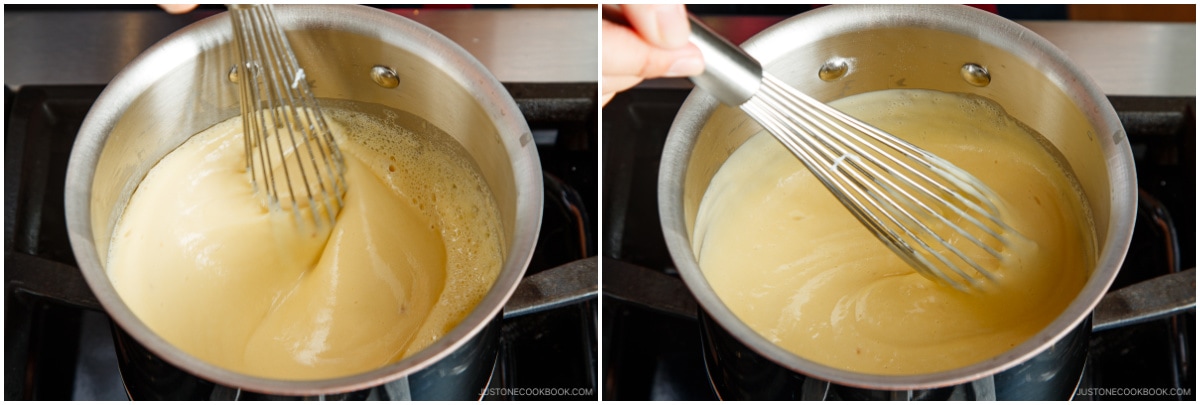
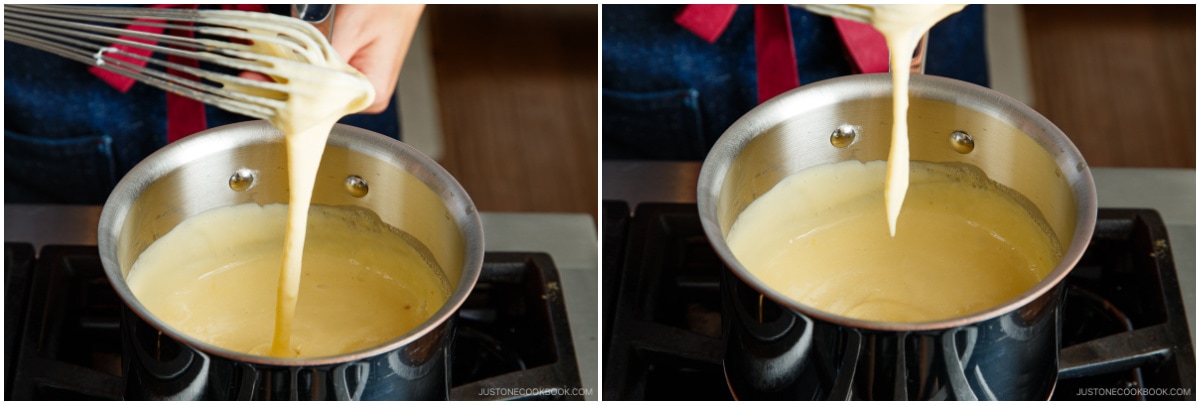
- The custard is done when you lift the whisk and the custard falls in ribbons at first, then drips. Immediately remove from the heat. Tip: The custard will continue to cook and thicken with the residual heat, so it should be runnier at this stage than your desired finished consistency.
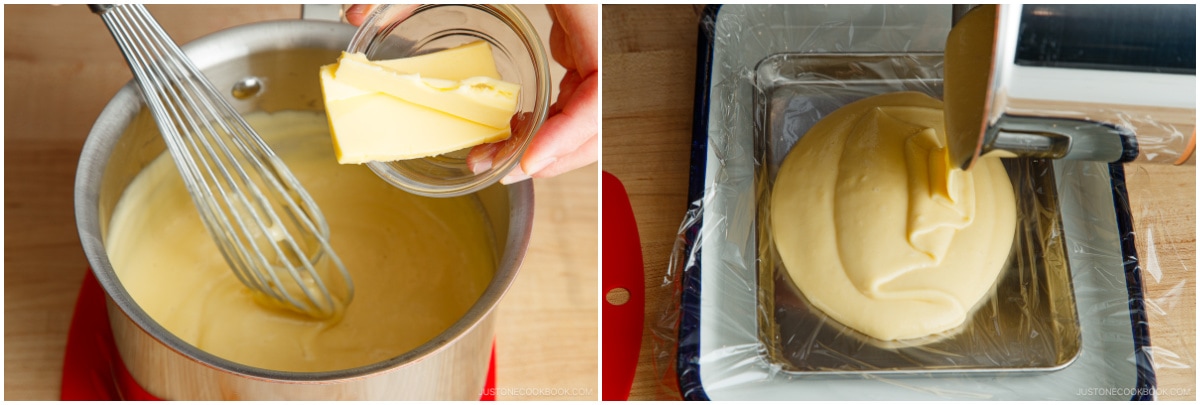
- Add 15 g unsalted butter and whisk to combine. (To make a chocolate custard, add 40 g baking chocolate chips at this stage.) Then, pour the custard directly on the plastic wrap in the prepared tray.
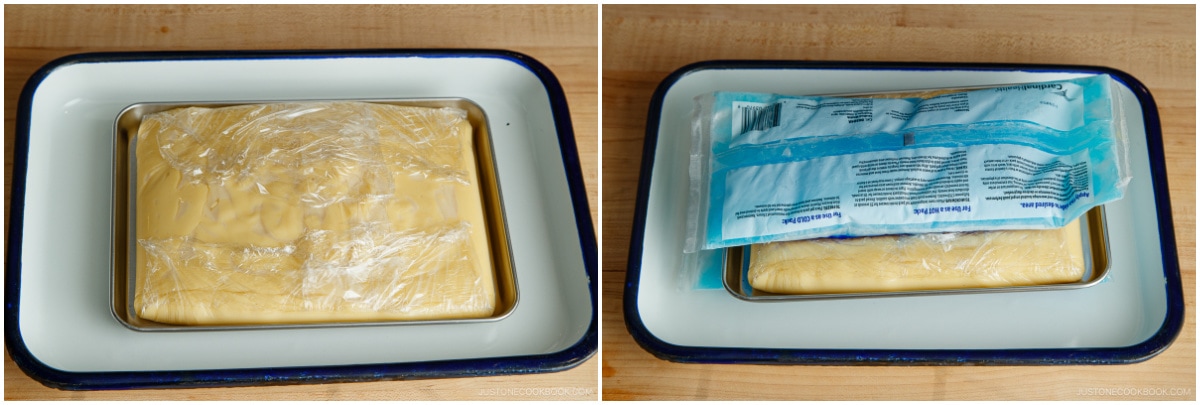
- Wrap the custard tightly with the plastic wrap, releasing the air. Cool immediately by placing ice packs or a bag of ice cubes on top. Once cooled, keep the custard in the refrigerator until ready to use. Tip: You can make this homemade custard ahead of time, since it keeps for 2–3 days in the refrigerator.
To Re-roll the Dough Ball (after 30 minutes)
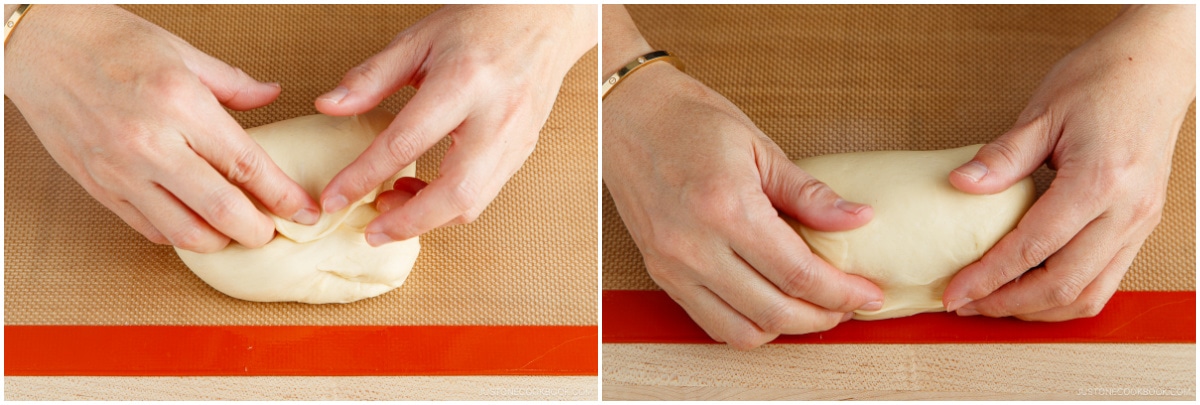
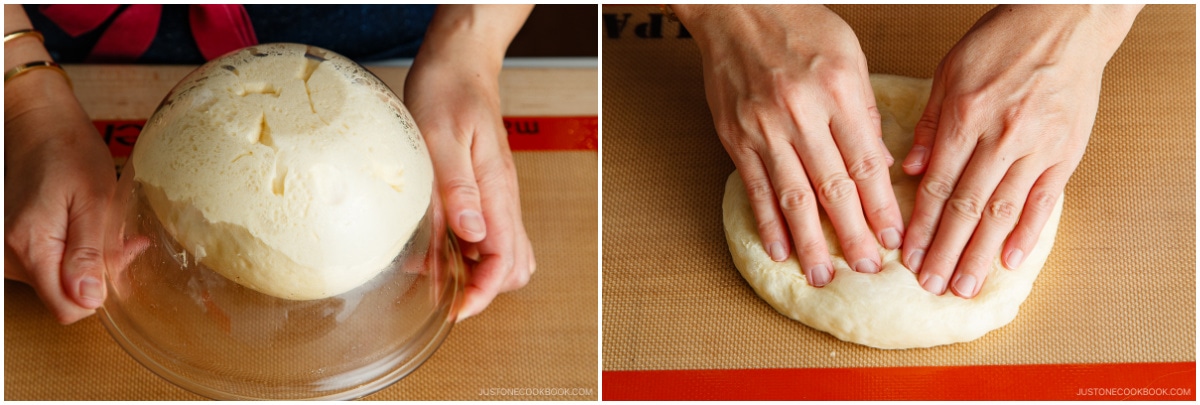
- Halfway through the first rise (at the 30-minute mark), uncover the dough and invert the bowl to release the dough onto your work surface, smooth side down.
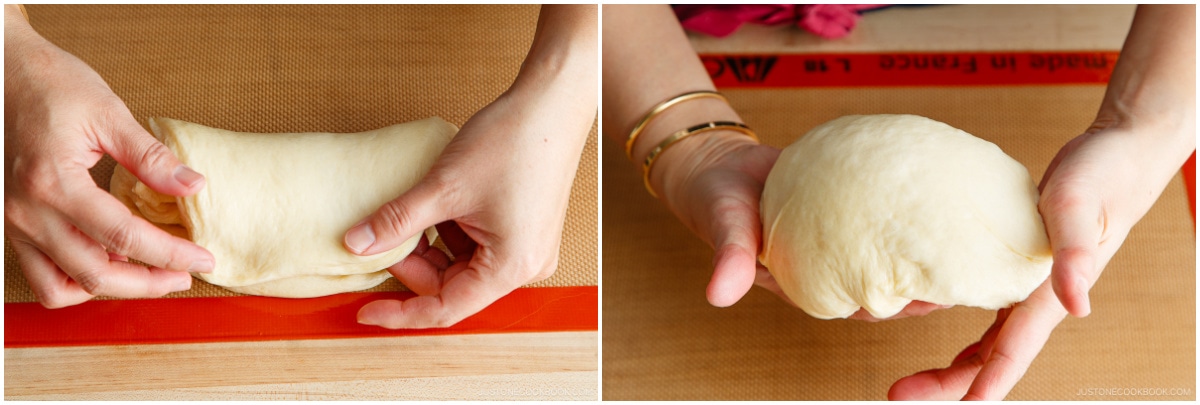
- Hold one edge of the dough with your fingers and gently roll it up to the other side, revealing the smooth surface. Remember to keep one smooth surface on your dough at all times. Gently pick up the dough.

- Pull down the edges of the dough from all sides to create a smooth, taut skin. Tuck the edges underneath to hide them at the bottom. Tip: Re-forming the dough ball at this point gives the dough strength and power to expand better and faster.
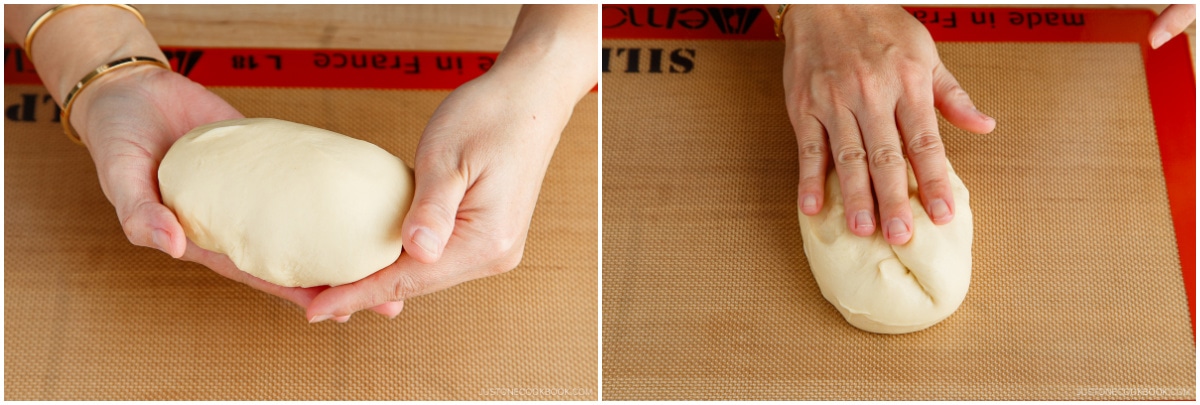
- Put the dough ball back in the bowl, smooth side up. Cover it with plastic and continue with the First Rise (30 more minutes).
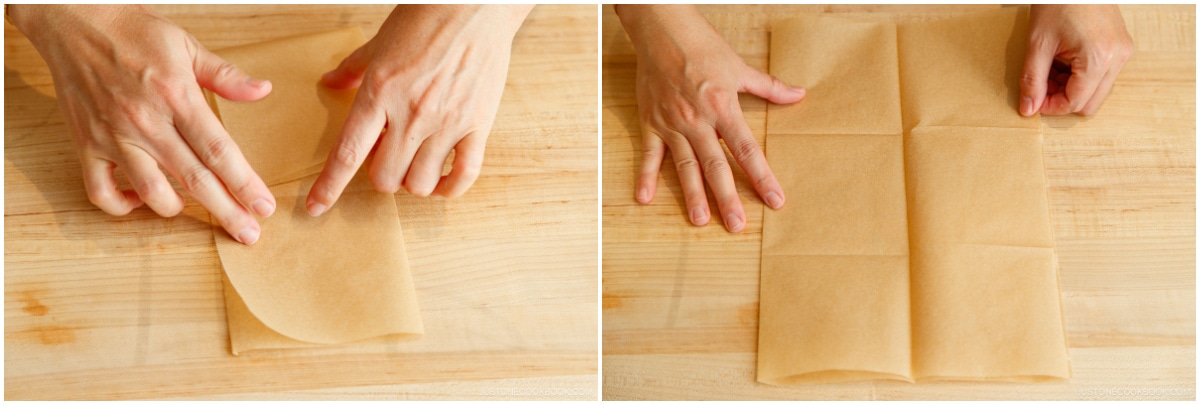
- Meanwhile, cut 6 squares of parchment paper, each 4 x 4 inches (10 x 10 cm). With a precut parchment sheet, you can make 12 squares.
To Deflate the Dough
- After 30 minutes, see if your dough has tripled in size.Tip: Do the Finger Test to check if your dough is ready. Dust some flour on top of the dough and poke your index finger in the middle. If the hole does not close up when you remove your finger, it’s ready. If the dough closes up immediately, proof the dough a little longer and test again.
- Invert the bowl to release the dough onto your work surface. Using your fingers, gently press down and deflate the air bubbles in the dough. Remember to keep one smooth surface on your dough at all times. My smooth surface is currently on the bottom of the dough.
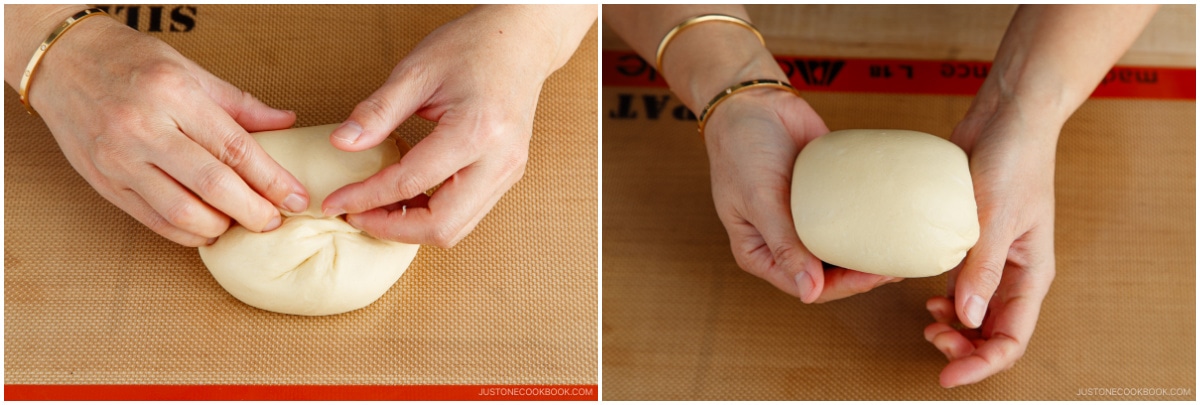
- Hold one edge of the dough and gently roll it up to the opposite side, revealing the smooth surface. Form a round shape, tucking any loose edges underneath.
To Divide and Shape the Dough
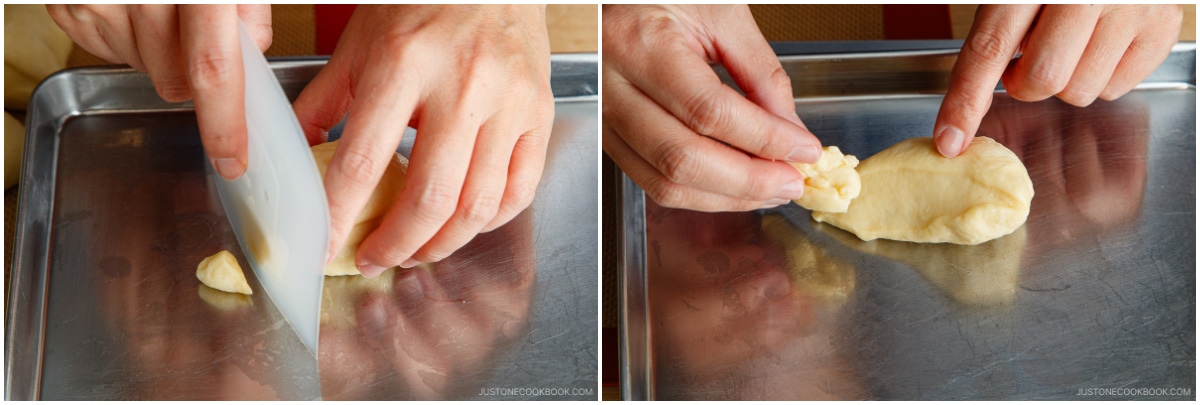
- Using a kitchen scale, weigh the dough; mine weighed 325–327 g. Then, divide it into 6 equal pieces with the dough scraper.
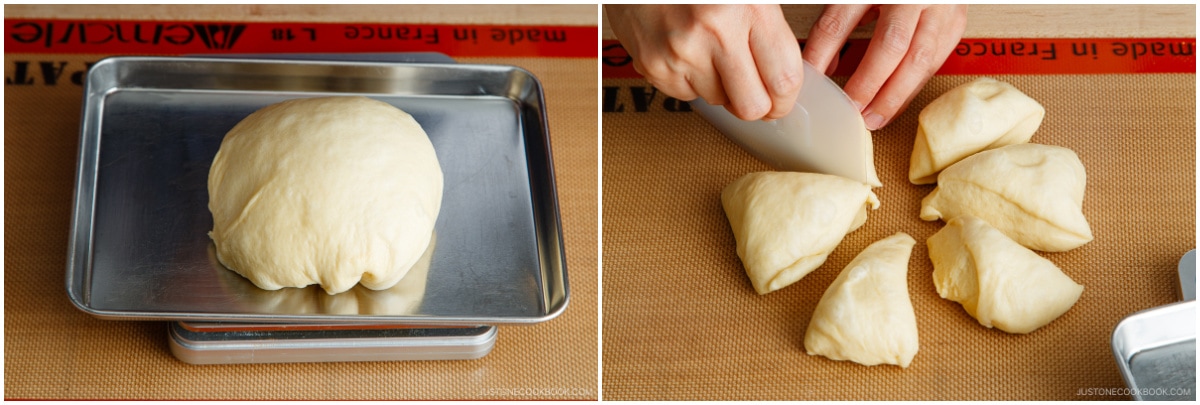
- If you have a piece that‘s bigger than the others, tear off some dough from the edge, keeping its smooth surface intact. Attach the torn dough to the edge of a piece that‘s smaller than the others.
- Using your palm, press down and deflate each piece of dough. Form each piece into a ball with a smooth, taut skin: Hold the dough with the smooth surface on top. Gently pull down and tighten the dough from all sides to create tension on the outside.
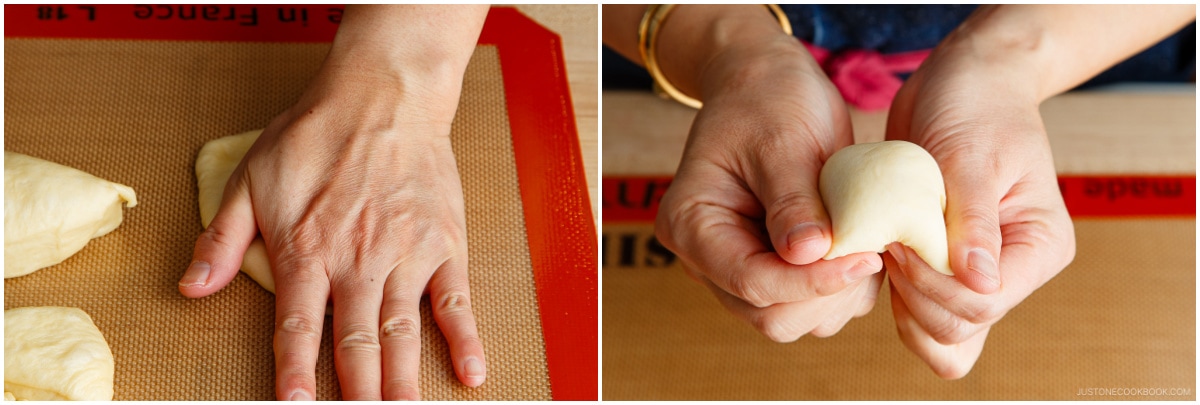
- We want all 6 dough balls to rise equally, so limit the pulling action to roughly the same for each ball, about 3–4 times total. Tuck and pinch the loose dough at the bottom. Tip: If you don't pinch it together really well, the dough expands during the final rise or deep-frying, and the back side of the dough won't look pretty.
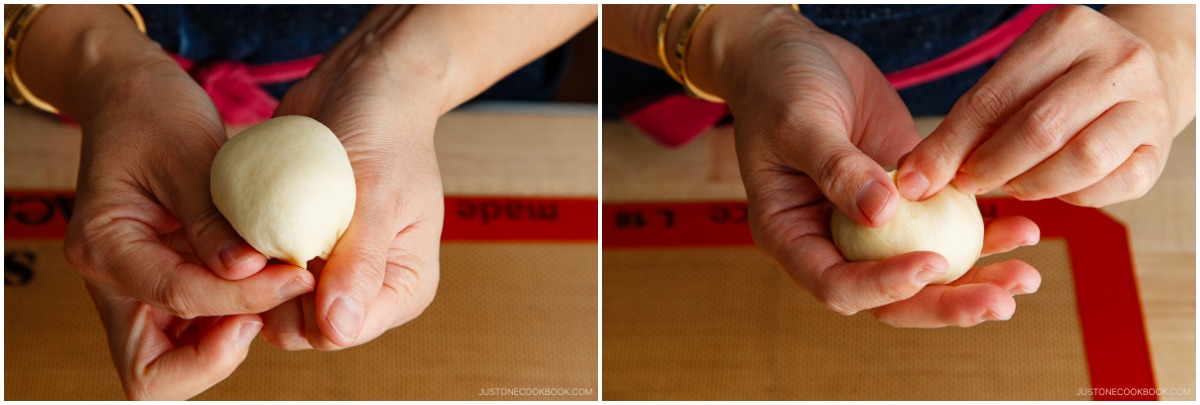
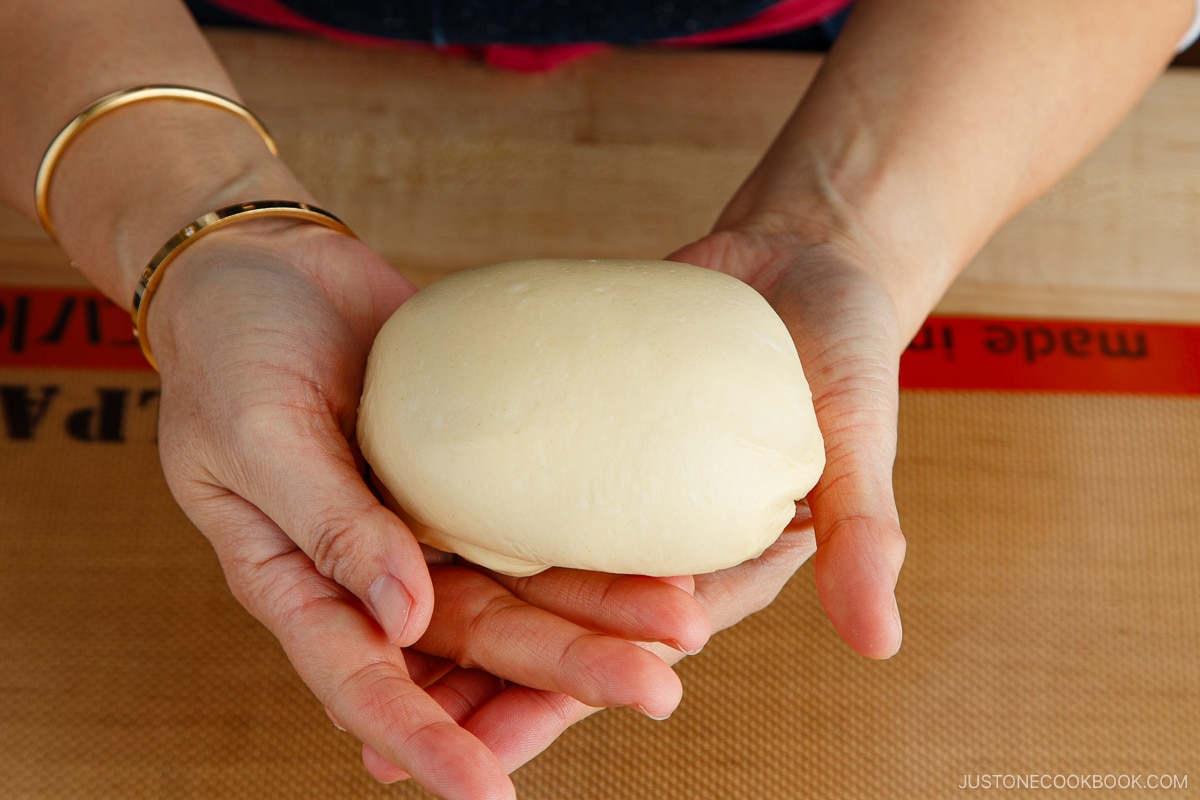
- You can roll it around in your hand on a non-dusted surface as well. The pinched dough should be smooth. Place the dough on a parchment square on a baking sheet. Repeat this process for the rest of the pieces.
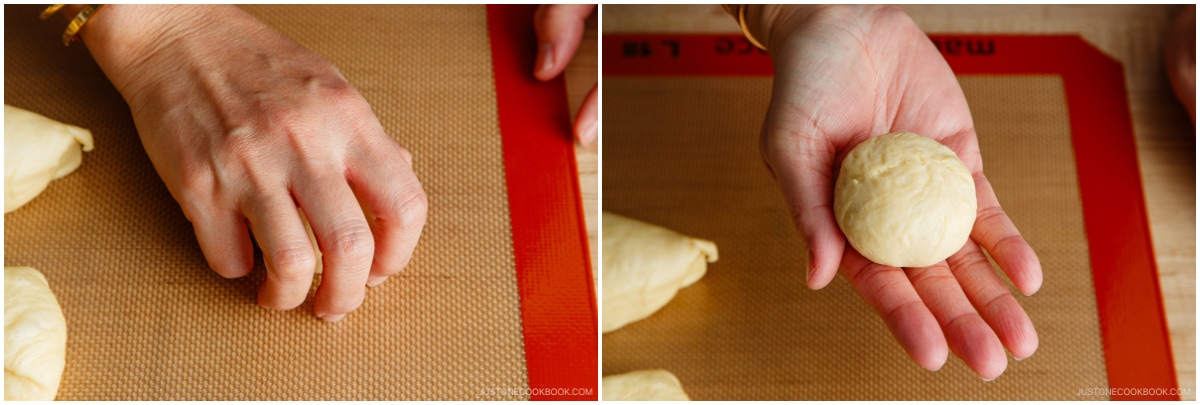
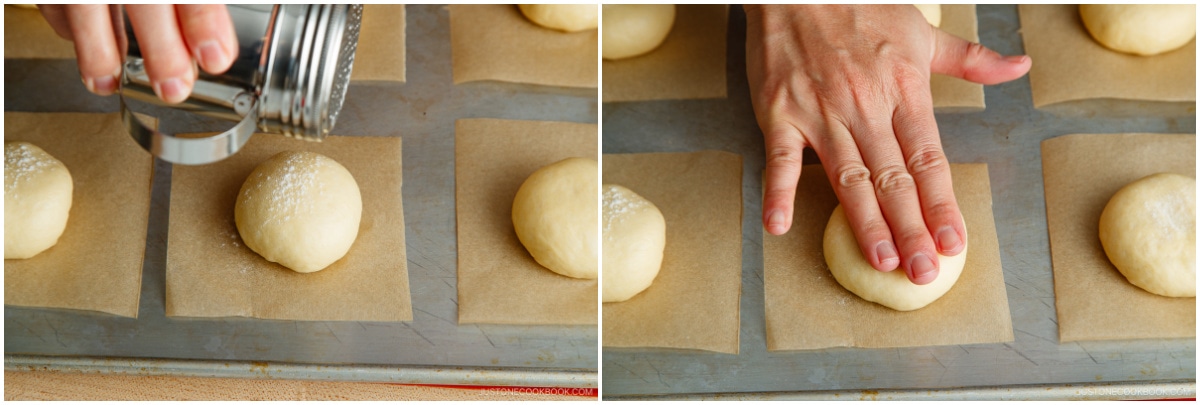
- Dust a little bit of bread flour on top and gently press down to flatten the rounded top of the dough.
The Final Rise (Proofing)
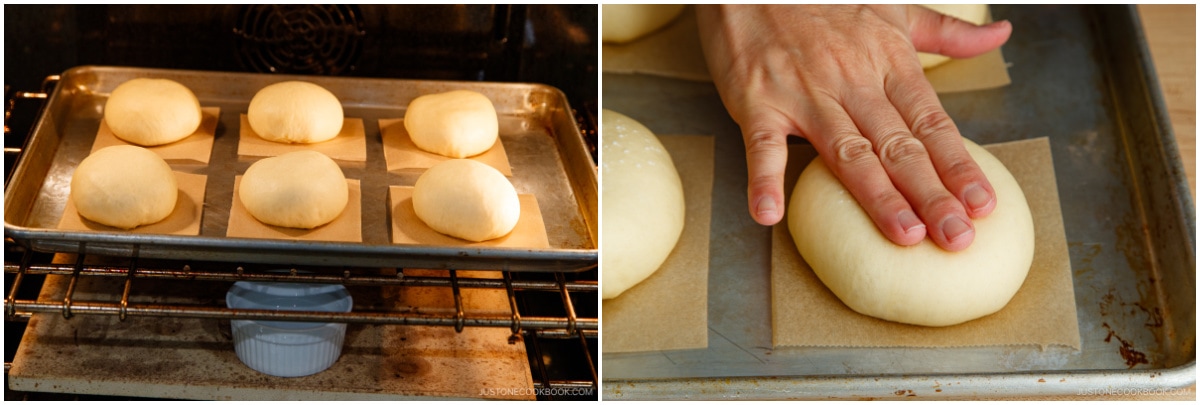
- Cover the dough with another baking sheet and place in your oven to proof. Add more boiling water to the dishes in your oven to create a humid proofing environment. Proof until the dough doubles in size, about 40–50 minutes.
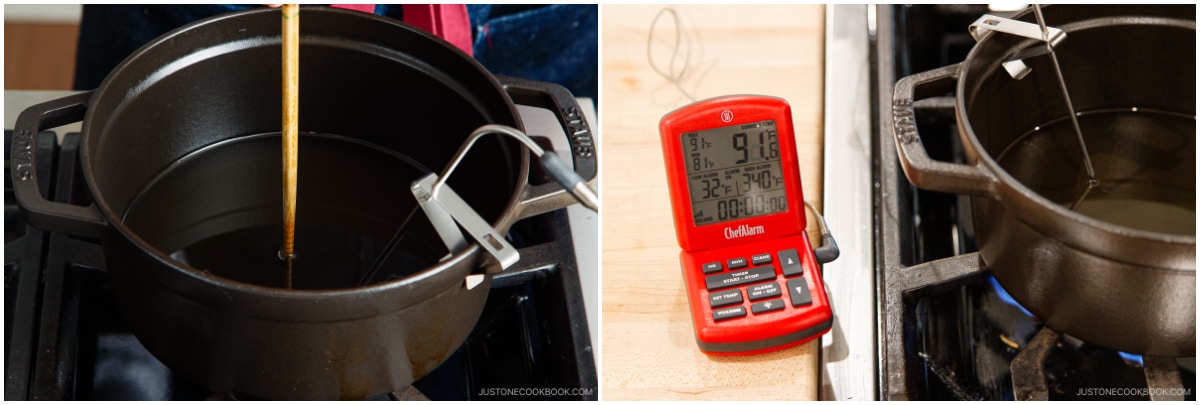
To Deep-Fry the Dough
- To a Dutch oven (I love this 2.75-quart Staub Cast Iron Round Cocotte) or heavy-bottomed pot, add 3 cups neutral oil or as much needed for 1 inch (2.5 cm) of oil in the pot. Heat over medium heat and bring it to 340ºF (170ºC). Set up a thermometer, if you have one. I highly recommend the ThermoWork’s ChefAlarm. Set the alarm on your thermometer to a low of 300ºF (150ºC) and a high of 340ºF (170ºC).
- When the dough balls have doubled in size, dust some bread flour on top and gently press down to flatten the rounded top of the dough.
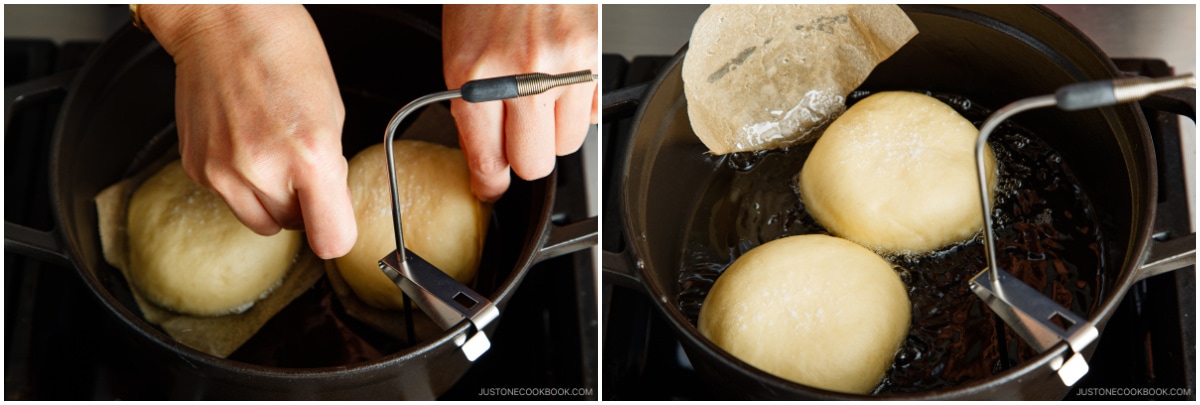
- Fry two donuts at a time and don‘t overcrowd the pot. Pick up the parchment square corners and carefully transfer the dough into the oil. Immediately remove the paper. Fry until they are brown on the bottom, for 55–60 seconds. If the oil temperature drops, fry a little longer, for 70–80 seconds.
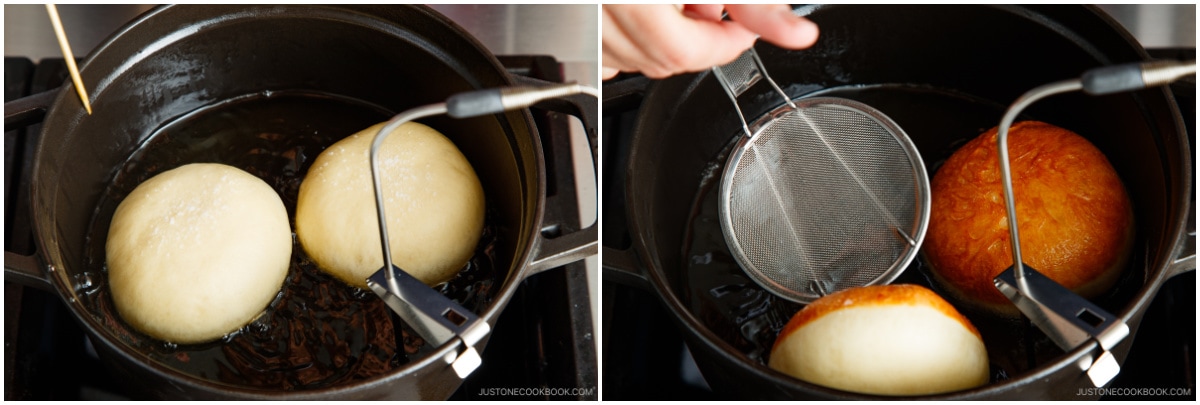
- If an air bubble forms in the dough, pop it with a skewer. Using a fine-mesh skimmer with a flat bottom, flip to cook the other side for another 55–60 seconds. Tip: Do not overcook the donuts as the remaining heat will continue to cook inside.
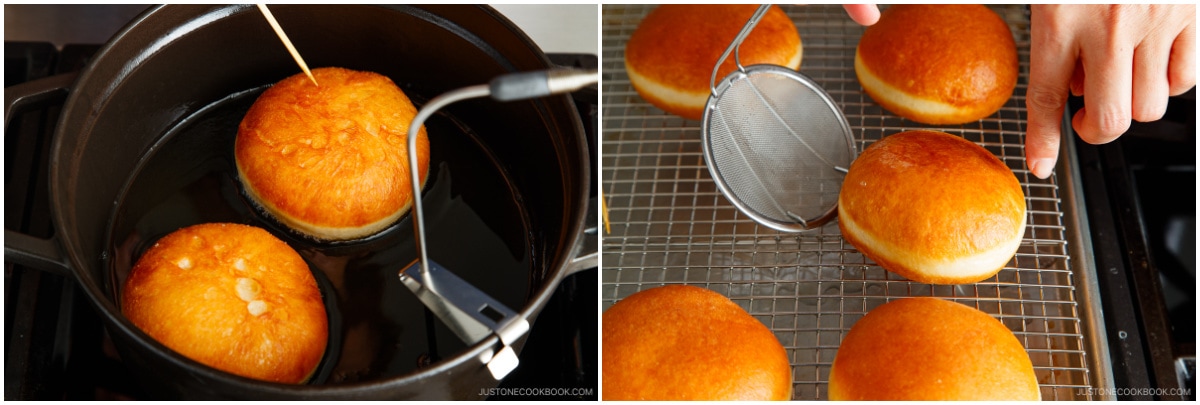
- When both sides of the donuts are nicely brown, remove with a fine-mesh skimmer, drain the oil, and transfer them to a wire rack. Continue frying the remaining dough.
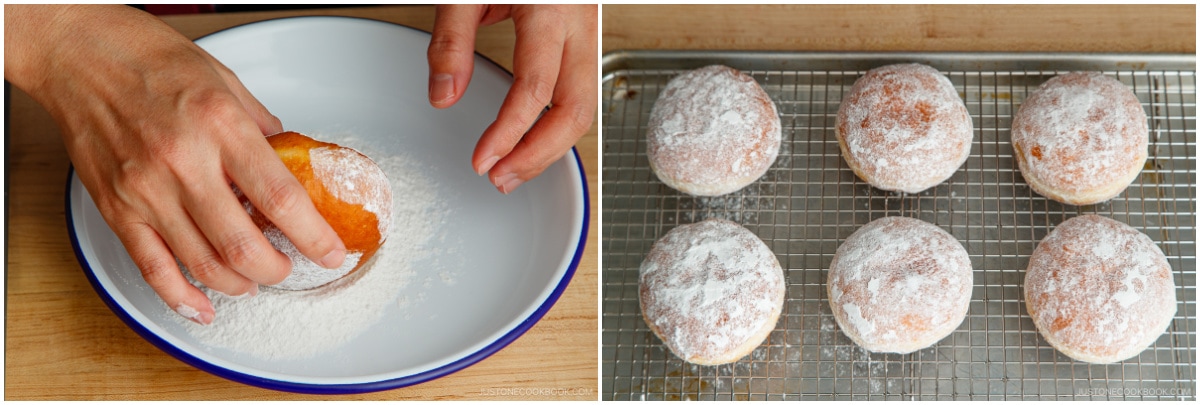
- When the donuts are slightly cool, roll them in confectioners’ sugar to dust on all sides. Serve warm or at room temperature.
To Fill with Custard
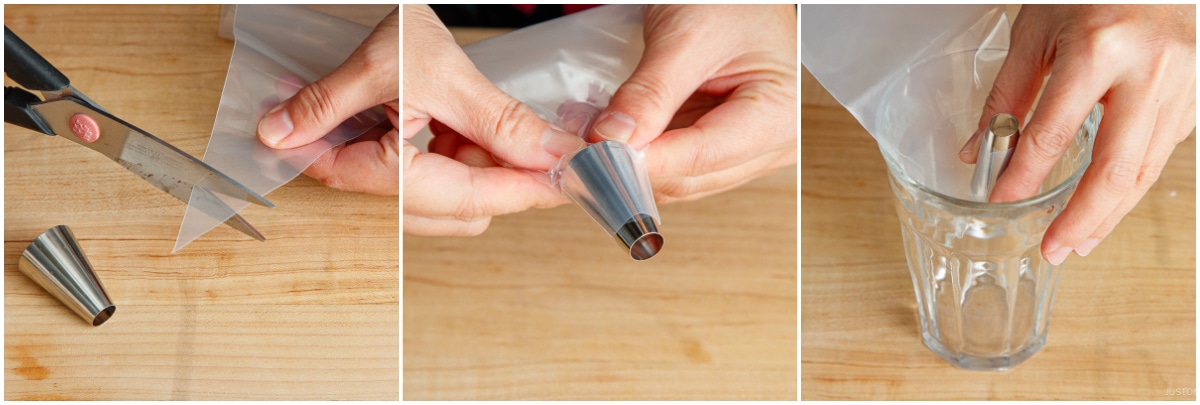
- Fill the donuts with custard cream just prior to serving. Cut the tip of a piping bag. Push a Wilton 2A decorating tip into the bag‘s tip so the metal sticks out a bit. Fold the tip end up (so the custard doesn‘t come out) and put the bag into a tall glass.
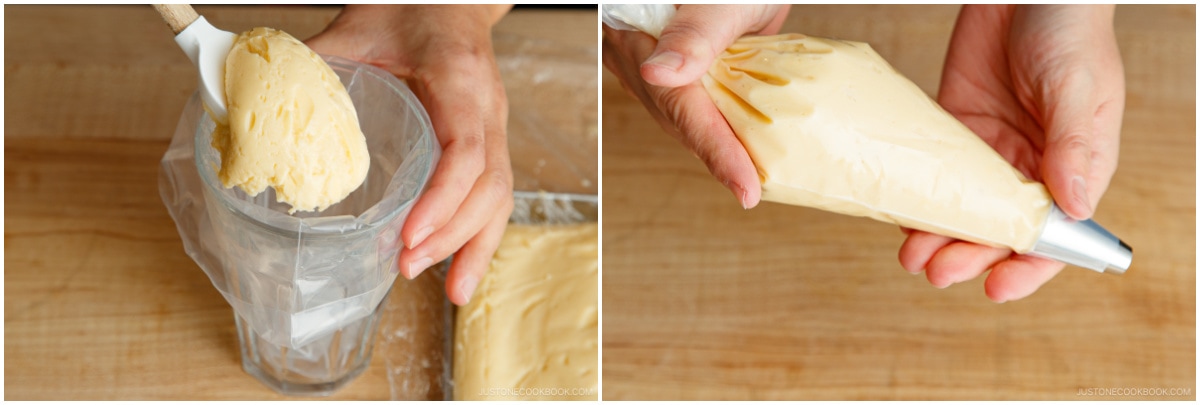
- Fold down the top half of the bag outward over the cup‘s edge. Transfer the chilled custard into the piping bag with a spatula. Once you fill the bag halfway, unfold the top half of the bag and push the custard down toward the tip. Twist the piping bag and squeeze it to test that the custard comes out smoothly. Set aside.
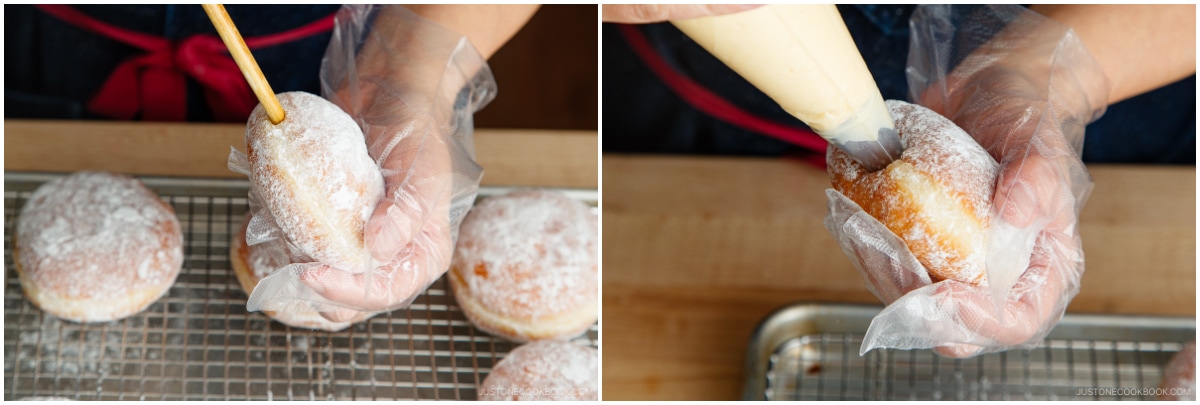
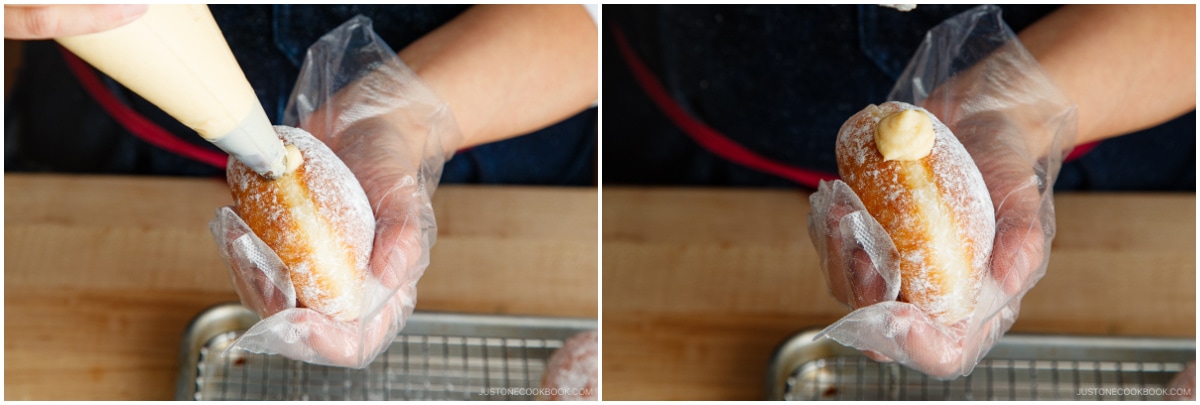
- Insert a chopstick tip into the side of a donut to make a hole. Make sure you don‘t poke through to the other side. Wiggle the chopstick inside the donut to create space for the custard. Repeat with the rest of the donuts. Then, pipe the custard into the donuts to fill until it is plump and swollen.
- Pipe an extra dollop of custard at the opening to decorate. Enjoy!
To Store
- Enjoy the Nama Donuts on the same day you make them. You can keep the unfilled donuts in an airtight container at room temperature for a day or in the freezer for up to 1 month. Fill the donuts with custard cream just prior to serving. Store the homemade custard filling for up to 2–3 days in the refrigerator. To prevent a film from forming, place a piece of plastic wrap on top of the custard.
Nutrition
Calories: 439 kcal · Carbohydrates: 43 g · Protein: 9 g · Fat: 26 g · Saturated Fat: 9 g · Polyunsaturated Fat: 9 g · Monounsaturated Fat: 7 g · Trans Fat: 0.3 g · Cholesterol: 142 mg · Sodium: 176 mg · Potassium: 182 mg · Fiber: 1 g · Sugar: 20 g · Vitamin A: 479 IU · Vitamin C: 0.02 mg · Calcium: 124 mg · Iron: 1 mg