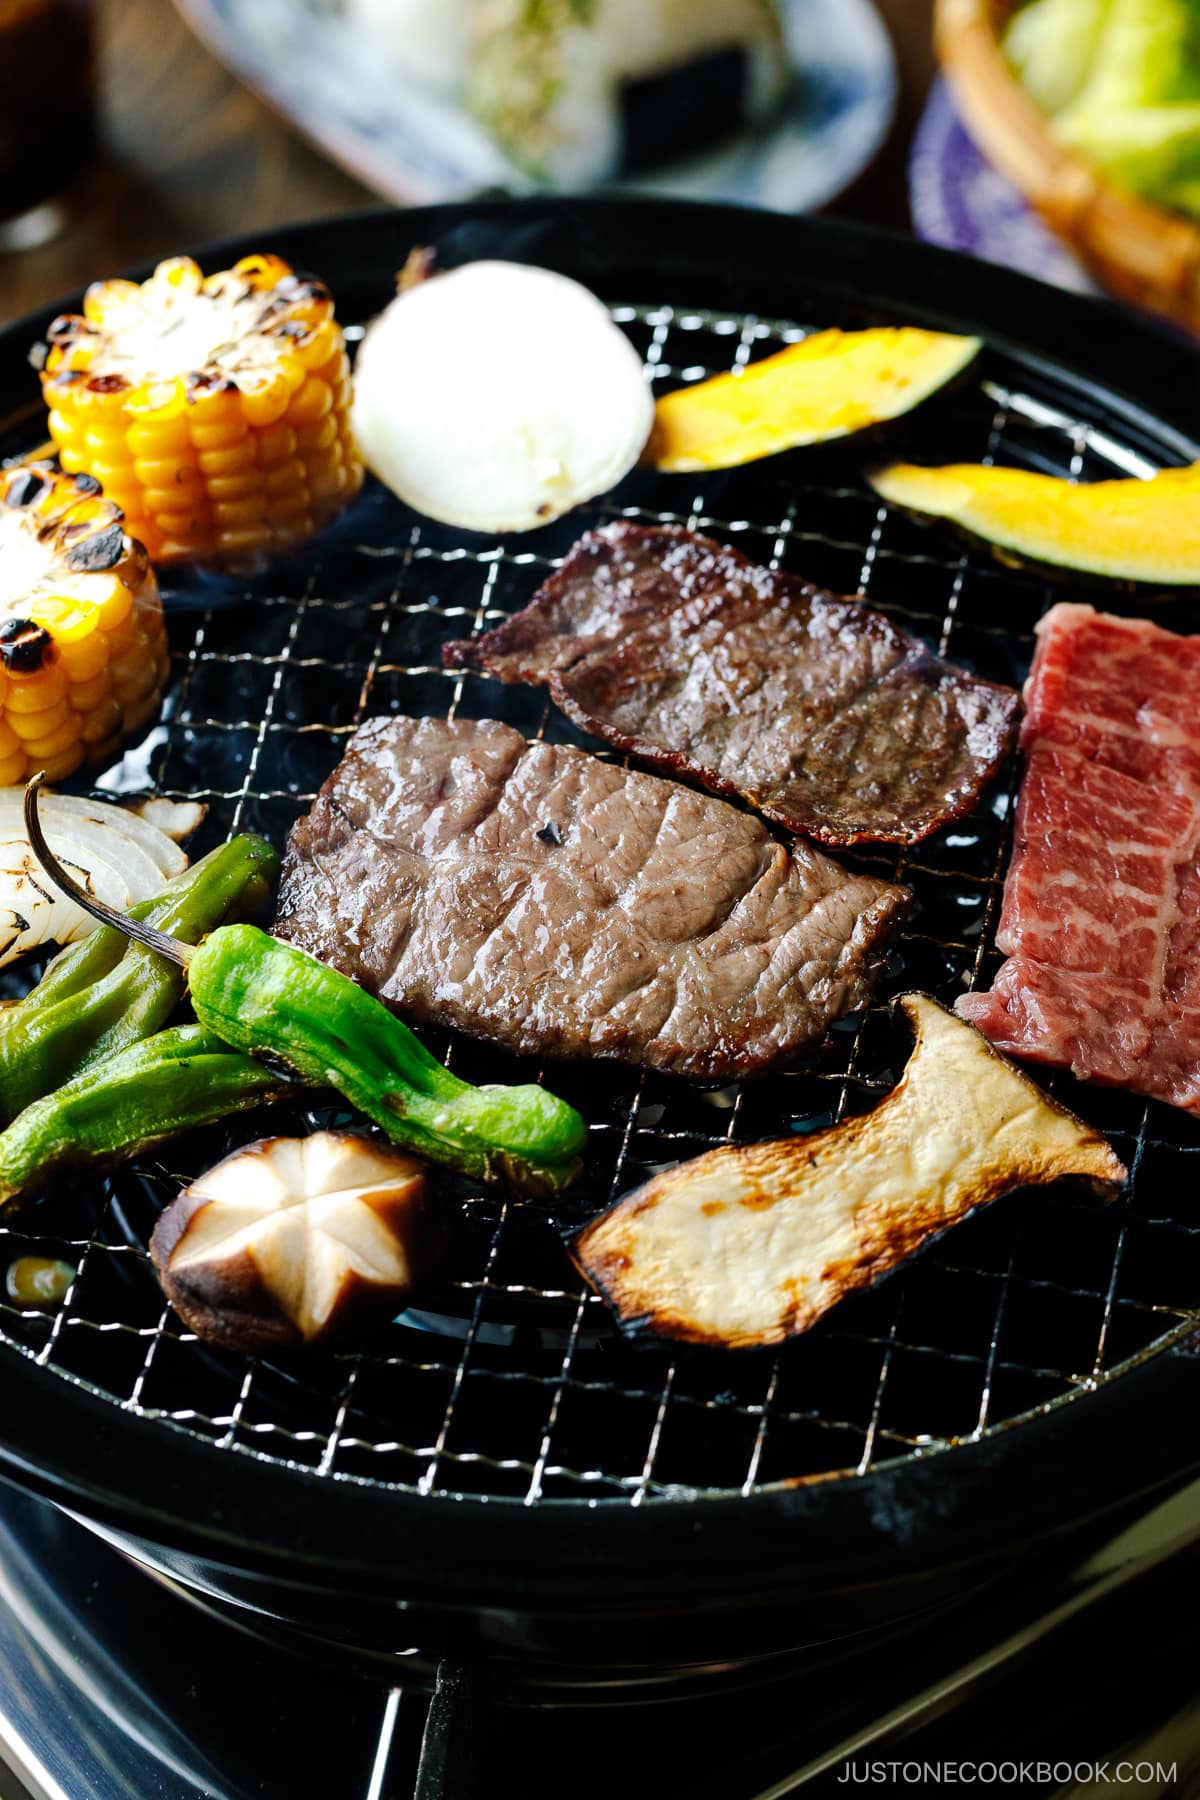
Gather family and friends around the table to enjoy an exciting Japanese BBQ meal called Yakiniku. Set platters of well-marbled beef, fresh sliced veggies, and mushrooms around the grill, then everyone cooks and enjoys the deliciously charred pieces by dipping them in a sweet-and-savory yakiniku sauce. This fun and social spread is also one of the easiest to prepare—perfect for a party!
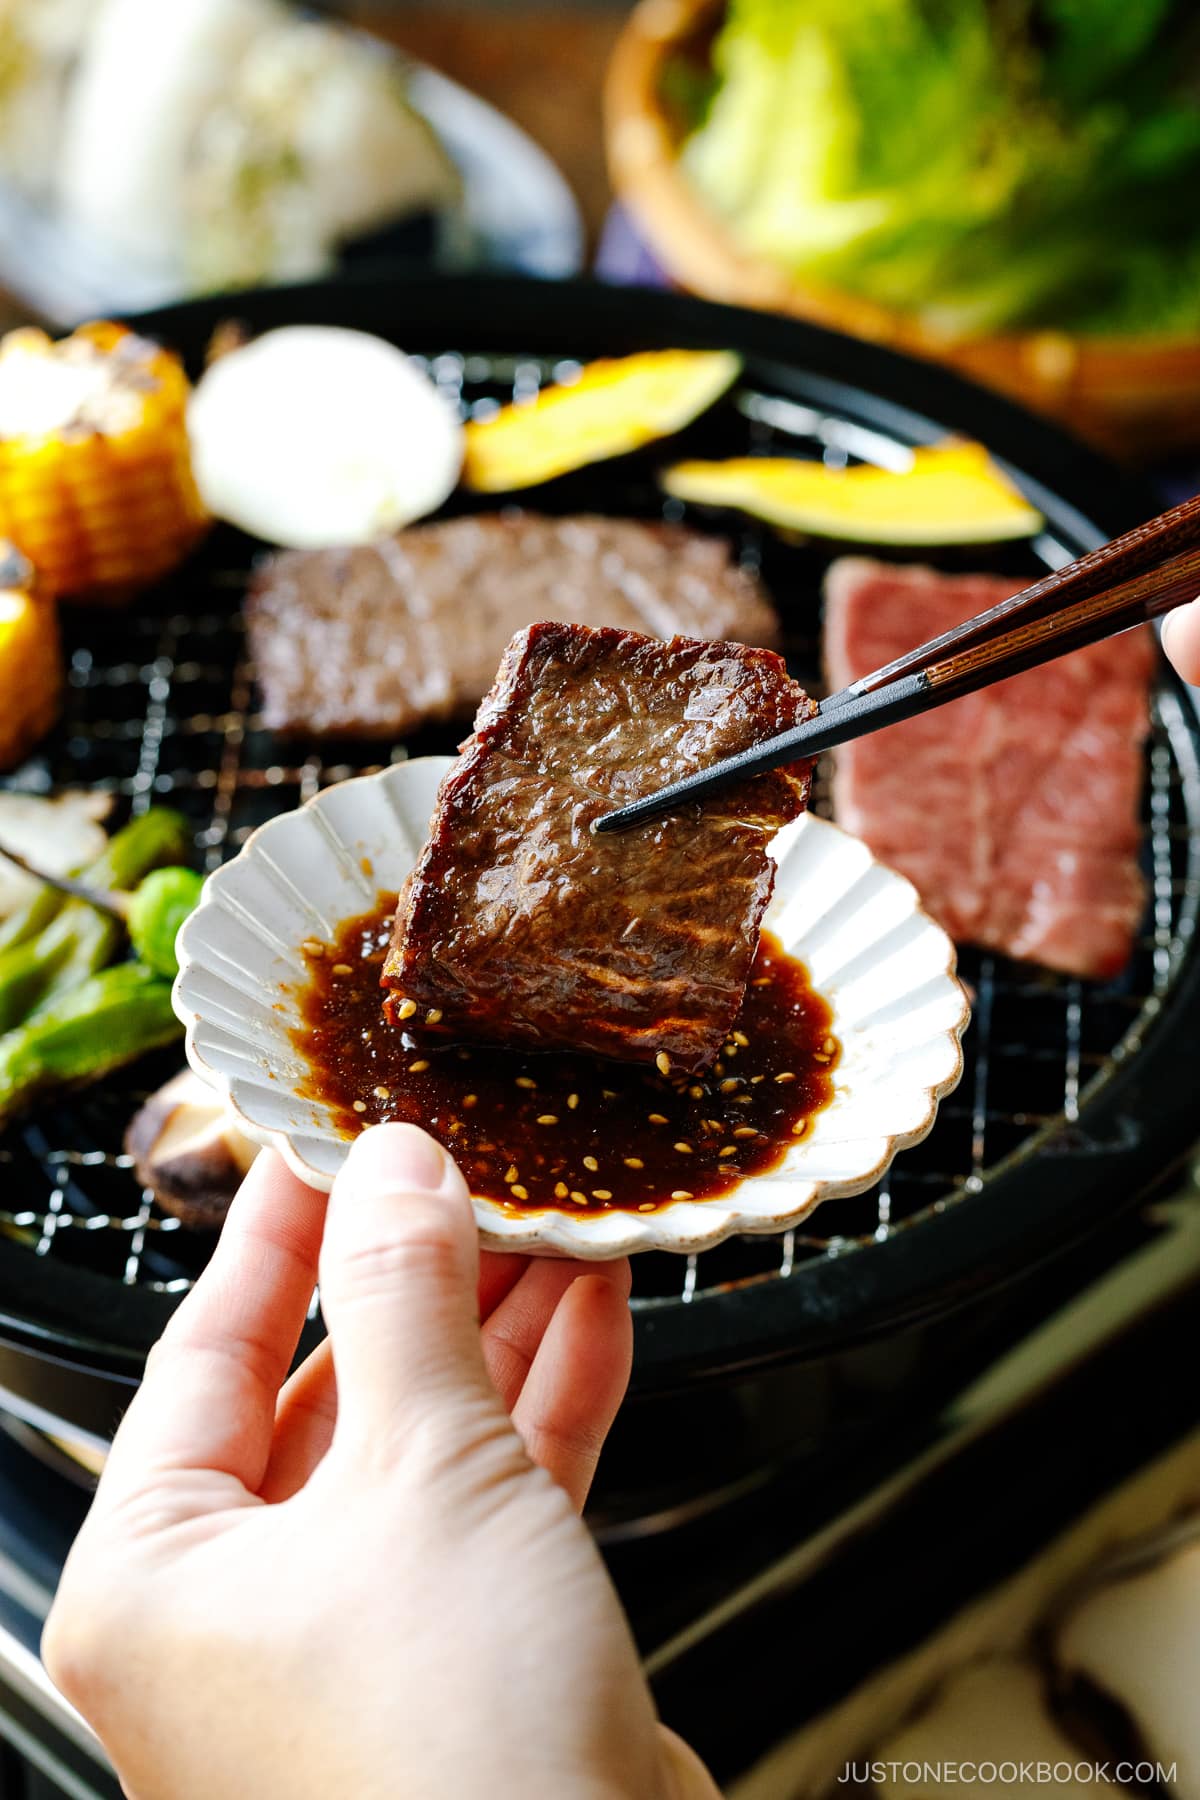
It’s grilling season, and if you love a simple fare of enjoying the juiciest meat and freshest vegetables, you need to try this Japanese BBQ or Yakiniku (焼肉).
The concept of yakiniku is simple and communal. You set a portable grill or iron plate in the middle of the table, and everyone cooks and eats the meat and vegetables together. Yes, it shares the same notion as hot pot, where good food brings people in an intimate setting, sharing laughter and having a good time, only this is for BBQ.
Now, let me show you how to serve and enjoy the most amazing spread of yakiniku at home!
Table of Contents
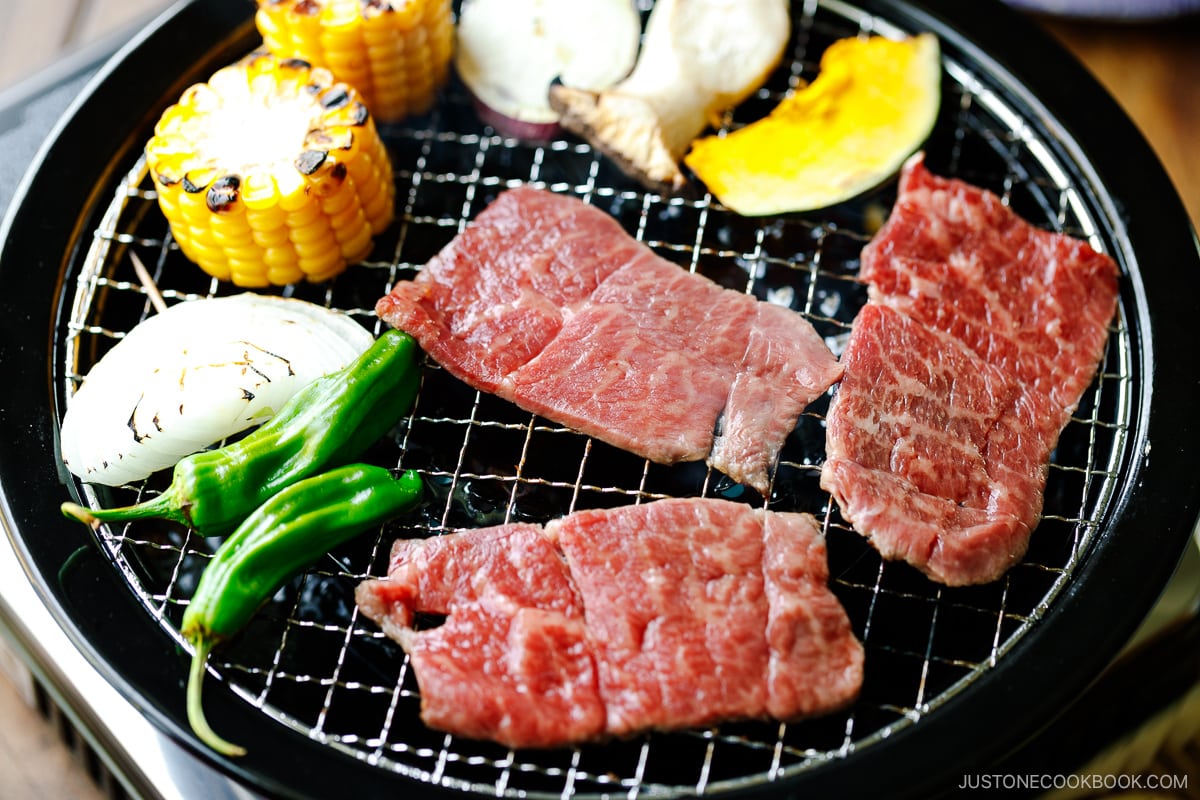
What is Yakiniku?
Yakiniku (焼肉) literally means “grilled meat” and refers to Japanese barbecue dish, in which meat and vegetables are dipped in sauce and eaten while being grilled. Originally from the Korean BBQ culture, yakiniku restaurants were founded in 1946, most of which were founded by Koreans living in Japan.
Then, in the 50s, cooking yakiniku at home became popular with a new yakiniku sauce, or “yakiniku no tare” released by Ebara Foods. I remember the TV commercial of the sauce and had enjoyed that taste of it as yakiniku was our frequent weekend rotation meal growing up.
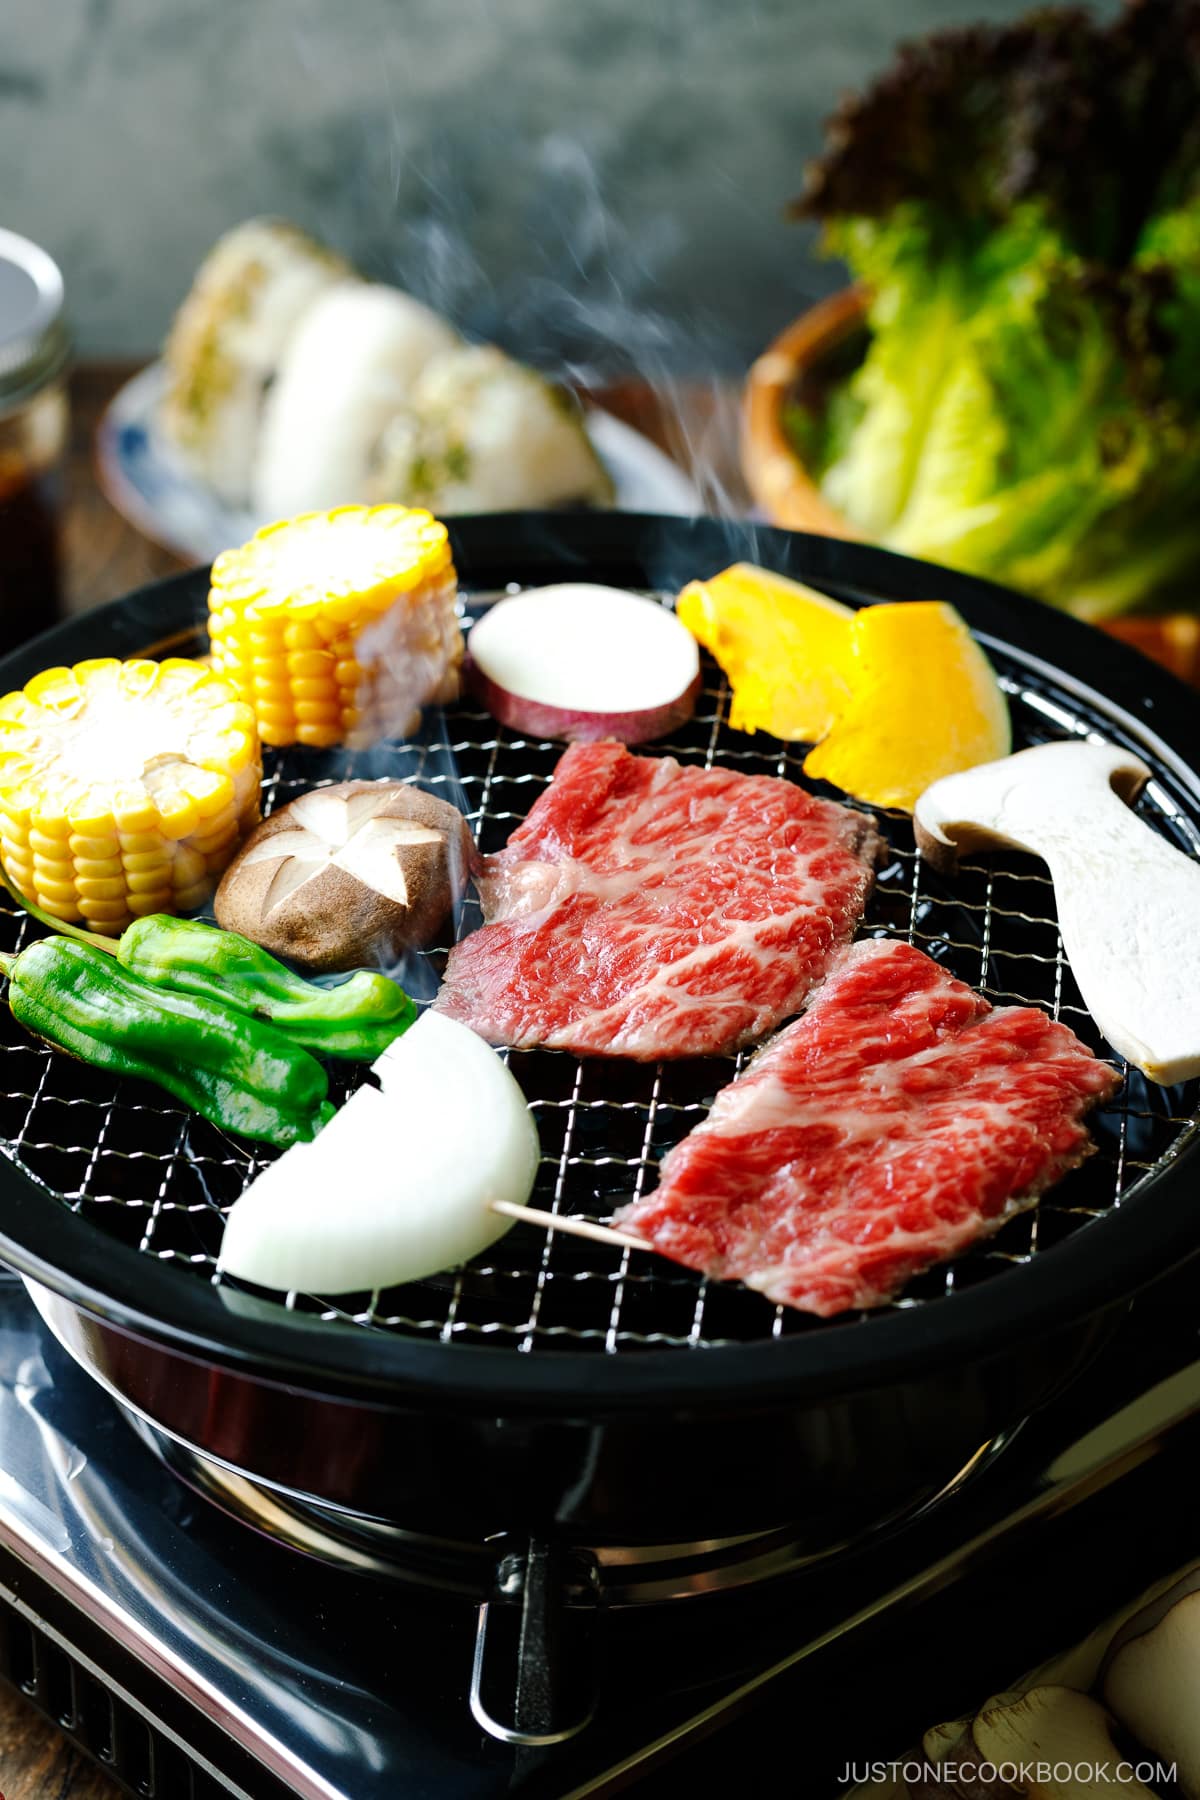
Why You’ll Love This Japanese BBQ
- Minimal prepping! I wanted to mention this first because it’s seriously one of the easiest BBQ recipes to make. You as the main host just need to cut the ingredients and set the table.
- So fun and social. This has to be the most unique feature of throwing a yakiniku party at home. Everyone is their own grill master, sharing the joy of cooking and savoring the food at once! Food tastes better this way too!
- Versatile. Whether you are gluten-free, vegan, or pescatarian, there are ways to implement all kinds of diets when it comes to grilling food. Also, you can do it outdoors or indoors.
How to Make Yakiniku At Home
The Ingredients You’ll Need
- Protein: We typically use different cuts of beef and pork, but feel free to work with what you can find. Be sure to cut your meat into thin slices or bite-sized pieces. Use tofu if you are vegetarian/vegan.
- Vegetables: All kinds of fresh produce that you would like to grill. Keep in mind that some of the root vegetables may need to be cooked slightly (quick microwaving for 1-2 minutes would do!) to speed up the grilling process. More about this below.
- Mushrooms: I love grilling different types of mushrooms. They grill fast and absorb all the delicious yakiniku sauce well.
- Homemade Yakiniku Sauce: soy sauce, sugar, gochujang, sesame oil, garlic, ginger, and sesame seeds.
The Cooking Steps
- Make the yakiniku sauce and keep it in a mason jar.
- Prepare the vegetables and mushrooms by slicing or cutting them into bite-sized pieces. For root vegetables and tough vegetables, you might want to blanch them or precook them. Microwaving for a few minutes is an easy choice.
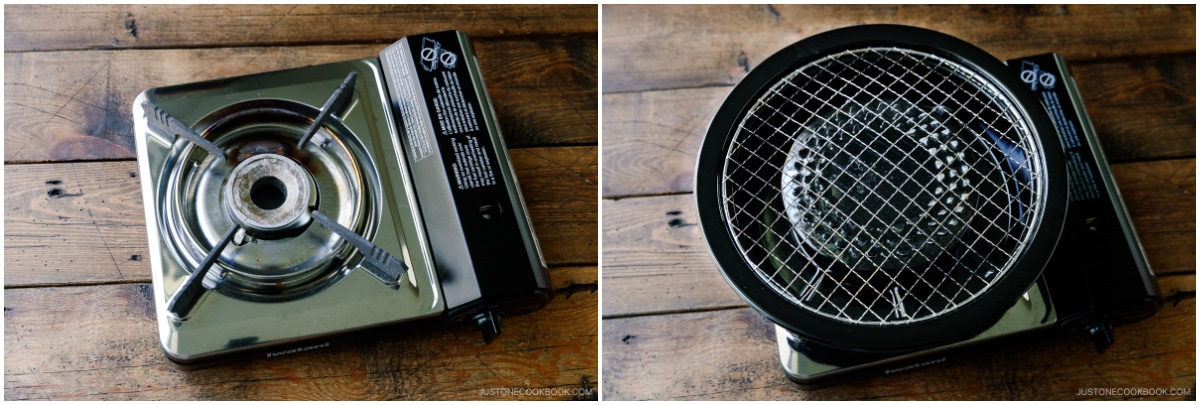
- Put all the ingredients on serving platters. Set up the table with a portable gas stove or an electric griddle.
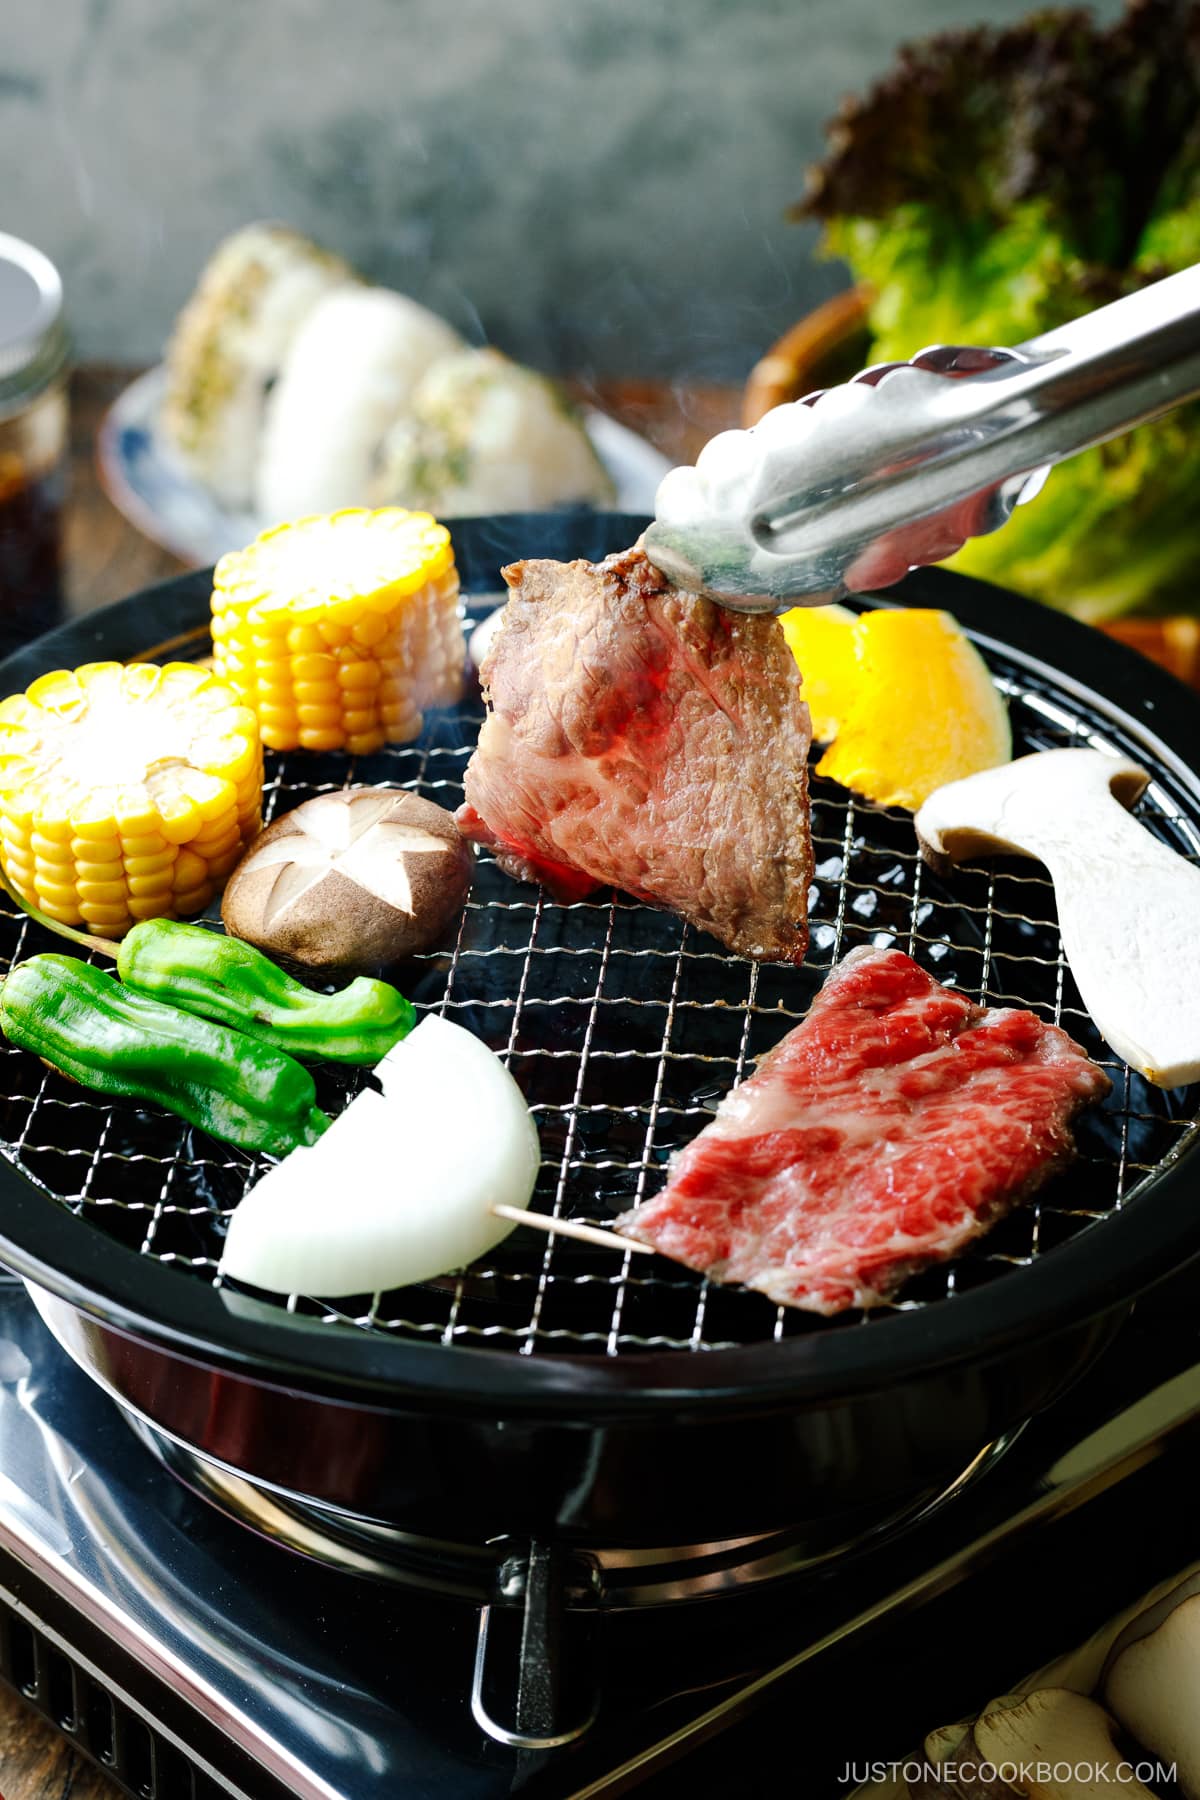
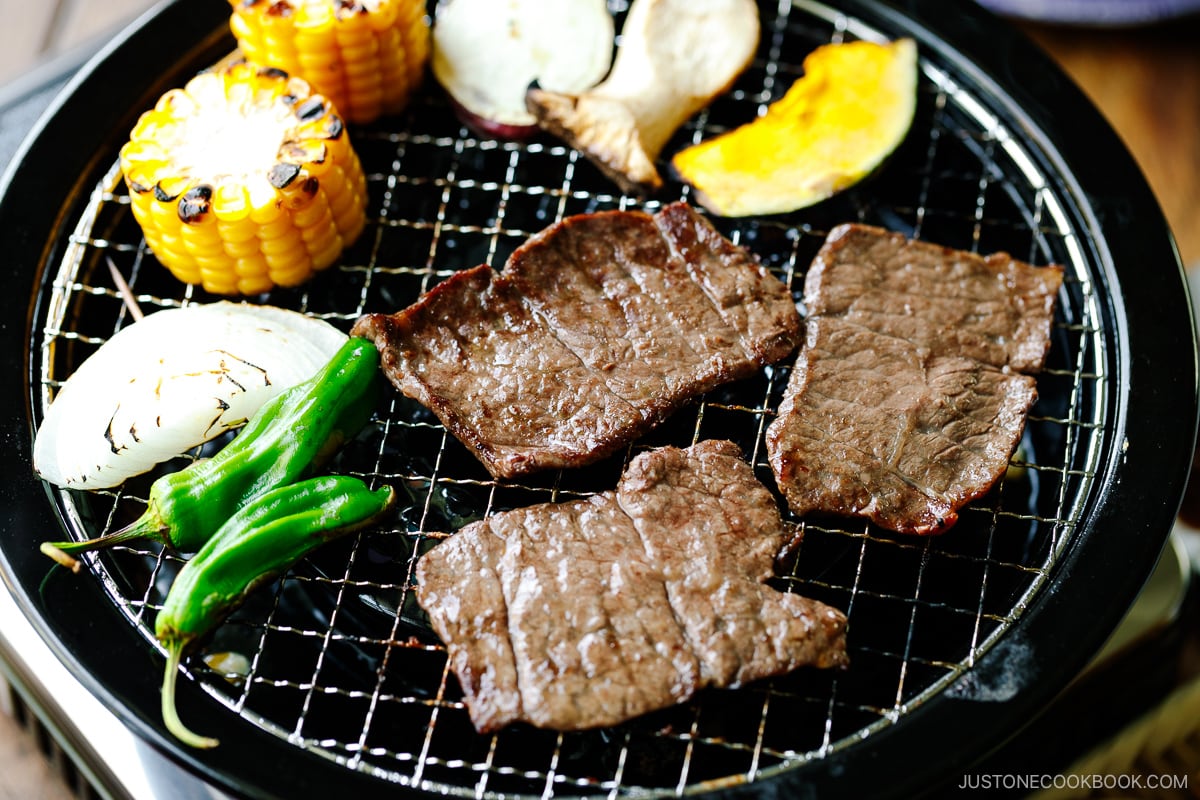
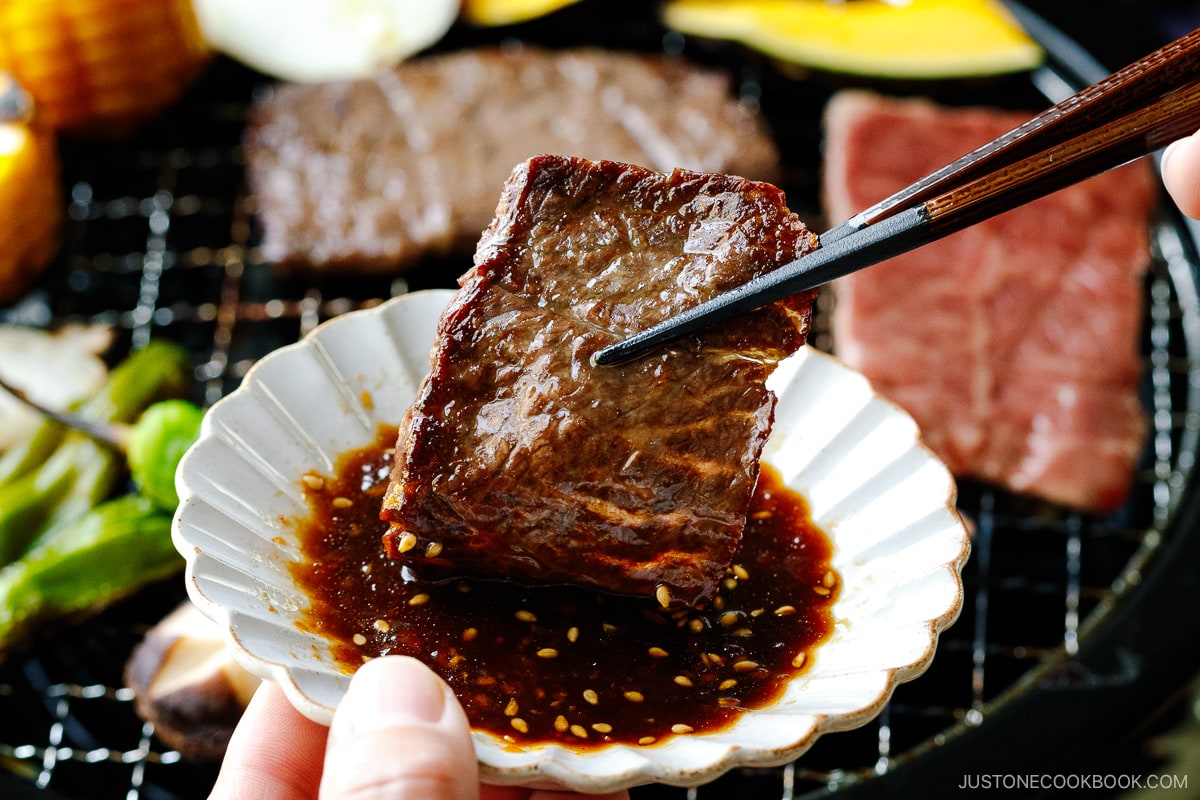
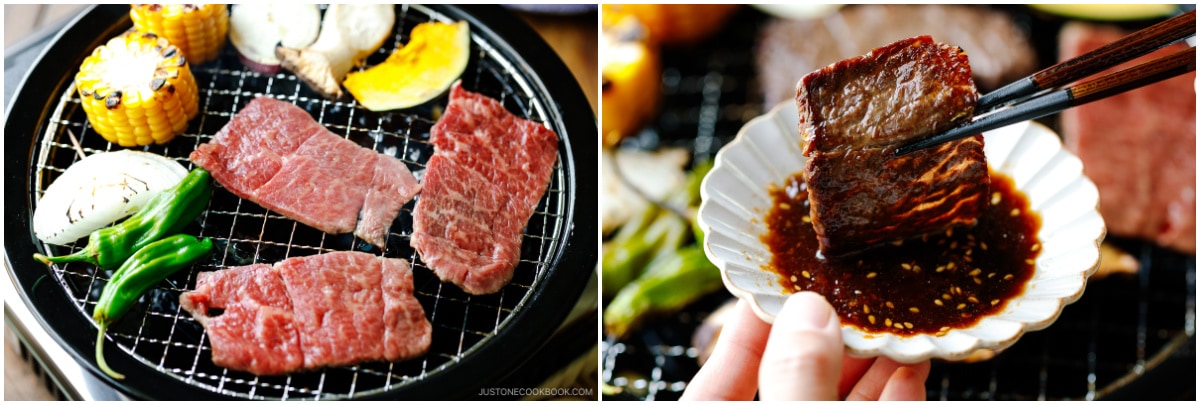
- Put the ingredients on the grill and start cooking. You only need to cook thinly sliced beef for less than a minute. Flip the vegetables and mushrooms when the bottom side is nicely browned. Once the food is cooked through, transfer it to a plate and dip it in the sauce to enjoy!
Yakiniku Cooking Tips
- Preheat the grill until it becomes hot. Otherwise, the meat will stick to the wire rack. Keep it on medium heat.
- Don’t overcrowd the grilling space. Give some space for turning over and even heating on the food.
- Turn the meat over when the juice comes up on the surface, about 15-20 seconds. Until then, don’t touch it. When the bottom side is slightly brown, turn the meat one more time and cook for a short time. Then enjoy! You only flip twice! Grilling guidelines should be 70% on the front side and 30% on the backside. Adjust the flame/heat accordingly.
How to Choose the Best Yakiniku Beef
Personally, I don’t need to eat a lot of meat, but I look for high-quality, well-marbled beef when it comes to yakiniku.
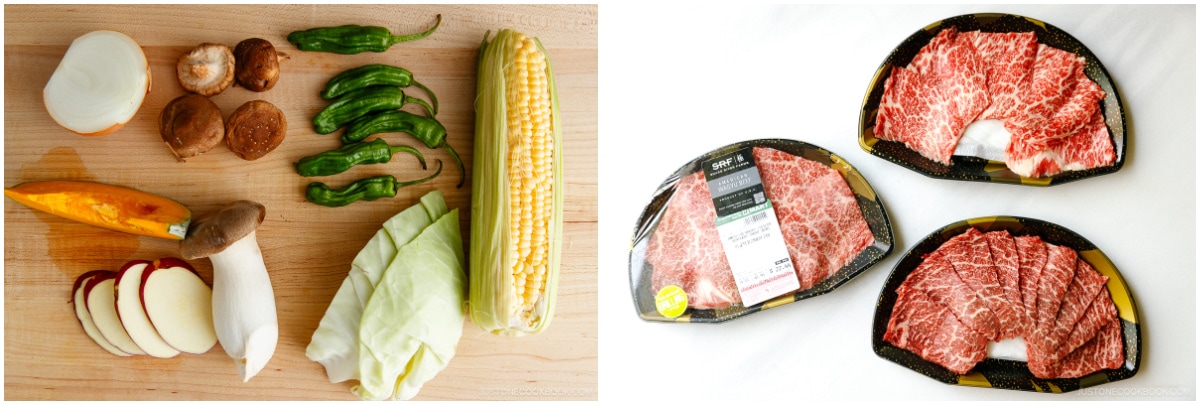
A Korean grocery chain, H-Mart, in San Francisco carries Snake River Farm’s American Wagyu Beef that’s thinly sliced perfect for grilling, like yakiniku-style.
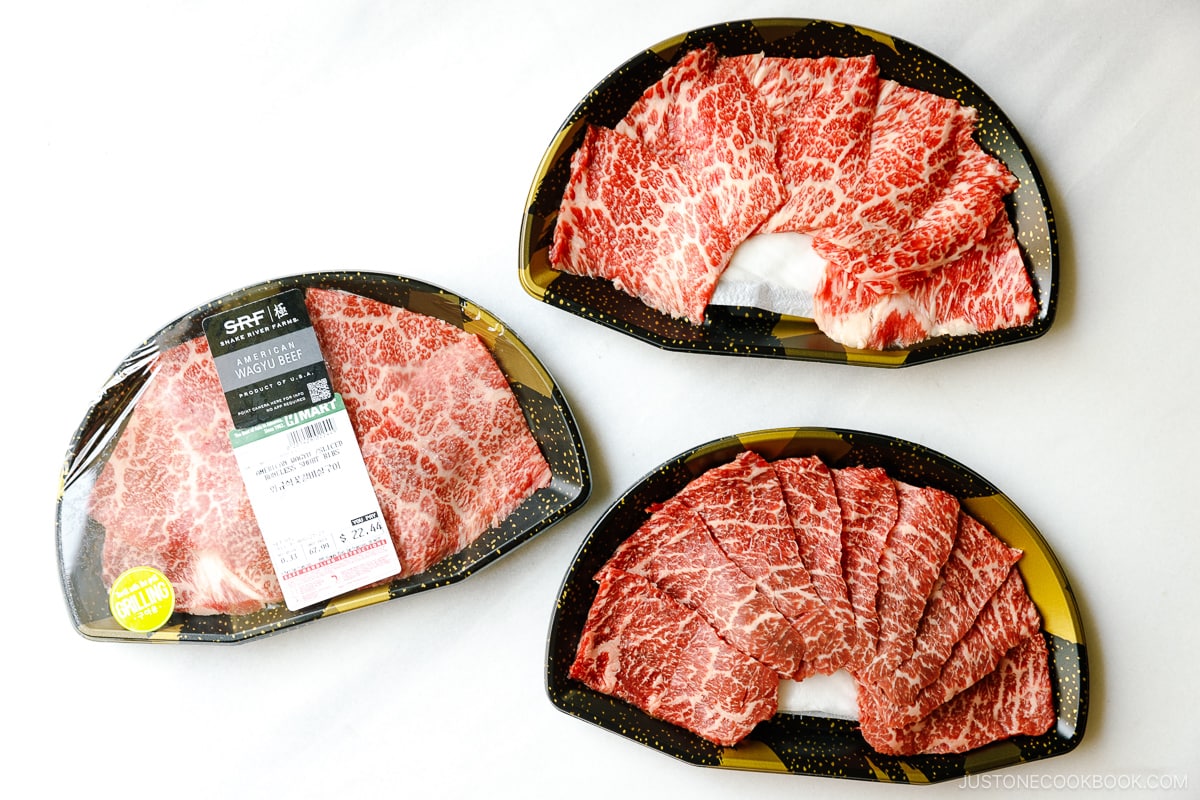
As you can see from the picture above, the marbling and fat content is slightly different from the packages, so do “study” the meat before you pick. My children and I prefer the bottom right, less fatty one, while Mr. JOC would go for top left or right package.
From observing different Asian grocery stores around my area, I learned that Korean and Japanese grocery stores carry similar cuts and quality meat. If the meat is not well-marbled, it is very chewy and hard to eat. Since it contains quite a bit of fat in the meat, you probably don’t need to buy/eat as much.
What Kinds of Vegetables and Mushrooms to Grill
You can grill pretty much anything, as long as you can imagine barbecuing them. Maybe not beets or cucumber, although there are probably grilled beets and cucumber recipes out there.
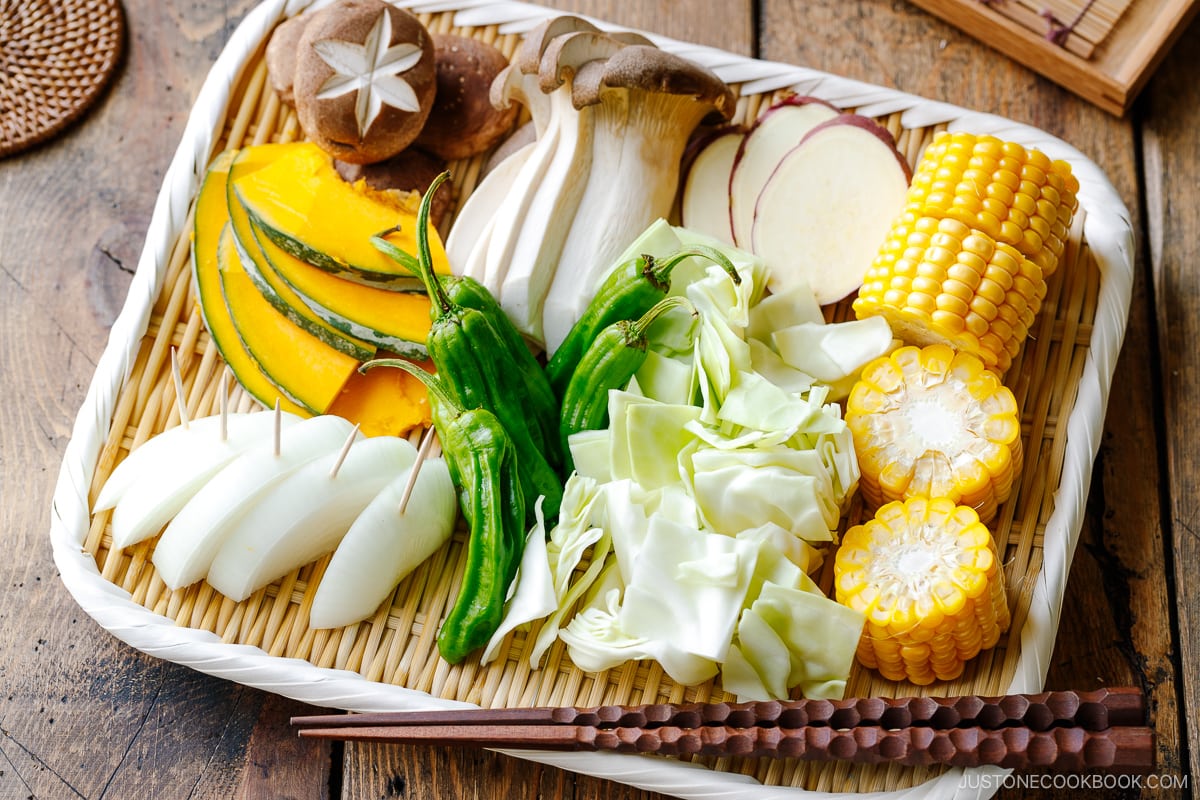
I usually include kabocha squash, sweet potatoes, sweet corn, green cabbage, sweet onion wedges, shishito peppers, and Japanese mushrooms like shiitake and king oyster.
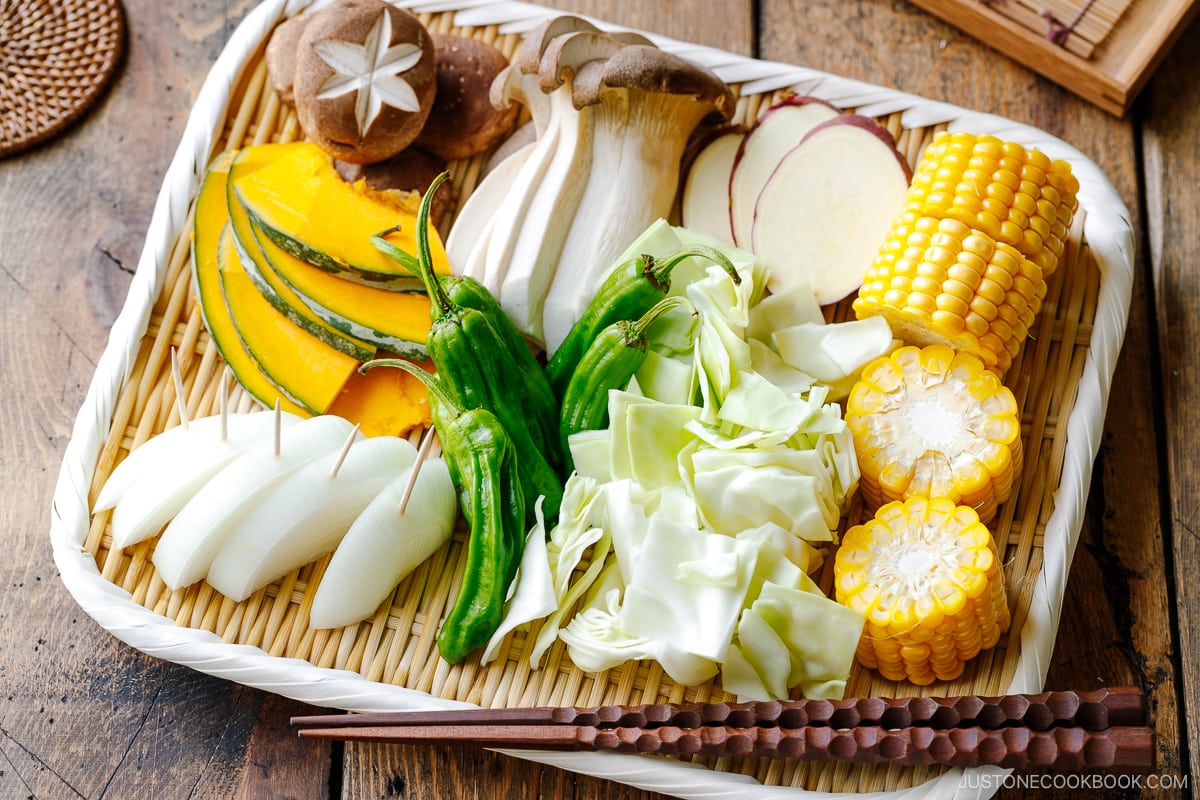
What kind of vegetables and mushrooms you like to grill? Comment below and share your cooking tip with us!
Delicious Yakiniku Sauce
Since we don’t need to season or marinate the ingredients at all, the grilled meat and vegetables are brought to the next level by this sweet and savory yakiniku sauce. You can find ready-made yakiniku sauce at the grocery store, but it’s worth making your own! It’s so simple and delicious that you know it can’t be beat.
Check out my Yakiniku Sauce recipe to learn how else to use this versatile sauce.
What to Serve with Yakiniku
- Rice – Japanese Corn Rice or a simple Garlic Fried Rice
- Soup – Japanese Glass Noodle Soup and Cold Miso Soup
- Salad and Sides – Fresh Kimchi, Spinach Namul and Bean Sprout Namul, Spicy Bean Sprout Salad, and Sunomono (Japanese Cucumber Salad)
Recommended Tools to Make This Recipe
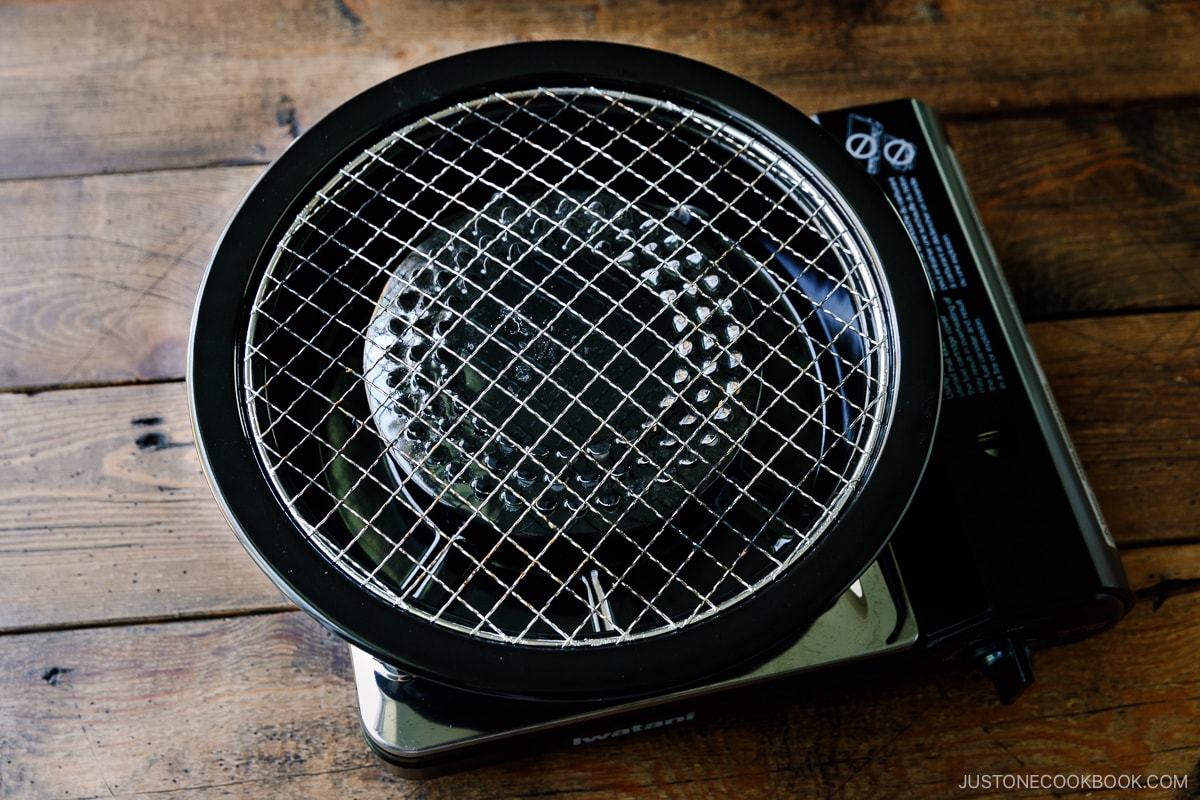
- Iwatani Butane Gas Stove – It’s a must-have for hot pot recipes in winter!
- Iwatani Aburi Stove Top Grill Pan – You will also need the Iwatani portable stove to put on top. It’s designed to drain fat and grease. I recommend grilling outdoors or patio setting.
- Zojirushi Electric Griddle – If you prefer to use an electric skillet, this is one I use along with a Takoyaki plate.
Wish to learn more about Japanese cooking? Sign up for our free newsletter to receive cooking tips & recipe updates! And stay in touch with me on Facebook, Pinterest, YouTube, and Instagram.
Yakiniku (Japanese BBQ)
Ingredients
For the Yakiniku Sauce (yields ⅓ cup, 80 ml)
- ¼ sweet onion (2.6 oz, 75 g; grated, with juice)
- 3 cloves garlic
- ⅛ tsp ginger (grated)
- ¼ tsp gochujang (Korean chili paste)
- ¼ cup soy sauce
- 2 Tbsp sugar
- ½ Tbsp toasted white sesame seeds
- 1 tsp toasted sesame oil
For the Yakiniku Ingredients
- ½ lb boneless beef short ribs (well marbled and thinly sliced to ⅛ inch, 3 mm thick; find yakiniku-style sliced beef for grilling at Asian grocery stores; you can slice your own meat; substitute pork, seafood, or chicken; for vegan, use tofu or other vegetables)
- 1 ear sweet corn (12.2 oz, 345 g with husks)
- 3 leaves green cabbage (3.5 oz, 100 g)
- ½ onion (5.1 oz, 145 g)
- 6 shishito peppers (1.2 oz, 35 g)
- 1 king oyster mushroom (eringi) (2.8 oz, 80 g)
- 4 shiitake mushrooms (1.2 oz, 35 g)
- 1 small wedge kabocha squash (3.5 oz, 100 g; about 1 inch, 2.5 cm at the widest part per wedge and roughly 1/16 of a whole kabocha)
- 6 slices Japanese sweet potato (Satsumaimo) (⅛-inch, 3-mm thick; soaked in water for 10 minutes and dried)
- neutral oil (for grilling)
Instructions
To Make the Yakiniku Sauce
- Gather all the sauce ingredients.
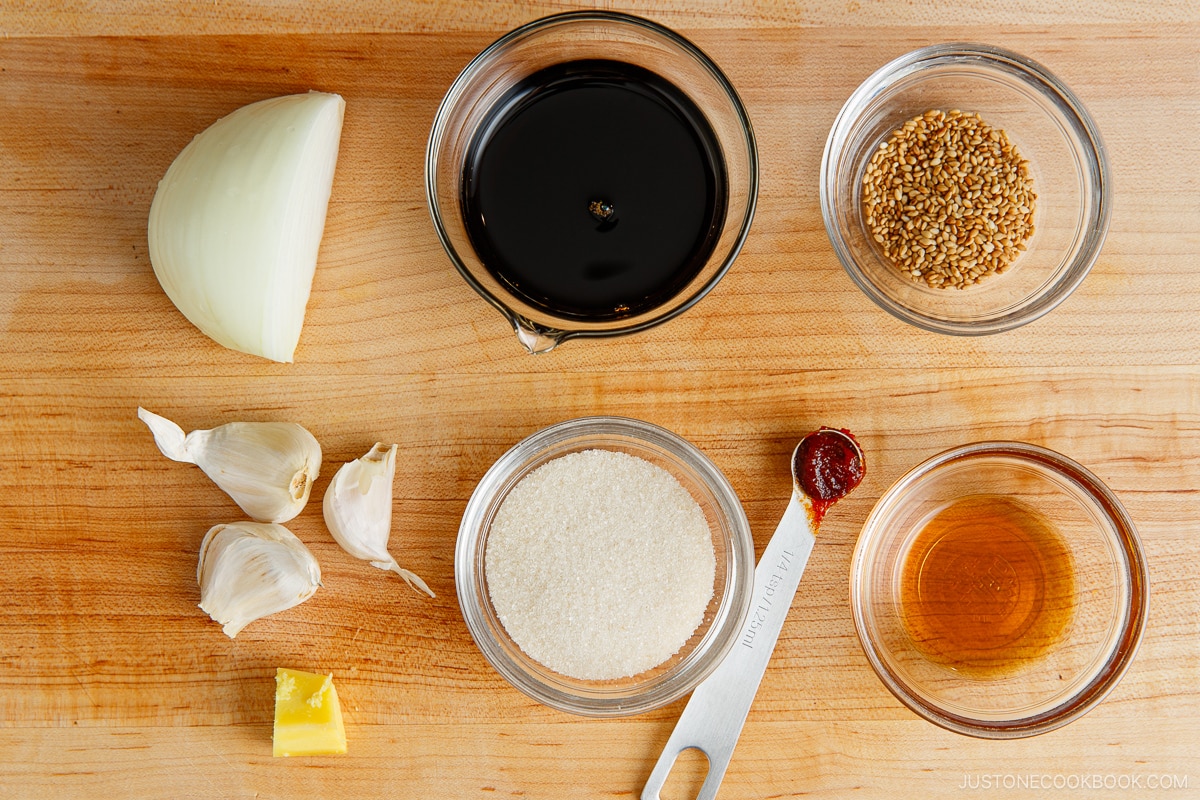
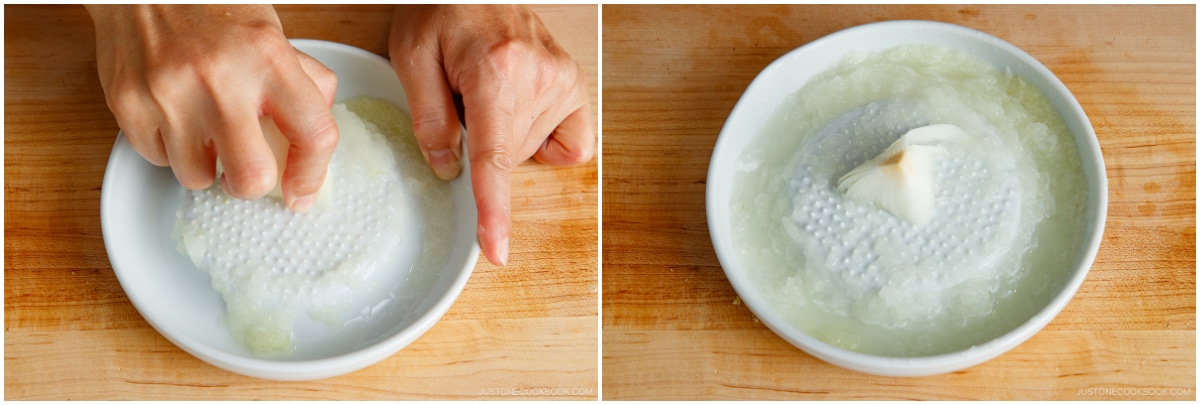
- Grate ¼ sweet onion (I use a ceramic grater). Make sure you collect all the juice.
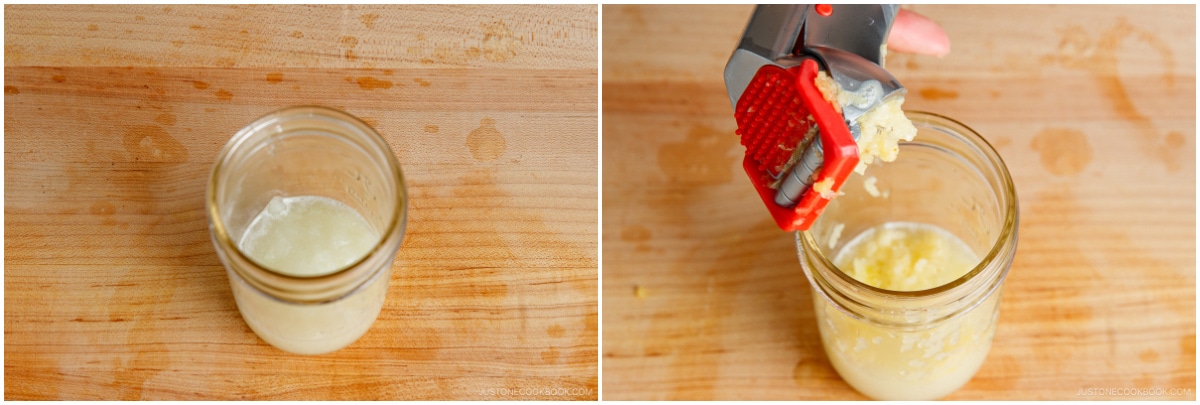
- Transfer the grated onion and its juice to a mason jar or microwave-safe container. Mince or press 3 cloves garlic (I use a garlic press) and add it to the jar.
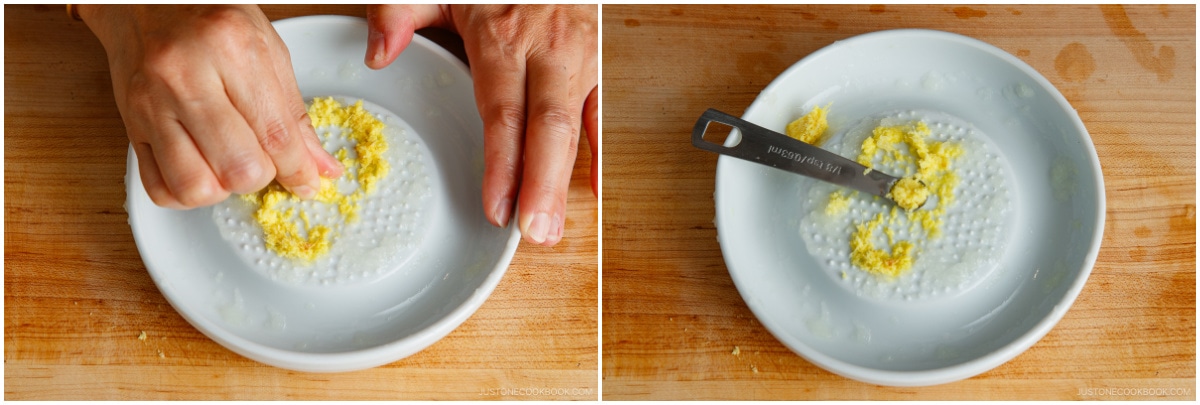
- Grate the ginger (I use the same ceramic grater) and collect ⅛ tsp ginger (grated).
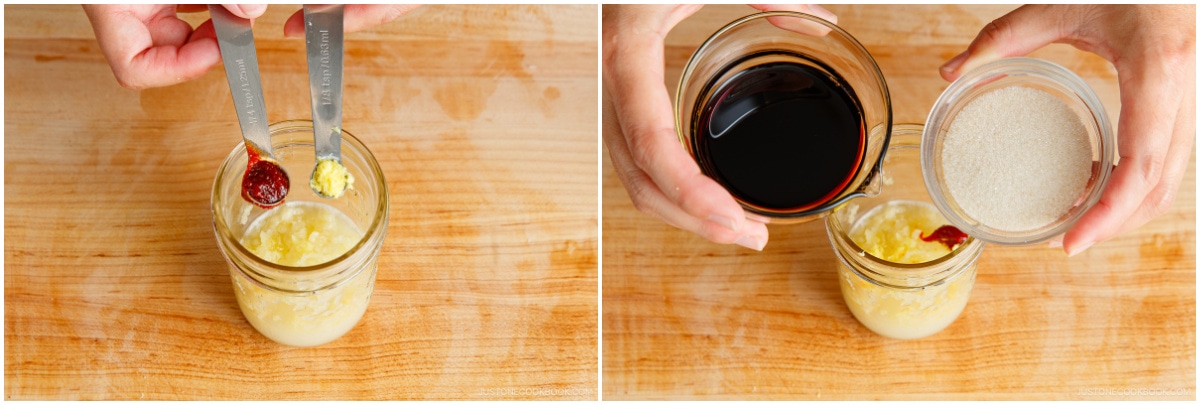
- To the jar, add the grated ginger, ¼ tsp gochujang (Korean chili paste), ¼ cup soy sauce, and 2 Tbsp sugar.
- Add ½ Tbsp toasted white sesame seeds. Microwave the sauce for 30–35 seconds until it‘s hot enough to dissolve the sugar.
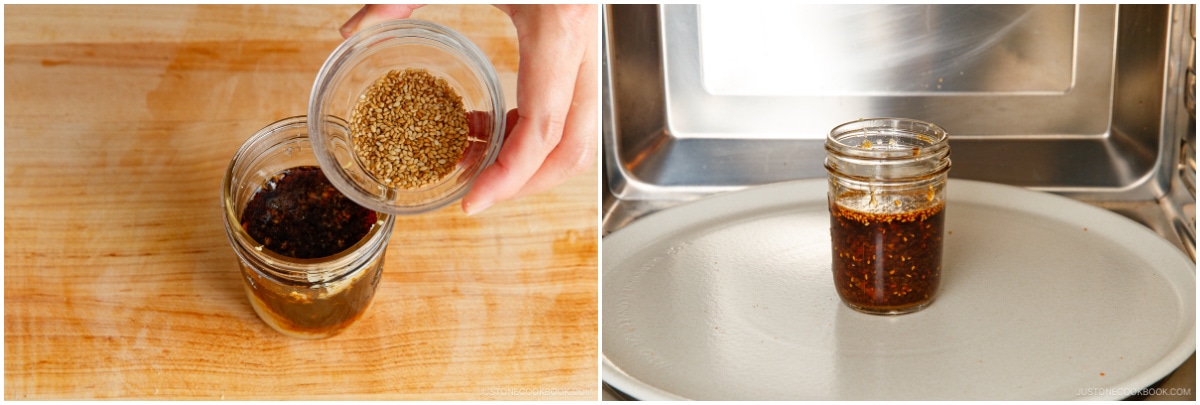
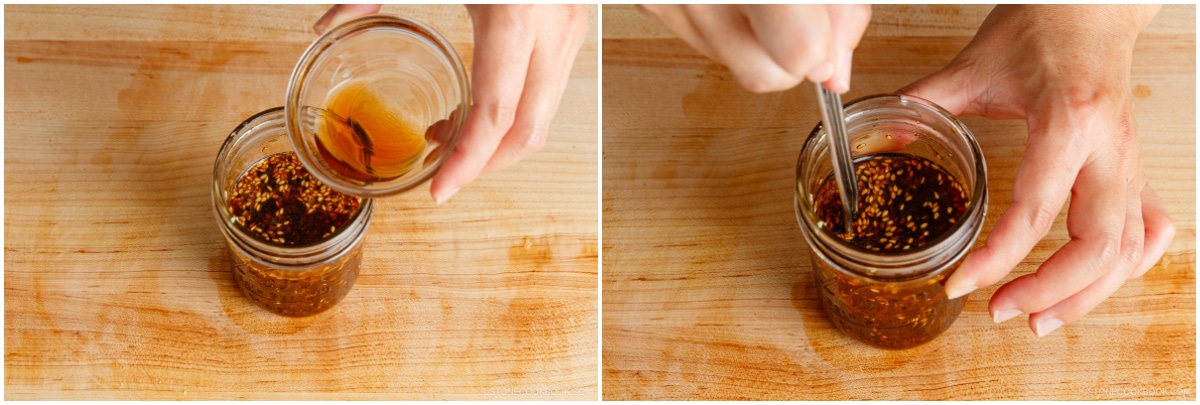
- Add 1 tsp toasted sesame oil and mix well. The Yakiniku Sauce is now ready to use.
To Prepare the Grilling Ingredients
- Gather all the Yakiniku ingredients. Set the thin slices of ½ lb boneless beef short ribs on serving platters and keep them in the refrigerator until you‘re ready to cook.
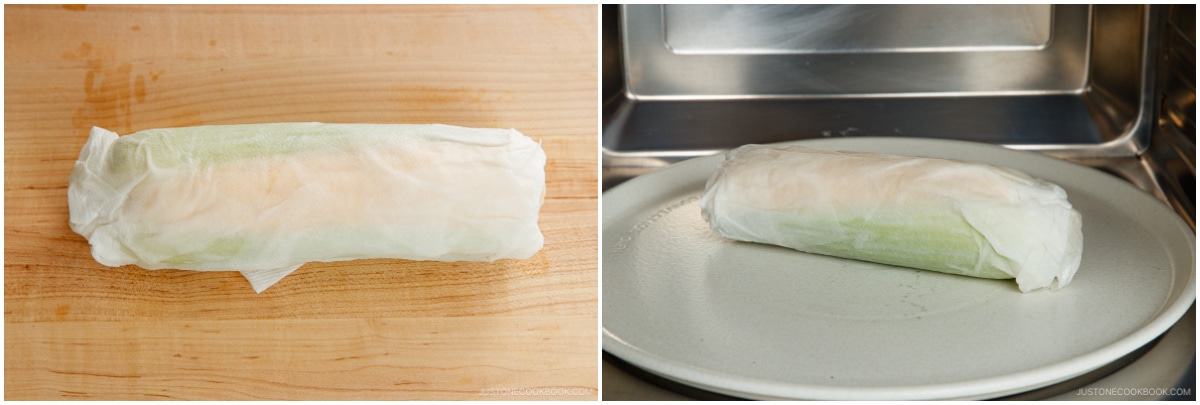
- Wrap a wet paper towel around 1 ear sweet corn (you can leave the husks on) and cook in the microwave for 2 minutes (1000W). Carefully remove the paper towel, husks, and silk from the hot corn. With a knife, cut the ear of corn crosswise into 1- to 1½-inch rounds.
- Cut the tough ribs from 3 leaves green cabbage. Slice the leaves into 1-inch (2.5-cm) squares.
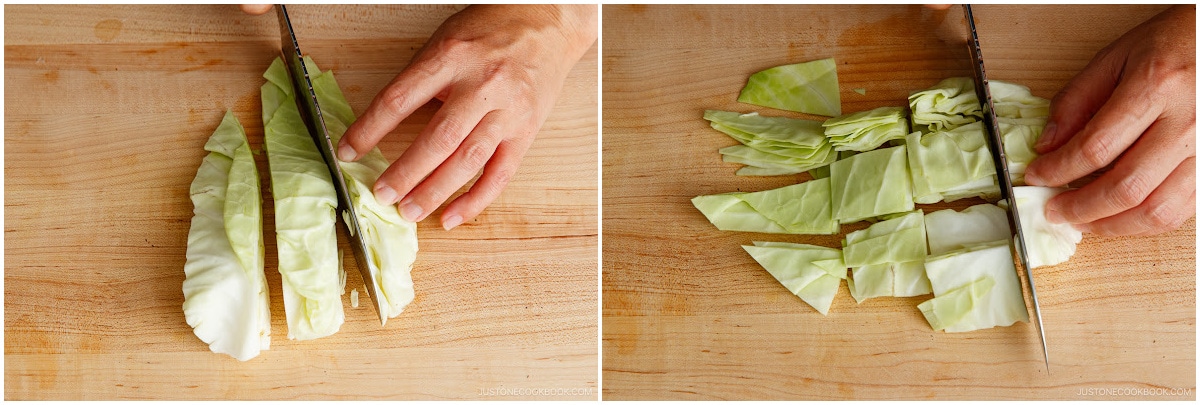
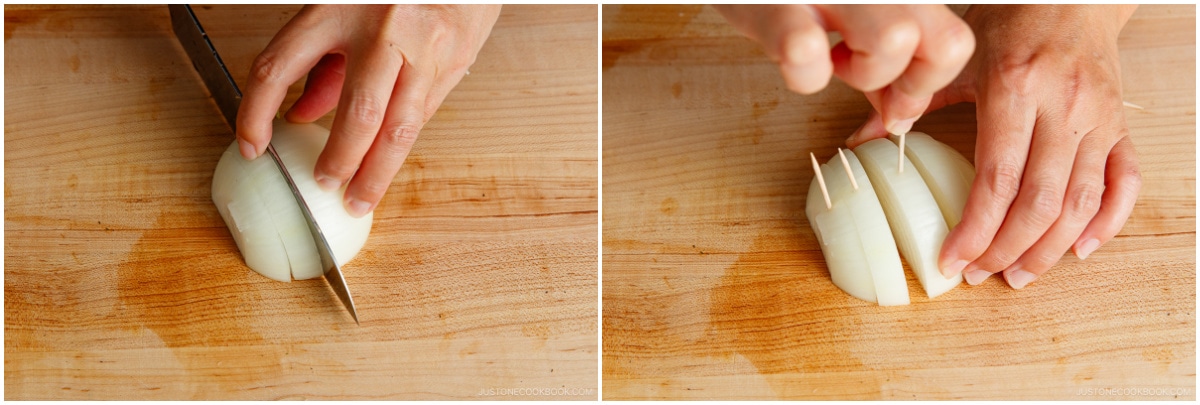
- With ½ onion, lay the onion half flat on the cutting board and slice it crosswise into half-rounds about ½ inch (1.25 cm) thick. I sliced my onion half into 5 slabs. Skewer each half-round slab with a toothpick through all the layers to keep them from separating.
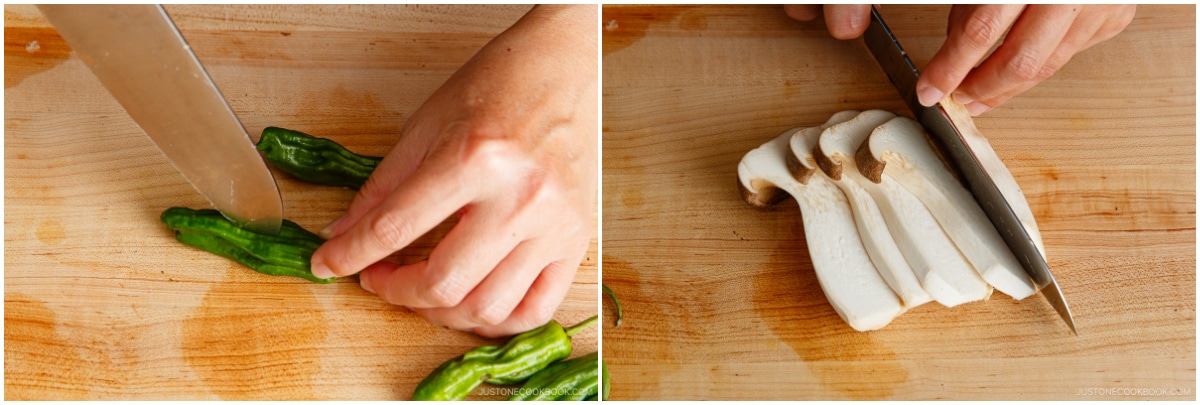
- Make a small slit in each of the 6 shishito peppers. This will allow the steam to escape and prevent them from exploding. Trim off the bottom end of 1 king oyster mushroom (eringi) and thinly slice the mushroom lengthwise.
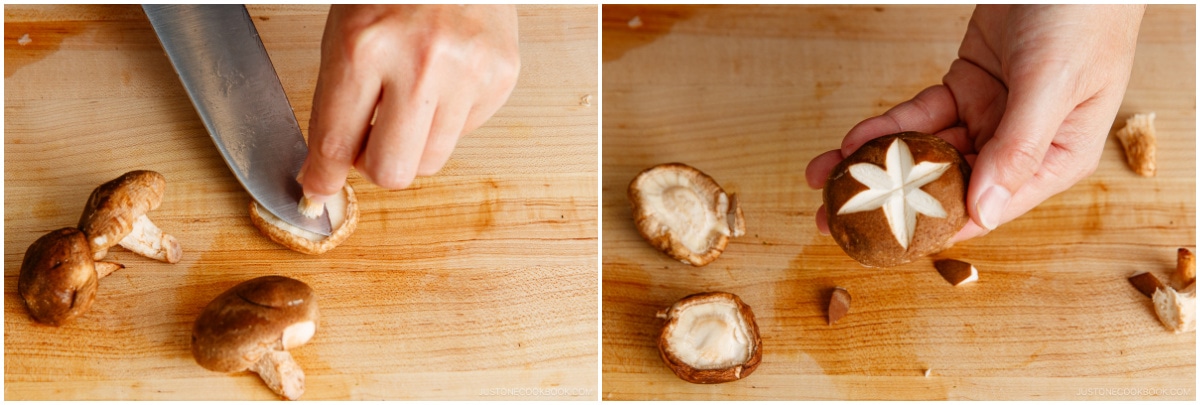
- Remove the stems from 4 shiitake mushrooms. If you wish, you can cut a decorative flower pattern on the mushroom caps. To watch me demonstrate this Japanese cutting technique, see my shiitake hanagiri video.
- Cut 1 small wedge kabocha squash wedge in half crosswise. Then, cut each half lengthwise into ⅛-inch (3-mm) slices.
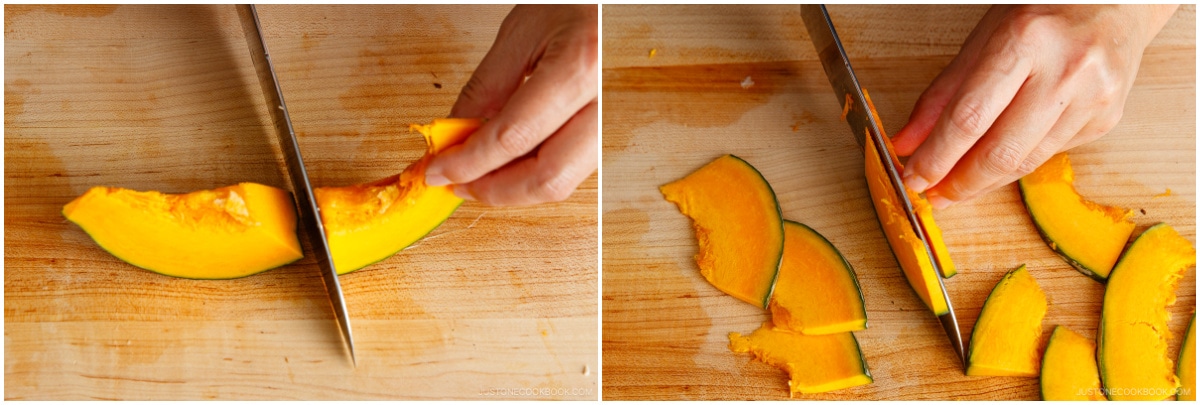
- Soak 6 slices Japanese sweet potato (Satsumaimo) in water for 10 minutes to remove the starch and pat them dry. Place all the ingredients on serving platters and take them to the table. Remove the platters of meat from the refrigerator and place them on the table as well.
To Cook the Yakiniku
- At the table, prepare a medium plate and a small bowl of Yakiniku Sauce for each person. Also, set up the table with a portable gas stove and grill top or an electric griddle. Preheat it on medium heat (375ºF/190ºC). When it‘s hot, lightly grease the grill or griddle with neutral oil. With well-marbled meat, you do not need to grease the area where you will cook it. (We usually divide the cooking surface into different sections, such as the meat section, vegetable section, or mushroom section.) Next, put the vegetables and meat in a single layer on the grill or griddle; do not overcrowd the cooking surface. You may need to cook the ingredients in batches.
- Leave the meat untouched to cook until juices appear on the surface, about 15–20 seconds. Then, flip the meat. When the bottom side gets lightly browned, flip the meat once more. Cook briefly before removing from the grill. You only need to cook the thinly sliced beef for a few minutes. For the vegetables and mushrooms, let them get nicely browned on the bottom before flipping them over to brown on the other side.As the food finishes cooking, transfer it to the individual plates and dip in the homemade Yakiniku Sauce to enjoy. Meanwhile, continue adding the rest of the meat and vegetables to the grill or griddle to cook and enjoy.
To Serve
- I like to serve Yakiniku as the star of a complete meal along with steamed rice or Japanese Corn Rice, a soup such as Homemade Miso Soup or Cold Miso Soup, a salad like Japanese Potato Salad, and a side dish like Japanese-style Pickled Tomatoes.
To Store
- You can keep the leftovers in an airtight container and store it in the refrigerator for 3 days or in the freezer for up to a month. Store any leftover Yakiniku Sauce in the refrigerator and use it within 2 weeks.


If I use chicken, I should thinly slice them, correct? Or could cutting into cubes work?
Hi Fel! Thank you for trying Nami’s recipe!
It is preferable to slice them rather than cut them into cubes so that the meat does not take too long to cook.
We hope this helps!